
What You’ll Learn
- Creating and uploading custom PHP template files
- Using Client, Section, Data, and Counter tokens
- Customizing report output with HTML and CSS
- Loading custom fonts in generated PDF reports
- Adjusting PDF-specific layout issues
Extension Add-on - This add-on provides standalone functionality within MainWP Dashboard. No third-party plugins required.
Introduction
The Pro Reports Extension uses PHP templates that allow you to design and create professional reports with the information you want to show to your clients. The extension also allows you to add custom content, including contact info, images, additional text, or any other content you want to include in your report. Creating a custom report consists of two steps. The first step is to create the actual PHP file representing the template, and the second is to edit and customize that PHP file. Customizing the template by adding or removing Pro Reports Tokens should be easy and straightforward for most readers. Advanced customization of the report requires some knowledge of HTML.Creating a PHP file for the Custom report
We will be using one of the built-in templates as a starting point for the custom report. We will do so by downloading MainWP Pro Reports Extension in ZIP file format and copying one of the PHP template files.1
Download the MainWP Pro Reports Extension from your MainWP Account
Download the MainWP Pro Reports Extension from your MainWP Account
2
Extract the plugin files to your computer
3
Locate one of the default PHP templates in the /mainwp-pro-reports-extension/templates/reports/ directory
Locate one of the default PHP templates in the /mainwp-pro-reports-extension/templates/reports/ directory
4
Copy a PHP file, rename the file to a new desired title, and use your favorite code editor to make customizations (see the following chapter for instructions on customization)
Copy a PHP file, rename the file to a new desired title, and use your favorite code editor to make customizations (see the following chapter for instructions on customization)
5
Once you are finished with the customization and the template is ready, upload the PHP file to the /wp-content/uploads/mainwp/report-templates/ directory on your Dashboard site
Once you are finished with the customization and the template is ready, upload the PHP file to the /wp-content/uploads/mainwp/report-templates/ directory on your Dashboard site
6
Once uploaded, the template will be available in the Report template dropdown
Once uploaded, the template will be available in the Report template dropdown 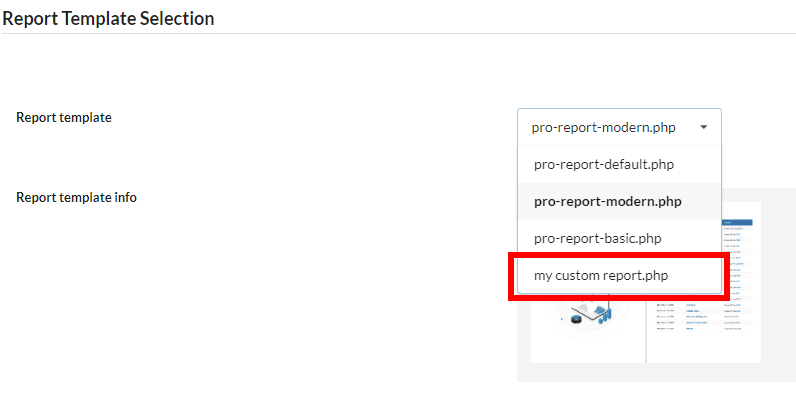
How to Use Tokens
Tokens offer an easy way to customize your Pro Report. They can be added directly to the PHP file of your custom report or in the existing Reports through the visual editor on MainWP Dashboard. The MainWP Pro Reports Extension uses three main token types:- Client Tokens
- Section Tokens
- Data Tokens
Client Tokens
These tokens will allow you to display data you have set on the Child Site edit screen. If you plan to use one of the Client tokens in a report for a certain Child site, a value for it must be set.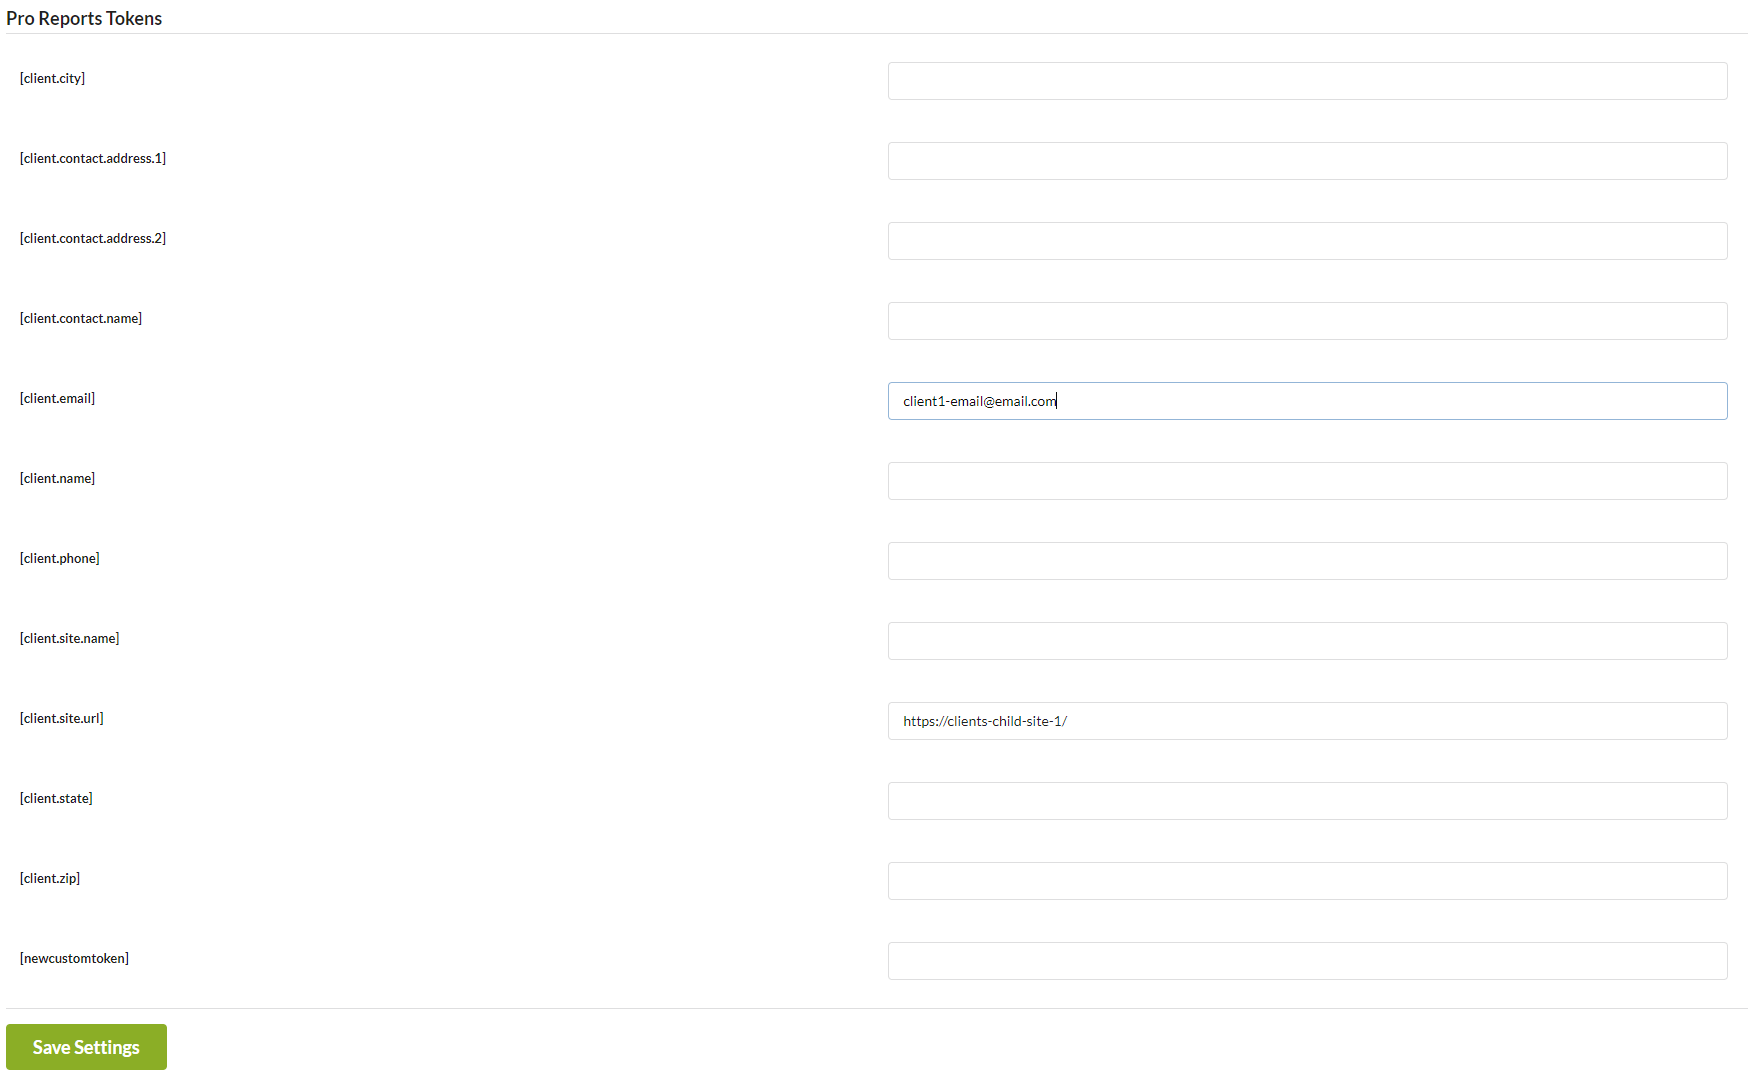 For example, by setting the value for [client.email], that token can be used in the Send email to field in order to send a report for multiple websites and multiple clients.
 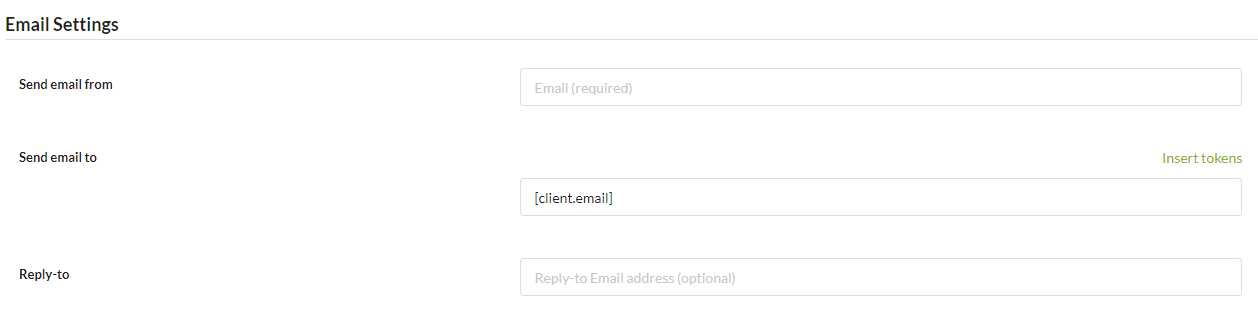 You can easily see available Client Tokens and insert them into a field by clicking on the Insert tokens link.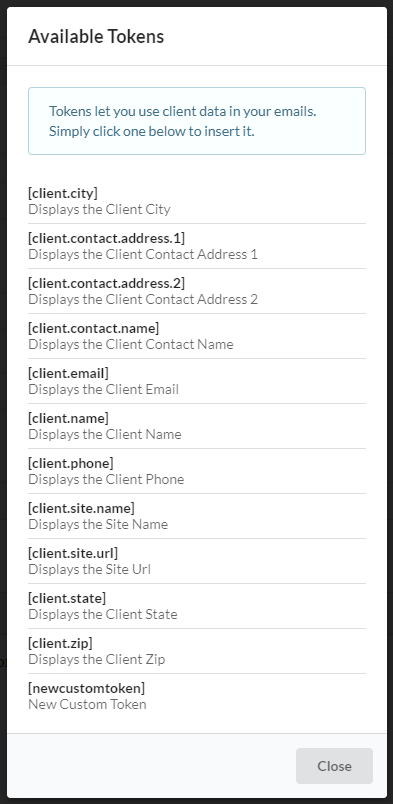
Section Tokens
Section tokens require both opening and closing tags. They can easily be recognized by the starting part section. For example, [section.plugins.installed] is an Opening tag and [/section.plugins.installed] is a Closing tag for that Section token. Section token loops through the database and searches for the relevant data during the selected date range. Example: [section.plugins.installed] The following code would loop through all selected Child sites and, within the selected Date range, list all instances of plugin installations. [section.plugins.installed] [plugin.name] [plugin.installed.date] [/section.plugins.installed]
Data Tokens
Data tokens have only one tag; they have to be used inside section tokens and have to be added between an opening and closing tag of a section token. From the example above for the Section Tokens, the [plugin.name] and [plugin.installed.date] are Data Tokens. [section.plugins.installed] [plugin.name] [plugin.installed.date] [/section.plugins.installed] In our help article you can find all available Data Tokens and the respective Section tokens into which they can be inserted.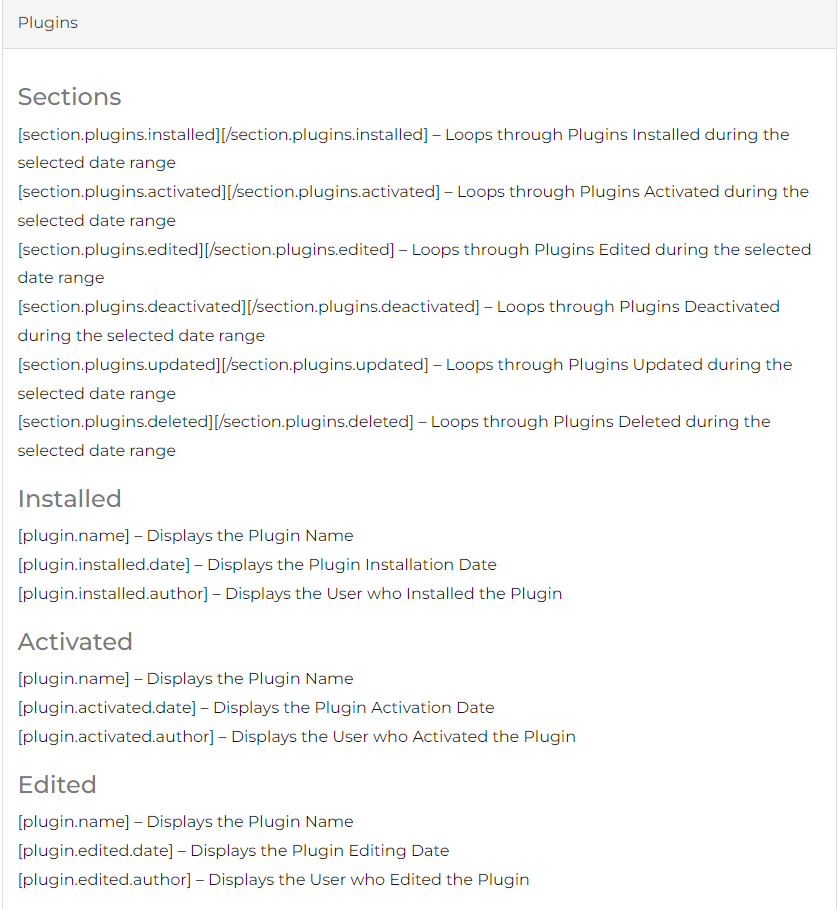
Counter Tokens
Counter Tokens are a special type of Data tokens. You will be able to recognize these tokens by the first word. They end with “.count.” For example [plugin.installed.count] These tokens won’t work inside of the section tokens. You need to use them outside of section tokens. Example: [plugin.installed.count] The counter token will display the number of Installed Plugins, but it must be placed outside of the opening and closing tag of the section token. [section.plugins.installed] [plugin.name] [plugin.installed.date] [/section.plugins.installed] Total number of plugin installations: [plugin.installed.count]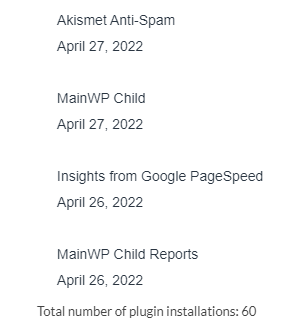
Inject Custom Content With mainwp_pro_reports_additional_content
All built-in Pro Reports templates fire the mainwp_pro_reports_additional_content hook near the end of the report body. Use it to append a custom section — for example, a per-site upsell block, a signature, a contact block, or extra site-specific data — without editing the template files themselves.
Use this hook when you want the same custom block to appear in every report template you ship, or when the block depends on the site the report is being generated for.
Hook signature
Every template passes four arguments:
The Modern template additionally exposes
mainwp_pro_reports_additional_content as a filter — return an HTML string to have Pro Reports wrap it in a report segment automatically. All other templates use do_action, so echo your markup directly.
Add a per-site content block
The$website argument makes the callback aware of which site the current report belongs to. Use it to look up ACF fields, custom post meta, or client data on the Dashboard and print site-specific content:
Before this update, the hook did not receive
$website, so callbacks could not tell which site the report was for when generating per-site reports. If you have an existing callback registered with 10, 3, update the accepted-args count to 4 to receive the site.Target a specific template
Use$template_file when you want the block to appear only in one template — for example, only in your custom clone of pro-report-agency.php:
Empty-section behavior
Report templates now render the additional-content wrapper only when your callback actually produces output. If your callback returns nothing (or the filter version returns an empty string), no empty container is added to the report.Custom Fonts and PDF Styling
The report preview uses your browser, while the generated PDF is rendered by Dompdf on the MainWP Dashboard site. Because of this, CSS that works in the preview may need PDF-specific adjustments before it works in the generated PDF.Custom Fonts
Do not rely on@import or Google Fonts CSS URLs for PDF templates. Instead, download the font files, upload them to your MainWP Dashboard site, and load them with @font-face.
Recommended font location:
- The font file is uploaded to the MainWP Dashboard site
- The template loads the font with an absolute
https://URL - The font URL opens directly in the browser
- There is no
.htaccessfile in the font folder blocking access - No security plugin, firewall, hotlink protection, or HTTP Basic Authentication blocks access to the font file
@font-face CSS to pass through to Dompdf. If Dompdf cannot resolve the requested font, it uses its default PDF fallback font.
Prefer .ttf font files and include the font format in the src declaration:
font-family name for each custom report font. Do not rely only on the font’s real or internal name, because Dompdf can reuse generated font metrics when the same family name has already been loaded.
If a PDF continues to use an old or partially broken font after changing font files, rename the CSS
font-family value to a new unique name. This forces Dompdf to build fresh font metrics for the renamed family.font-weight: normal !important on the elements that use that separate family:
MainWP Report Sora 700, and fall back to a default PDF font.
If you have real regular and bold font files, the preferred long-term pattern is to register both weights under one unique family name:
Preview Works but PDF Uses a Default Font
First complete the custom font checks above. If you are using an older Pro Reports version that still applies a PDF fallback font after the template styles, a custom font can work in the browser preview while the generated PDF still uses a default font. Also check for inherited bold styles from headings, table headers, and bold tags:h1throughh6thbstrong
font-weight: 700 font file or force those elements to font-weight: normal !important.
If the CSS is correct but PDF output is still partially garbled, rename the CSS font-family value to force Dompdf to rebuild font metrics. You can also clear the generated Dompdf font cache files in /wp-content/uploads/mainwp_pro_reports/fonts/, but do not delete the uploaded source .ttf files.
If the site cannot update Pro Reports immediately, keep the @font-face declarations in the template <head> and add a second stylesheet immediately after the opening <body> tag.
This later stylesheet can reapply the custom font for the PDF output:
mainwp_pro_reports_pdf_font_override_css filter, use that filter only for compatibility cases where you need to inject or restore PDF-only fallback CSS. It is not required for normal custom font use.
Line Height and Table Alignment
Dompdf table layout can differ from browser table layout. Large unitlessline-height values, such as line-height: 1.8, can make table text appear vertically misaligned in the generated PDF, especially when combined with vertical-align: middle.
For PDF templates, use a smaller line height and create vertical space with padding:
padding-top and padding-bottom values instead of relying on a large line height.
Related Resources
- Available Pro Reports Tokens - Complete token reference
- Pro Reports Extension - Main Pro Reports documentation
- Add Images to Templates - Adding images to reports