What You’ll Learn
- Redirecting frontend traffic to hide your Dashboard site
- Restricting wp-admin access by IP address
- Adding HTTP Basic Authentication to wp-admin and wp-login
- Manually removing Dashboard locks if locked out
Extension Add-on - This add-on provides standalone functionality within MainWP Dashboard. No third-party plugins required.
The MainWP Dashboard Lock Extension allows you to limit access to your Admin area and even redirect Non-WP-Admin pages to a different site making your MainWP Dashboard virtually invisible. All of these changes can be made without you having to ever edit the .htaccess file yourself.
Frontend Redirect Rules
Make your dashboard front page inaccessible to everyone but you. Easily set a redirect URL, and all hits on Non-WP-Admin pages will be redirected to it. This will make your MainWP Dashboard site virtually invisible. Redirection is the process of forwarding one URL to a different URL. There are three main kinds of redirects: 301, 302, and meta refresh. It is a way to send both users and search engines to a different URL from the one they originally requested.Add Frontend Redirect Rules
Remove Frontend Redirect Rules
Exclude Custom Pages from Redirection
Do not add a full-page URL in the box. It’s enough to add just a page slug. For example, if you want to exclude http://yourdomain.com/sample-page/, add /sample-page/ in the box.
Important Notes
The Frontend Redirect Rules automatically skip requests containingcron and /wp-json. Use the Exclude slugs from redirection option for any additional pages or slugs that must stay accessible. 
Dashboard Lock
The Extension allows you to limit access to Admin area pages and to your wp-login.php page to specific IP addresses without having to manually edit your .htaccess file. Additional IPs can be set up to access your WordPress admin by adding one IP address per line if you access your dashboard from multiple locations. You can also add a secondary login and password for your Admin area pages and to your wp-login.php page. This is helpful if you have a dynamic IP but still want to add some extra protection to your site.Limit Access to certain IP addresses
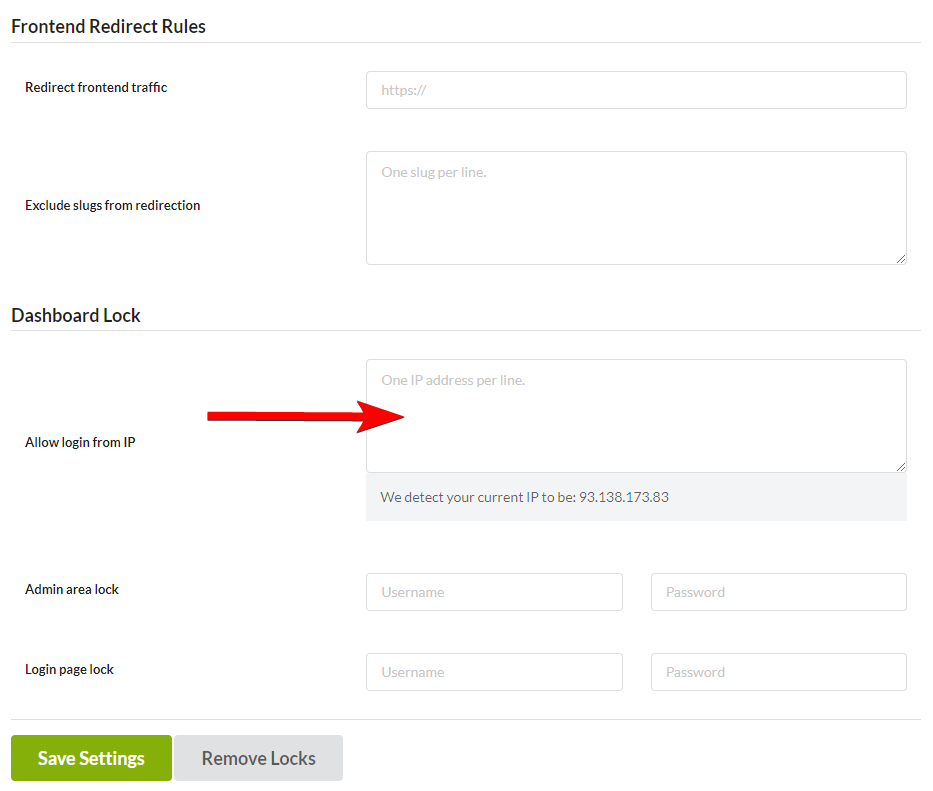
In the provided text area, enter one or multiple IP addresses (each in a new line)
In the provided text area, enter one or multiple IP addresses (each in a new line)
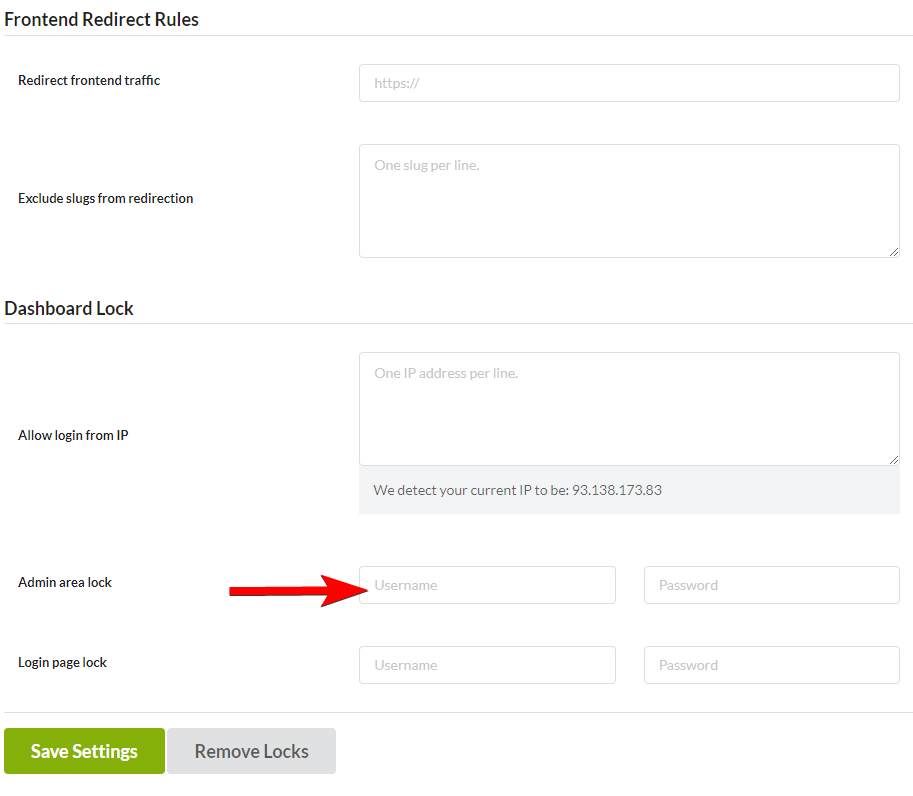
Lock the /wp-admin/ pages
After enabling the Admin area lock, before accessing any WP Admin page (../wp-admin/..) HTTP Basic Authentication will be required.
Lock the /wp-login.php page
After enabling the Login page lock, before accessing any Login page (../wp-login.php), HTTP Basic Authentication will be required.

Important Notes
If you are having issues with the Admin area lock and Login page lock, please check here. Some hosts don’t allow HTTP basic authentication, and this can create an infinite redirection loop. This can make accessing your MainWP Dashboard site hard. In case you experience this issue, please remove Admin area and login page locks. If this doesn’t help, it is highly recommended to contact your host support. In case you have lost your HTTP Basic Auth credentials, remove Admin area and Login page locks.HTTP Basic Authentication Not Working
HTTP access authentication is a method for an HTTP user agent to provide a username and password when making a request. It is a technique for enforcing access controls to web resources because it doesn’t require cookies, session identifiers, and login pages. No handshakes should be performed in prediction. The use of HTTP Authentication with cPanel/WHM is disabled; therefore, the option was removed from the Tweak Settings. It was disabled in cPanel/WHM 11.42 version. If you are not comfortable with tweaking cPanel settings by yourself, we highly suggest contacting your host support and asking them to do this for you. Even though it has been disabled from cPanel/WHM, you can enable HTTP Authentication by modifying /var/cpanel/cpanel.config. Add the line below skiphttpauth=0 Setting it to 1 means it has been disabled. Setting it to 0 means it has been enabled. After enabling HTTP Authentication & a pop-up will occur. Restart cPanel once you save this file.Remove Dashboard Locks
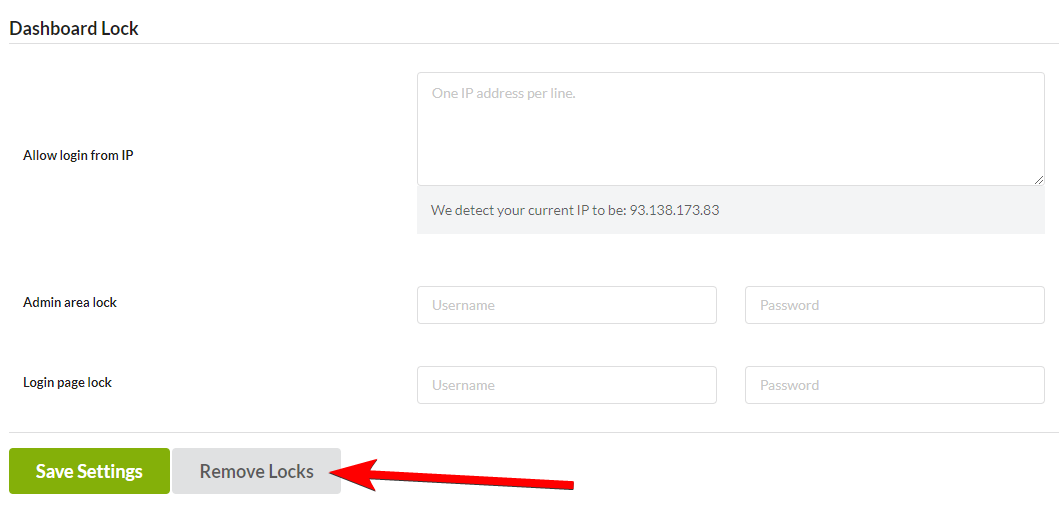
There are two ways to unlock your MainWP Dashboard site. In case there are no issues with your MainWP Dashboard site, and you can access the Dashboard Lock Extension settings, you will be able to use the Remove Locks button to remove the allowed IP address restriction, WP Admin lock, and login page lock. In case you can’t access your MainWP Dashboard site, locks will need to be removed manually.Unlock MainWP Dashboard
It will remove all restrictions from your .htaccess files (Allowed IP Addresses, WP Admin, and WP-login.php locks)
Manually Remove MainWP Dashboard Locks
Remove IP Address Restriction
Remove the code inserted by the Dashboard Lock Extension
Remove the code inserted by the Dashboard Lock Extension # BEGIN MainWP Secure and Clean. // remove code from here # END MainWP Secure and Clean.
Remove the Admin area lock
Remove the code inserted by the Dashboard Lock Extension
Remove the code inserted by the Dashboard Lock Extension # BEGIN MainWP Secure and Clean - Apache Password Protect wp-admin // remove code from here # END MainWP Secure and Clean - Apache Password Protect wp-admin
Remove Login page lock
Remove the code inserted by the Dashboard Lock Extension
Remove the code inserted by the Dashboard Lock Extension # BEGIN MainWP Secure and Clean - Apache Password Protect wp-login.php // remove code from here # END MainWP Secure and Clean - Apache Password Protect wp-login.php
Related Resources
- Security Add-ons - Browse all security tools
- How Secure is MainWP - Security architecture overview
- Two-Factor Authentication - Add 2FA to your Dashboard