What You’ll Learn
- Creating a Fathom API token
- Connecting Fathom to MainWP Dashboard
- Assigning Fathom sites to child sites
- Viewing visitor data and widgets
- Including Fathom data in Pro Reports
Integration Add-on - This add-on extends MainWP to work with Fathom Analytics. It requires a connected Fathom account with sites available to assign in MainWP.
The Fathom Extension for MainWP simplifies accessing Fathom data for all Child Sites within your MainWP Dashboard. It adds global and individual widgets that display visitor counts and valuable insights, empowering you to make informed decisions for your Child Sites.
Use this Extension To Track:
- Views
- Users
- Unique pages view
- Average Engagement time
- Visitors by Country
- Visitors by Page
- Visitors by Device
- Views by Referrers
- Visitors by Browsers
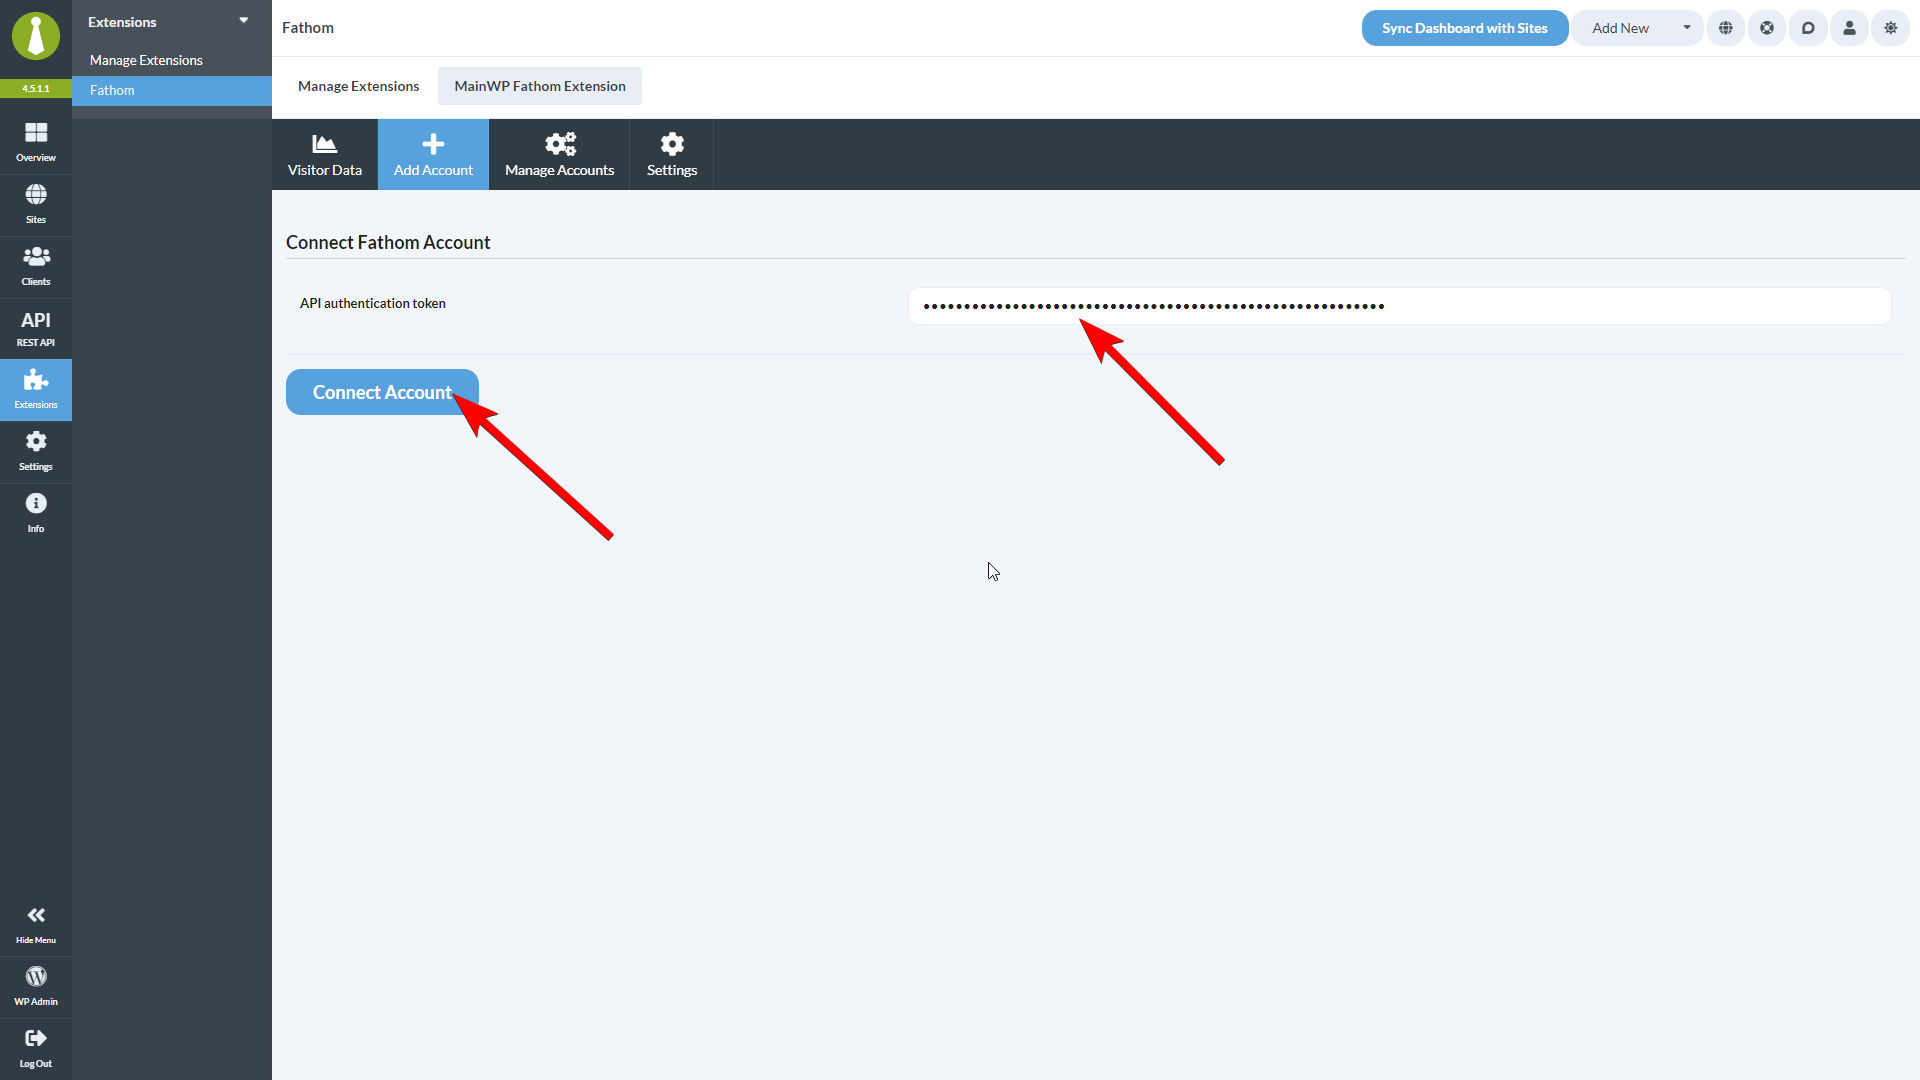
Establishing a connection with a Fathom Account
Navigate to https://app.usefathom.com/api
Navigate to https://app.usefathom.com/api
Click the Create New button to create an API token
Click the Create New button to create an API token\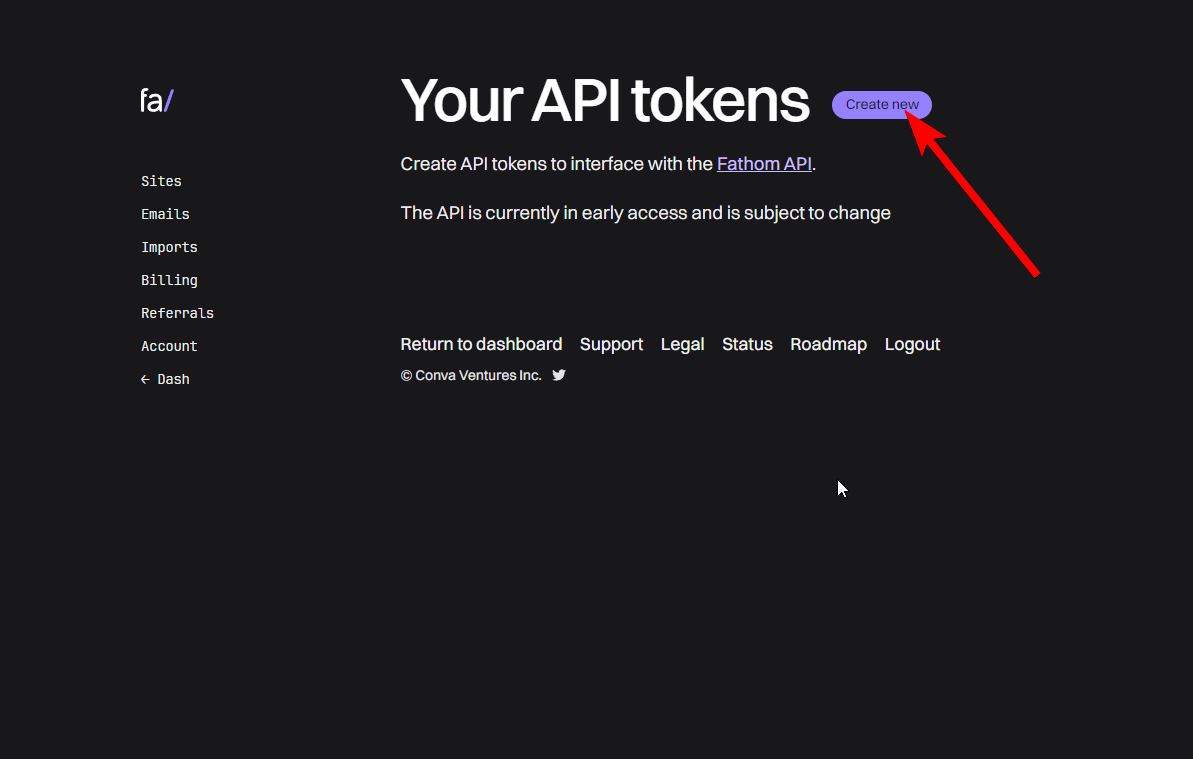
Give the key a name, set Permissions to Admin key, and click the Save change button
Give the key a name, set Permissions to Admin key, and click the Save change button\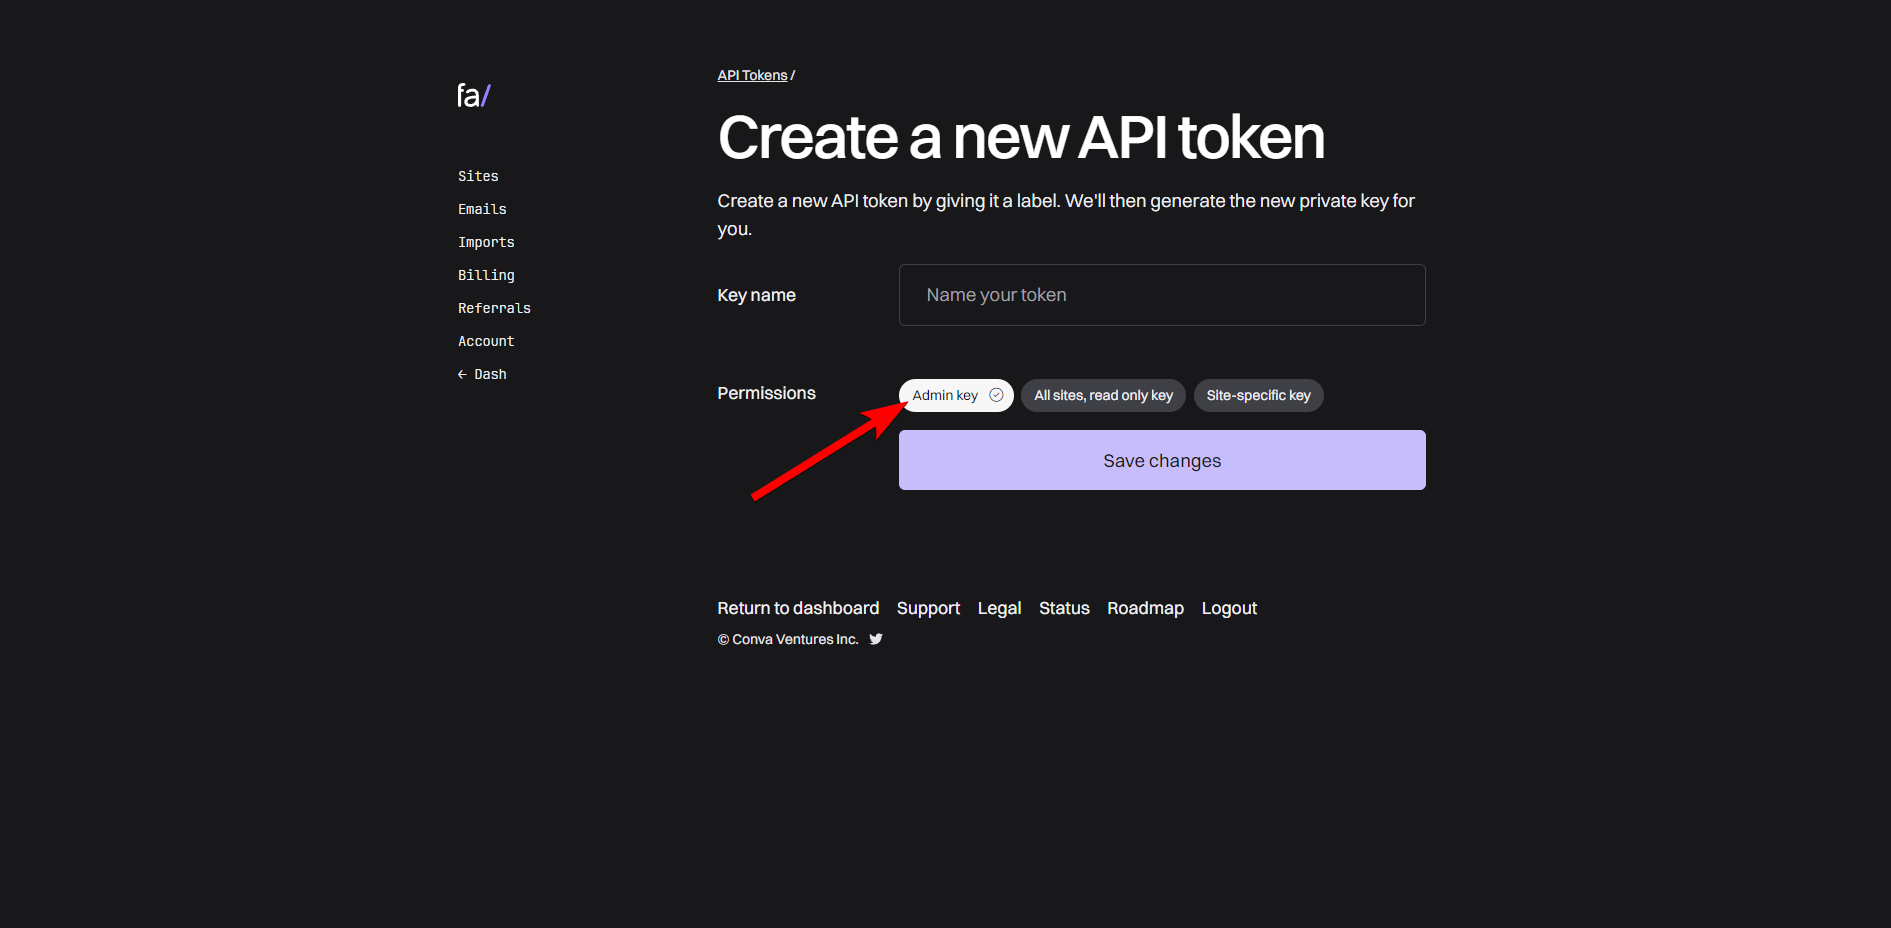
Assigning sites from your Fathom Account to Child Sites in your MainWP Dashboard
Locate the desired child site and click the Edit action
Locate the desired child site and click the Edit action\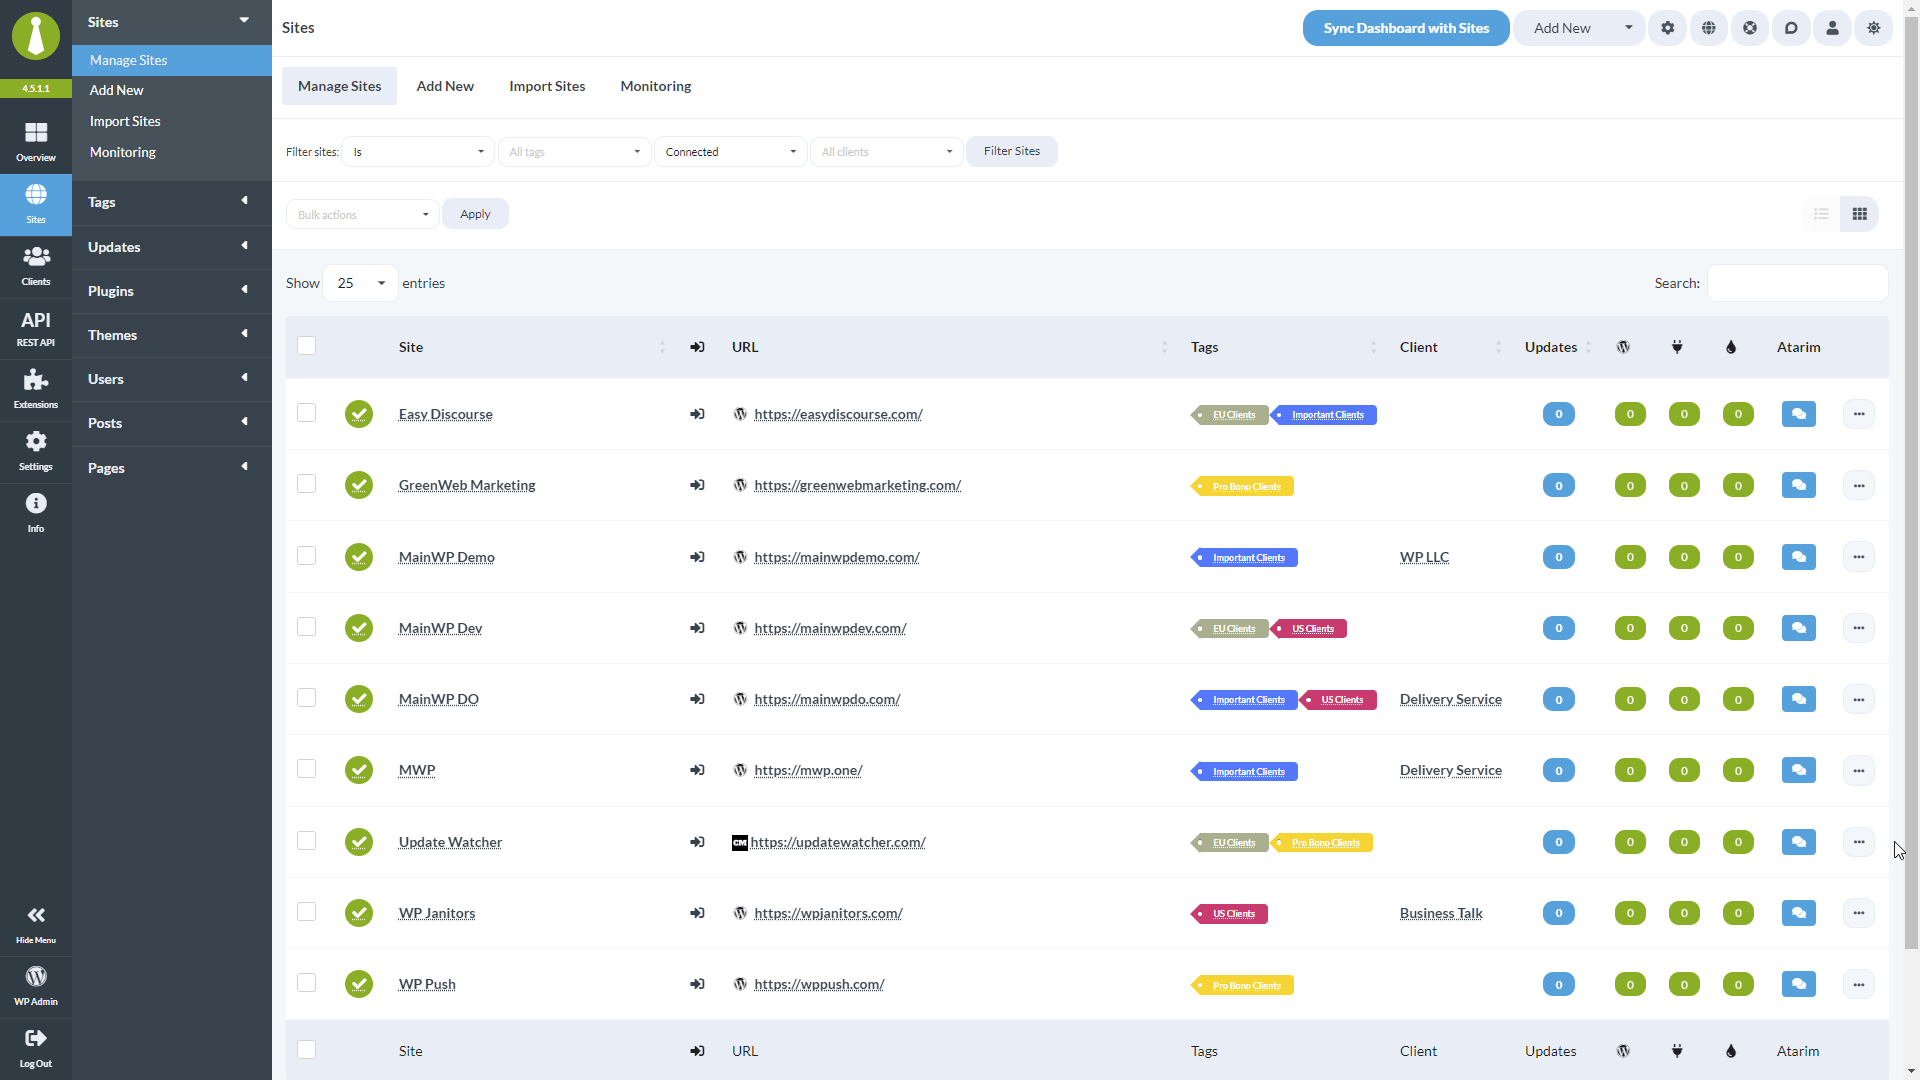
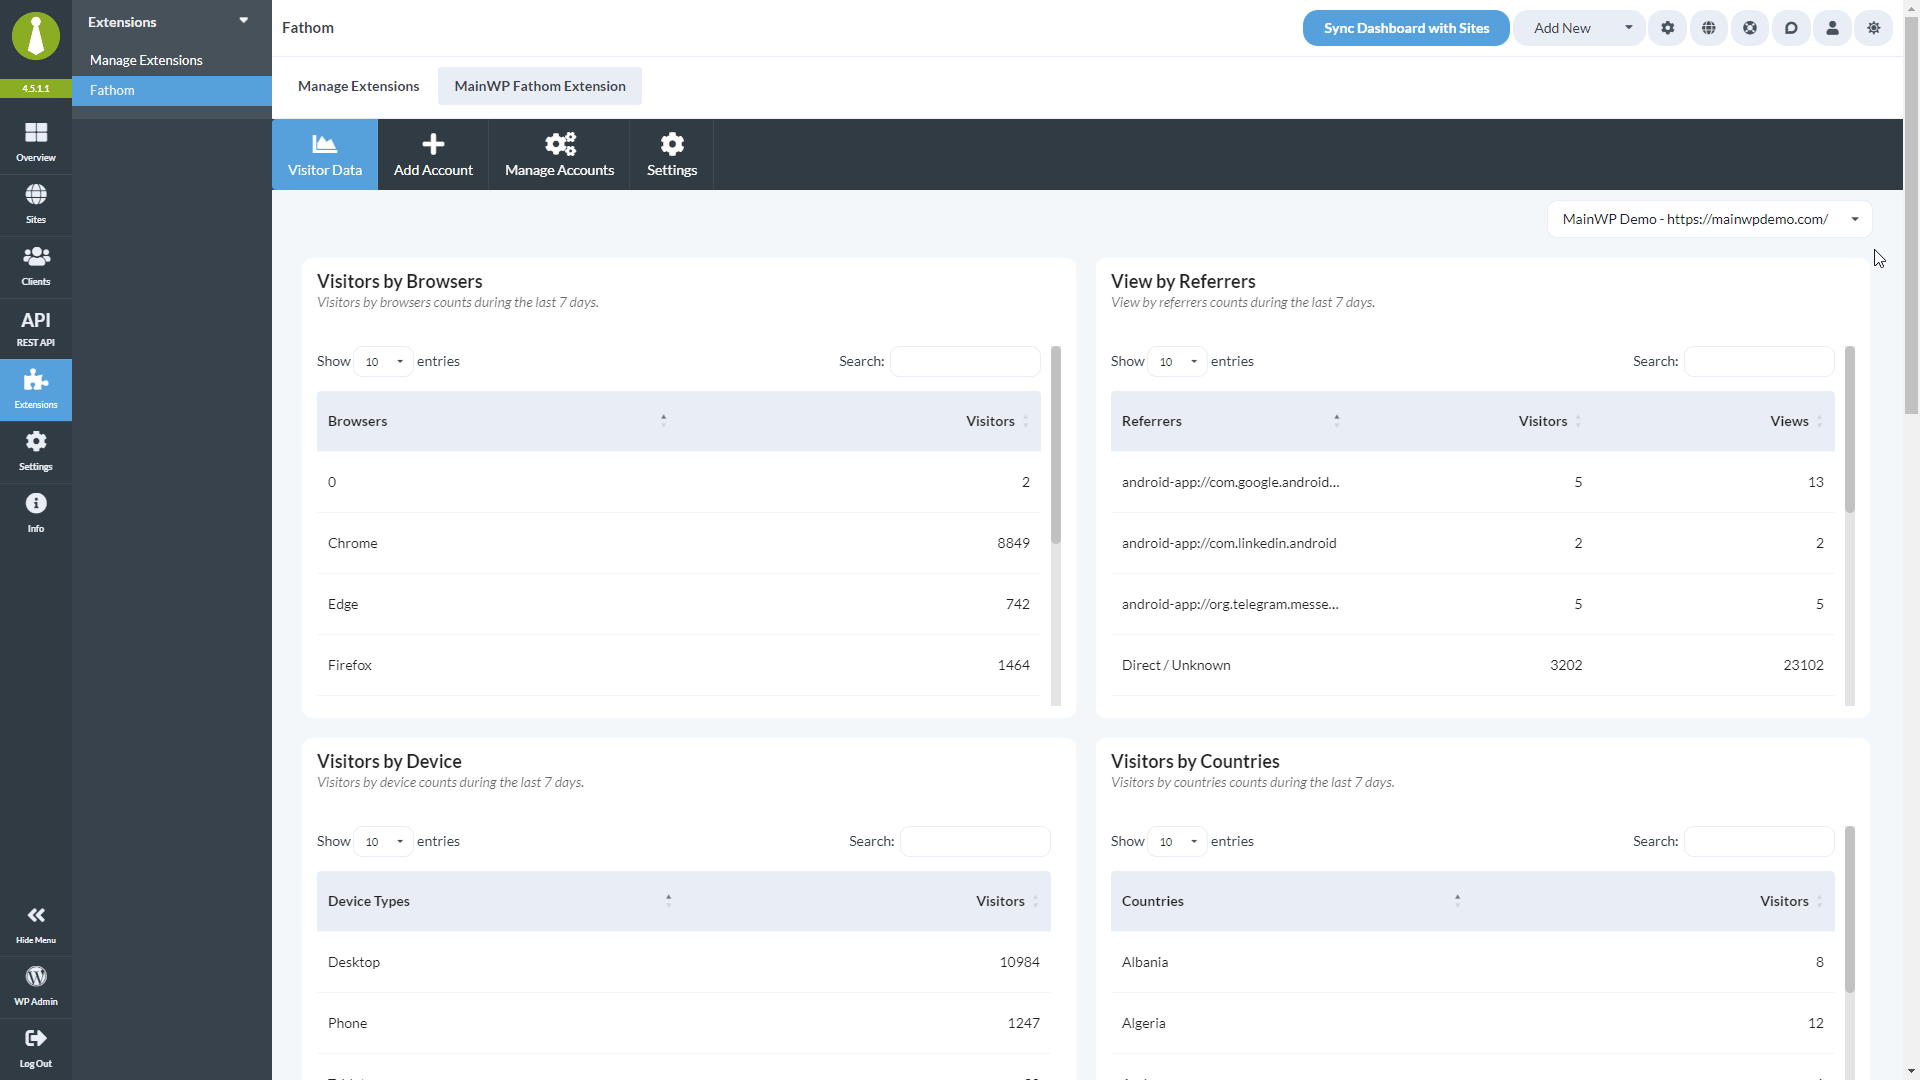
Fathom Visitor Data
After you connect your Fathom Analytics account and assign Fathom sites to your child sites, you will be able to see all Fathom Analytics data on the Add-ons > Analytics > Fathom > Visitor Data page.
Refreshing Fathom data
Fathom data is cached in your MainWP Dashboard so that pages load quickly and so the Fathom Aggregation API isn’t called on every page view. The cache is refreshed automatically based on the Data refresh frequency setting, and you can also refresh it on demand.Data refresh frequency
Set how often MainWP fetches fresh stats from your Fathom account:Choose a value for Data refresh frequency
Available options are Every hour, Every 3 hours, Every 9 hours, Every 15 hours, Every 18 hours, and Every 24 hours.
Refresh Data button
Use the Refresh Data button to force an immediate update outside of the configured refresh frequency. It clears the Fathom stats cache and re-fetches data from Fathom for all assigned sites.- On the Settings tab, click the Refresh Data button next to Save Settings.
- On the Visitor Data tab, click the Refresh Data button to reload the page with fresh stats.
Display interval
The Display interval setting on the Settings tab controls the time range shown in Fathom widgets and on the Visitor Data page. Choose Week or Month depending on the reporting window you want to see by default.Removing a connected Fathom account
When you remove a connected Fathom account from MainWP, the extension automatically clears the Fathom site assignments from your child sites and removes the related cached stats. You don’t need to manually clean up child site settings after disconnecting an account.Widgets
The Fathom widget will be added to the Overview page and on the Individual Child site Overview page. As always, the widgets can be enabled or disabled in Page Settings, and they can be re-arranged however you wish.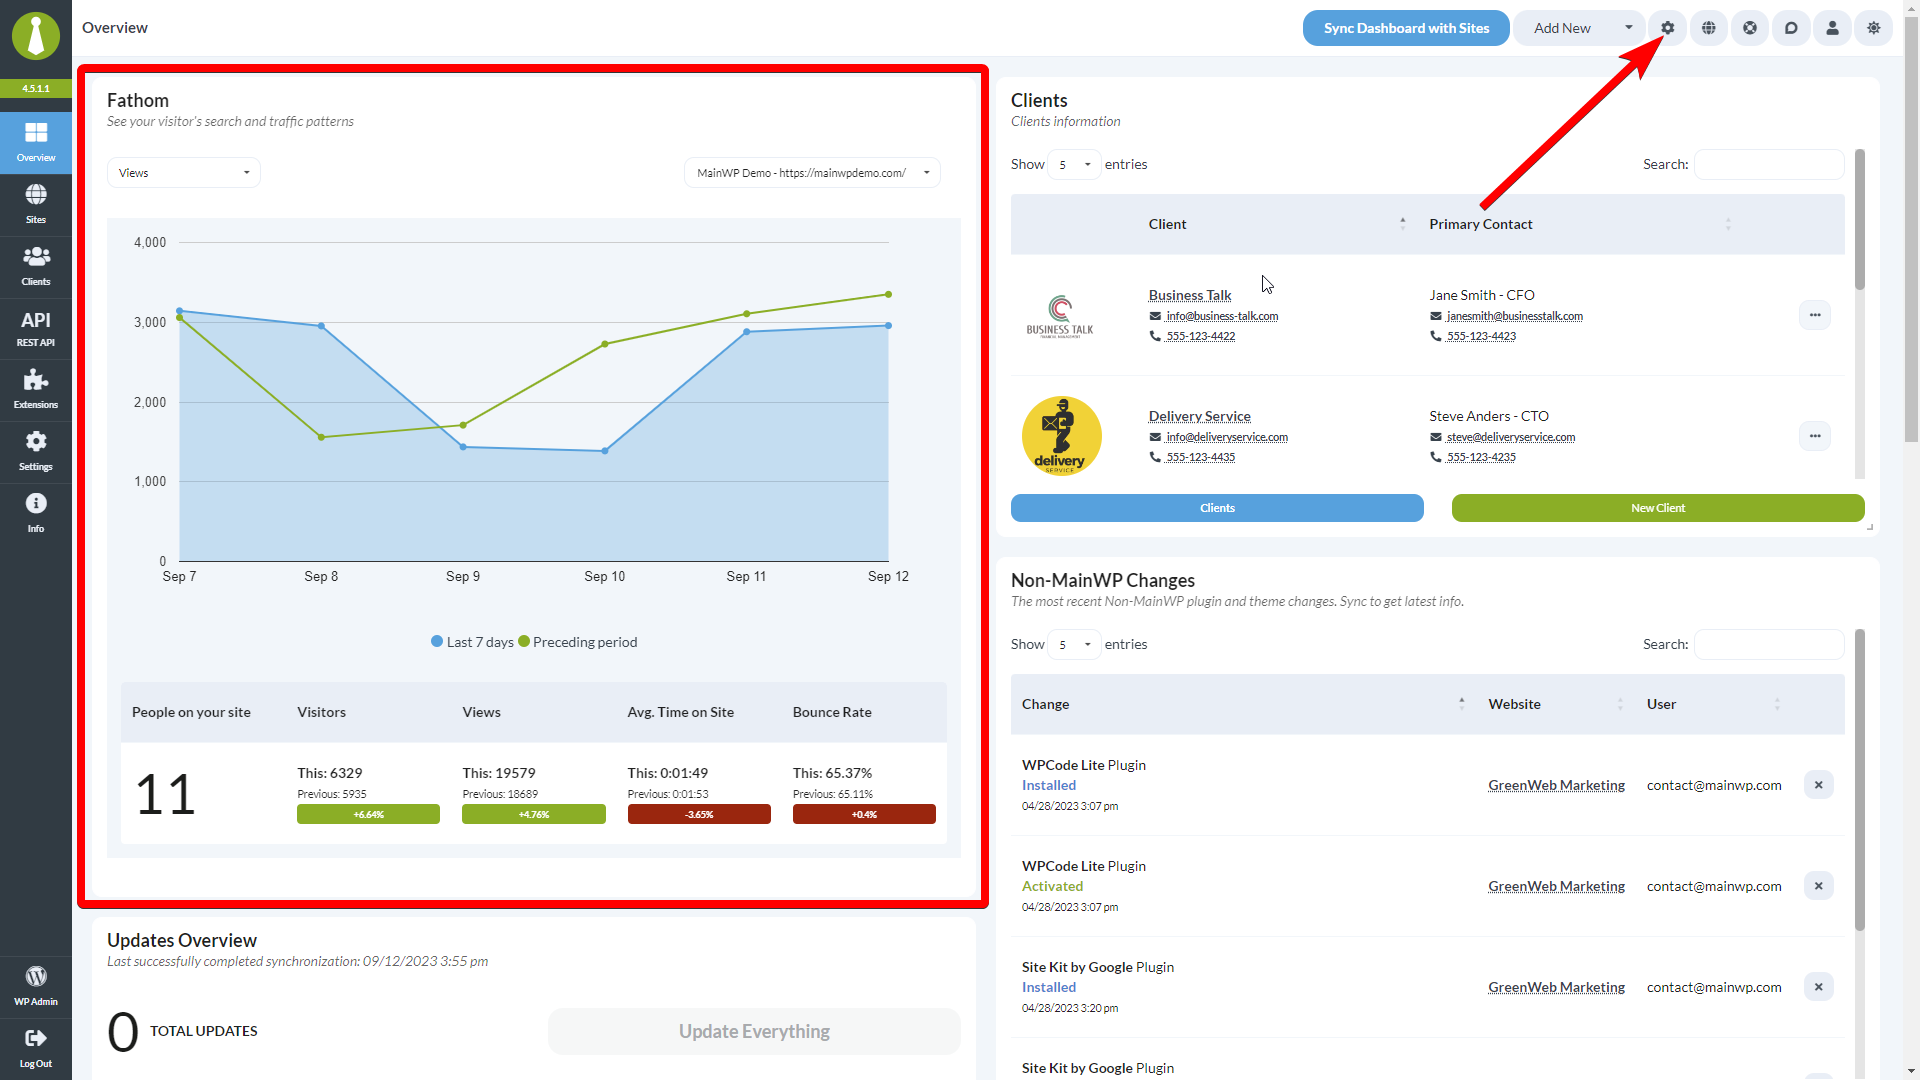
Fathom data in Pro Reports
Fathom data can be easily included in Pro Reports by selecting it from the Report Data section of the Pro Reports.\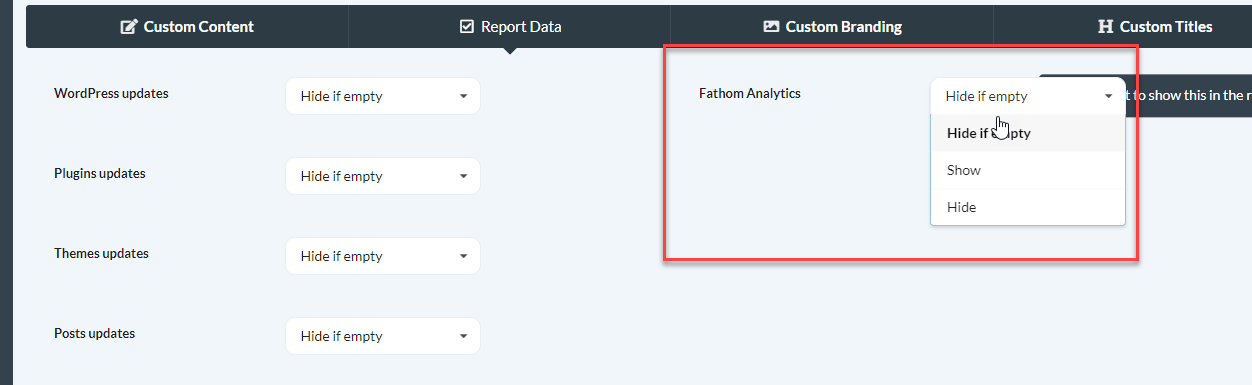
Related Resources
- Analytics Add-ons - Browse all analytics integrations
- Pro Reports Extension - Include analytics data in reports
- Available Pro Reports Tokens - Fathom tokens