
What You’ll Learn
- Installing Yoast SEO on Dashboard and child sites
- Exporting and importing SEO settings templates
- Publishing posts and pages with custom SEO settings
- Managing Yoast SEO across your network
Install and Set the WordPress SEO Extension
Installation of the MainWP WordPress SEO Extension requires three important steps:- Installing the Extension itself on your MainWP Dashboard site
- Installing the Yoast SEO plugin on your MainWP Dashboard site
- Installing the Yoast SEO plugin on Child Sites
Installing the Extension
The MainWP WordPress SEO Extension needs to be installed only on your MainWP Dashboard site. You can install it as any other MainWP add-on.Installing the Plugin on MainWP Dashboard Site
The Yoast SEO plugin needs to be installed on your MainWP Dashboard site. You can install it like any other WordPress plugin. For additional help with installing WordPress plugins, please review this help document.Installing the Plugin on Child Sites
For the proper use of the MainWP Yoast SEO Extension, you need to install the Yoast SEO Plugin on your child sites.Install from MainWP Dashboard
Log in to your MainWP Dashboard
Go to the MainWP > Sites > Plugins > Install Plugins page
In the Search field, enter the plugin name (Yoast SEO)
Press enter on your keyboard
After the search results appear, locate the plugin
Select the Install this Plugin option
Select your child sites
In the Installation Options box, make sure that the Activate after installation option is selected.
Click Complete Installation
Once the installation is complete, Sync your MainWP Dashboard
Install directly on Child Site
Log in to your child site
Go to WordPress Admin > Plugins > Add New
In the Search field, enter the plugin name (Yoast SEO)
After the search results appear, locate the plugin
Click the Install button
Click the Activate button
Yoast SEO Dashboard
From the MainWP > Add-ons > Content Operations > WordPress SEO > Yoast SEO Dashboard page, you can monitor all of your child sites where the synced plugin inventory includes the Yoast SEO plugin. In the sites list, you will be notified if the plugin has an update available or if the plugin is deactivated.- In case the plugin is not activated, the Activate Plugin action will appear in the corresponding site row.
- If there is a new version of the plugin, the Update Plugin action will appear in the corresponding site row.
Available Actions
From the MainWP > Add-ons > Content Operations > WordPress SEO > Yoast SEO Dashboard page, you can open the child site overview, edit the child site, open the child site’s WordPress admin, or open Yoast SEO on the child site. Actions are provided in a Child Site row. Important Notes: If you know that you have the plugin installed on a child site, but the child site doesn’t appear in the list, try to re-sync your sites.Manage Yoast SEO Plugin Settings
The MainWP WordPress SEO Extension lets you manage Yoast SEO plugin settings on your child sites. The process of the settings management requires three steps:- Exporting Yoast SEO Settings from one of your Websites
- Importing the Settings Template to your Extension
- Saving the Template to Child Sites
Export Yoast SEO Settings
Log in to one of your WordPress sites where you have the Yoast SEO plugin configured
Follow the Import And Export in Yoast SEO tutorial
Import the Yoast SEO Settings Template to the Extension
Log in to your MainWP Dashboard
Go to the MainWP > Add-ons > Content Operations > WordPress SEO page
Go to the Settings Templates tab
Click the Import Settings button
Complete the Import Template modal
- Set the Template title
- Set the Template description
- Paste the exported settings into Import Settings
- Click the Import Settings button
Save Yoast SEO Settings to Child Sites
Log in to your MainWP Dashboard
Go to the MainWP > Add-ons > Content Operations > WordPress SEO page
Go to the Settings Templates tab
Locate the previously uploaded template
Select your Child Sites
Click the Apply Template button
Publishing Posts and Pages with your SEO Settings
Once the WordPress SEO Extension and Yoast SEO plugin are installed on your MainWP Dashboard, the Yoast SEO meta box is available in the Add New Post and Add New Page screens. From there, you can publish your custom SEO settings along with the post content.Publish Posts with Custom SEO Settings
Log in to your MainWP Dashboard
Go to the MainWP > Sites > Content Operations > Manage Posts page
Click Add New
Set your post content
Select your child sites
Set SEO Settings
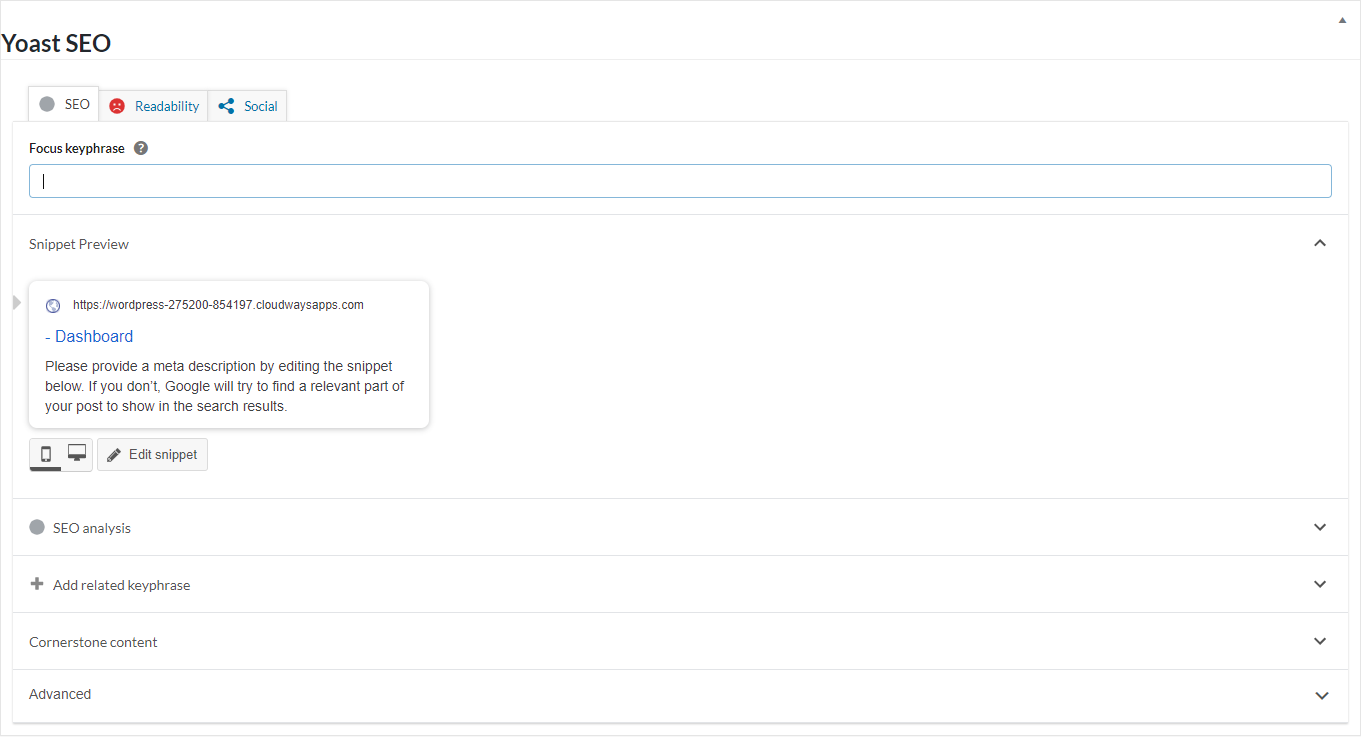
Click the Set SEO Values button
Click the Publish button
Publish Pages with Custom SEO Settings
Log in to your MainWP Dashboard
Go to the MainWP > Sites > Content Operations > Manage Pages page
Click Add New
Set your page content
Select your child sites
Set SEO Settings
Click the Set SEO Values button
Click the Publish button
Related Resources
- Posts/Pages Add-ons - Browse all content tools
- SEOPress Extension - Alternative SEO integration
- Manage Posts - Post management guide