What You’ll Learn
- Installing Jetpack Protect extension and plugin
- Viewing and fixing vulnerabilities on child sites
- Connecting child sites to Jetpack
- Using bulk actions to manage multiple sites
Integration Add-on - This add-on extends MainWP to work with Jetpack Protect. Requires Jetpack Protect to be installed and active on your child sites.
Jetpack Protect extension allows you to see any vulnerabilities on your child sites directly in your MainWP Dashboard. The extension works in tandem with the Jetpack Protect plugin on your child sites. Both the extension and the plugin are free to download and use.
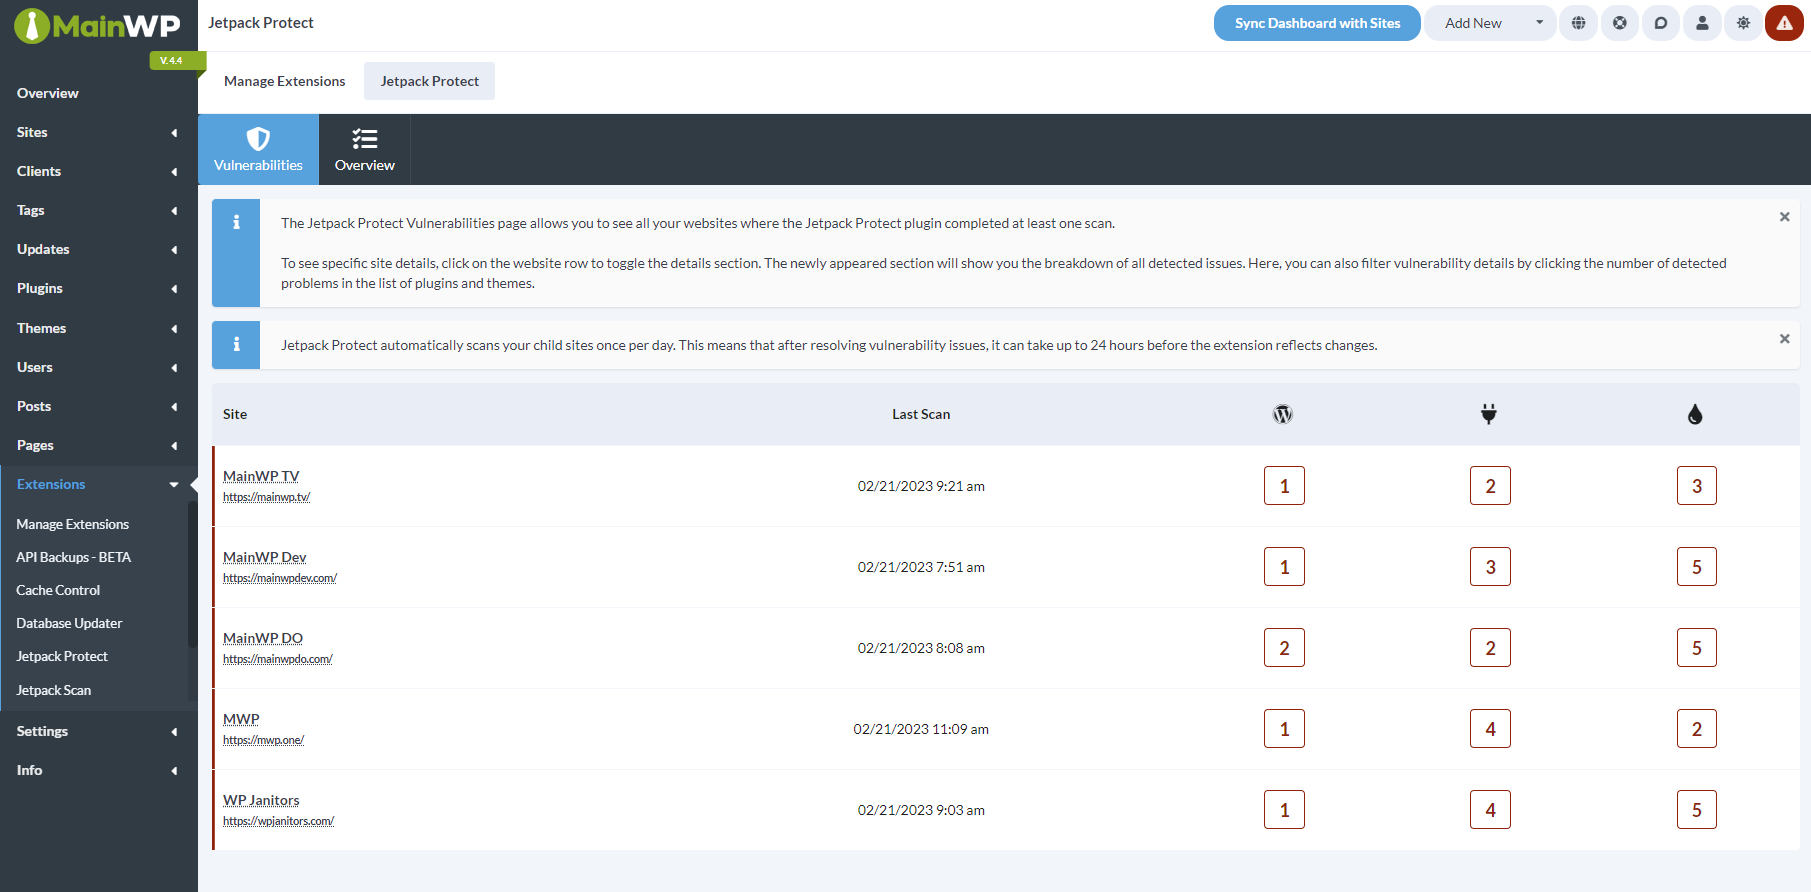
Jetpack Protect automatically scans your child sites once per day. This means that after resolving vulnerability issues, it can take up to 24 hours before the extension reflects changes.
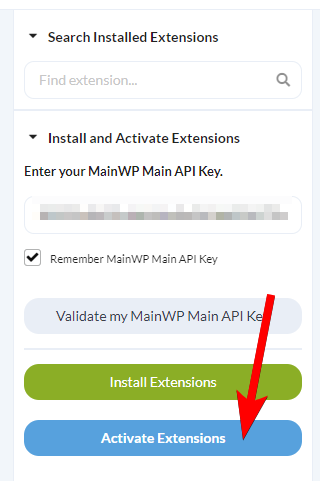
Installing the extension
First step is to install the Jetpack Protect plugin on the desired child sites and activate it. After that, follow these steps to install the MainWP Jetpack Protect extension.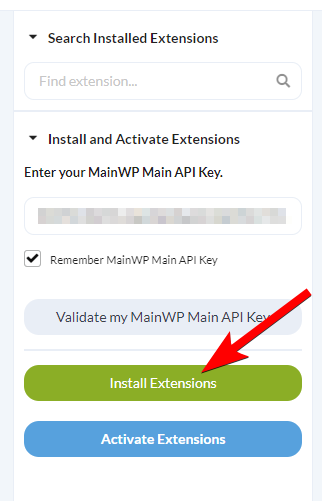
Vulnerabilities tab
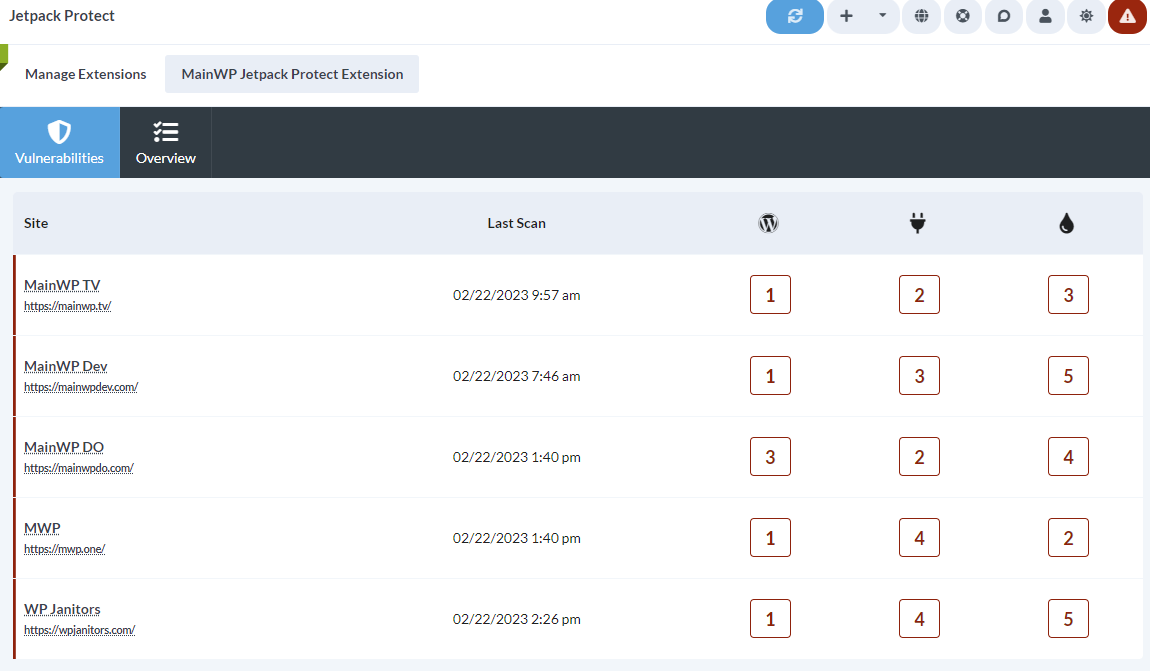
Fix a vulnerability
Then you can click a vulnerability to reveal more information about it. For supported WordPress core, plugin, and theme vulnerabilities, you can update to the fixed version when one is available. For plugin and theme vulnerabilities, you can also delete the affected item.
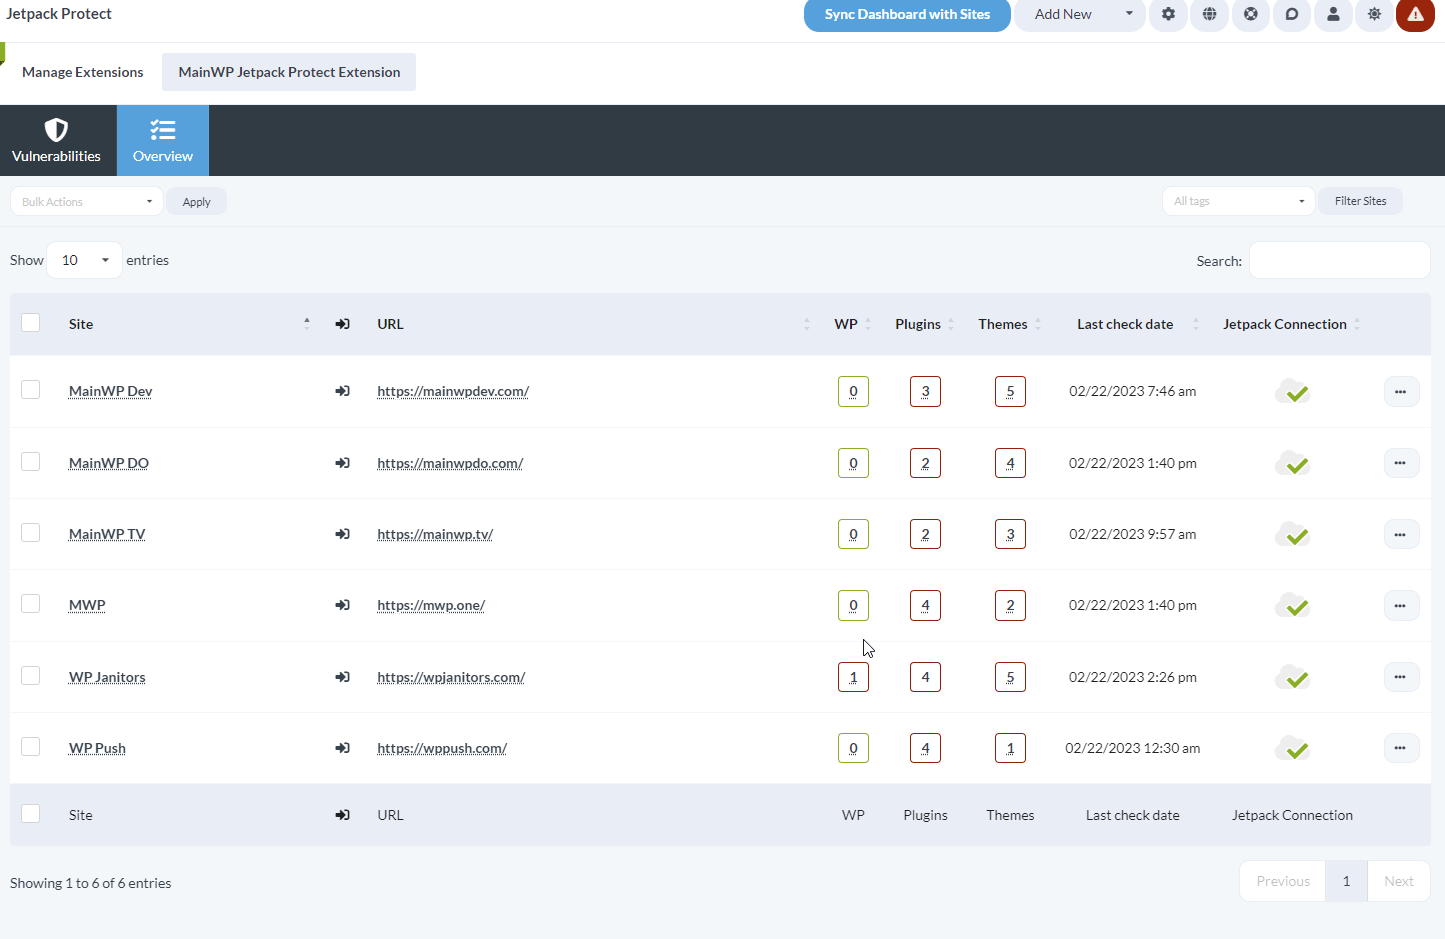
Overview tab
This page provides you with additional actions related to the Jetpack Protect plugin. The ellipsis menu includes actions such as Overview, Edit, Go to Jetpack Protect, Hide Jetpack Protect or Unhide Jetpack Protect, and Connect Jetpack Protect or Disconnect Jetpack Protect.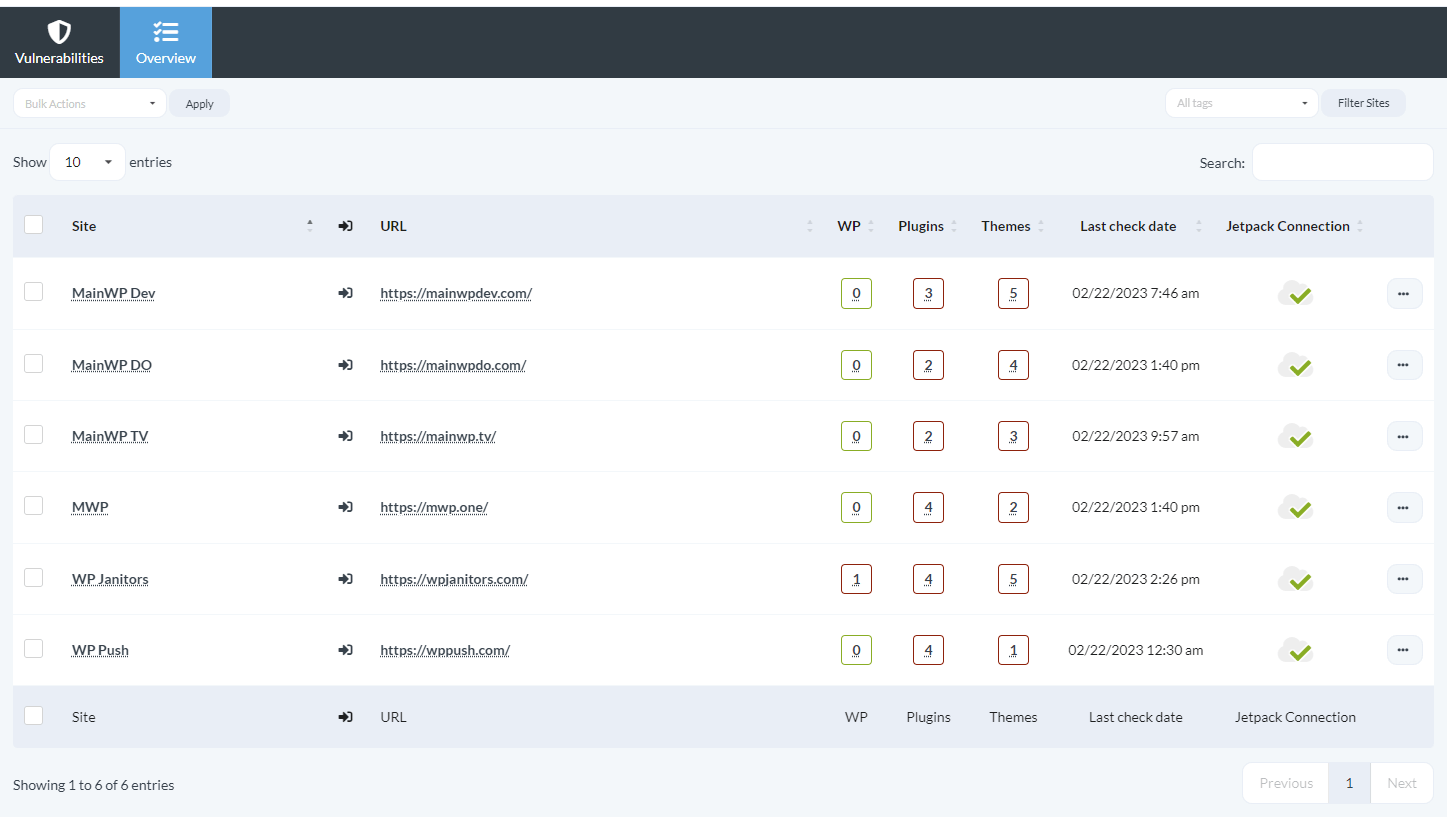
Jetpack Protect REST API
The extension registers a v1 REST API endpoint atwp-json/mainwp/v1/jetpack-protect/result. All MainWP REST API calls, including full documentation and examples, are publicly available on Postman. Please refer to our REST API documentation for more details on enabling REST API and managing API keys.
Quick Start with Jetpack Protect
The extension works in tandem with the Jetpack Protect plugin on your Child Sites. Both the extension and the plugin are free to download and use.Navigate to MainWP Dashboard > Add-ons > Security > Jetpack Protect
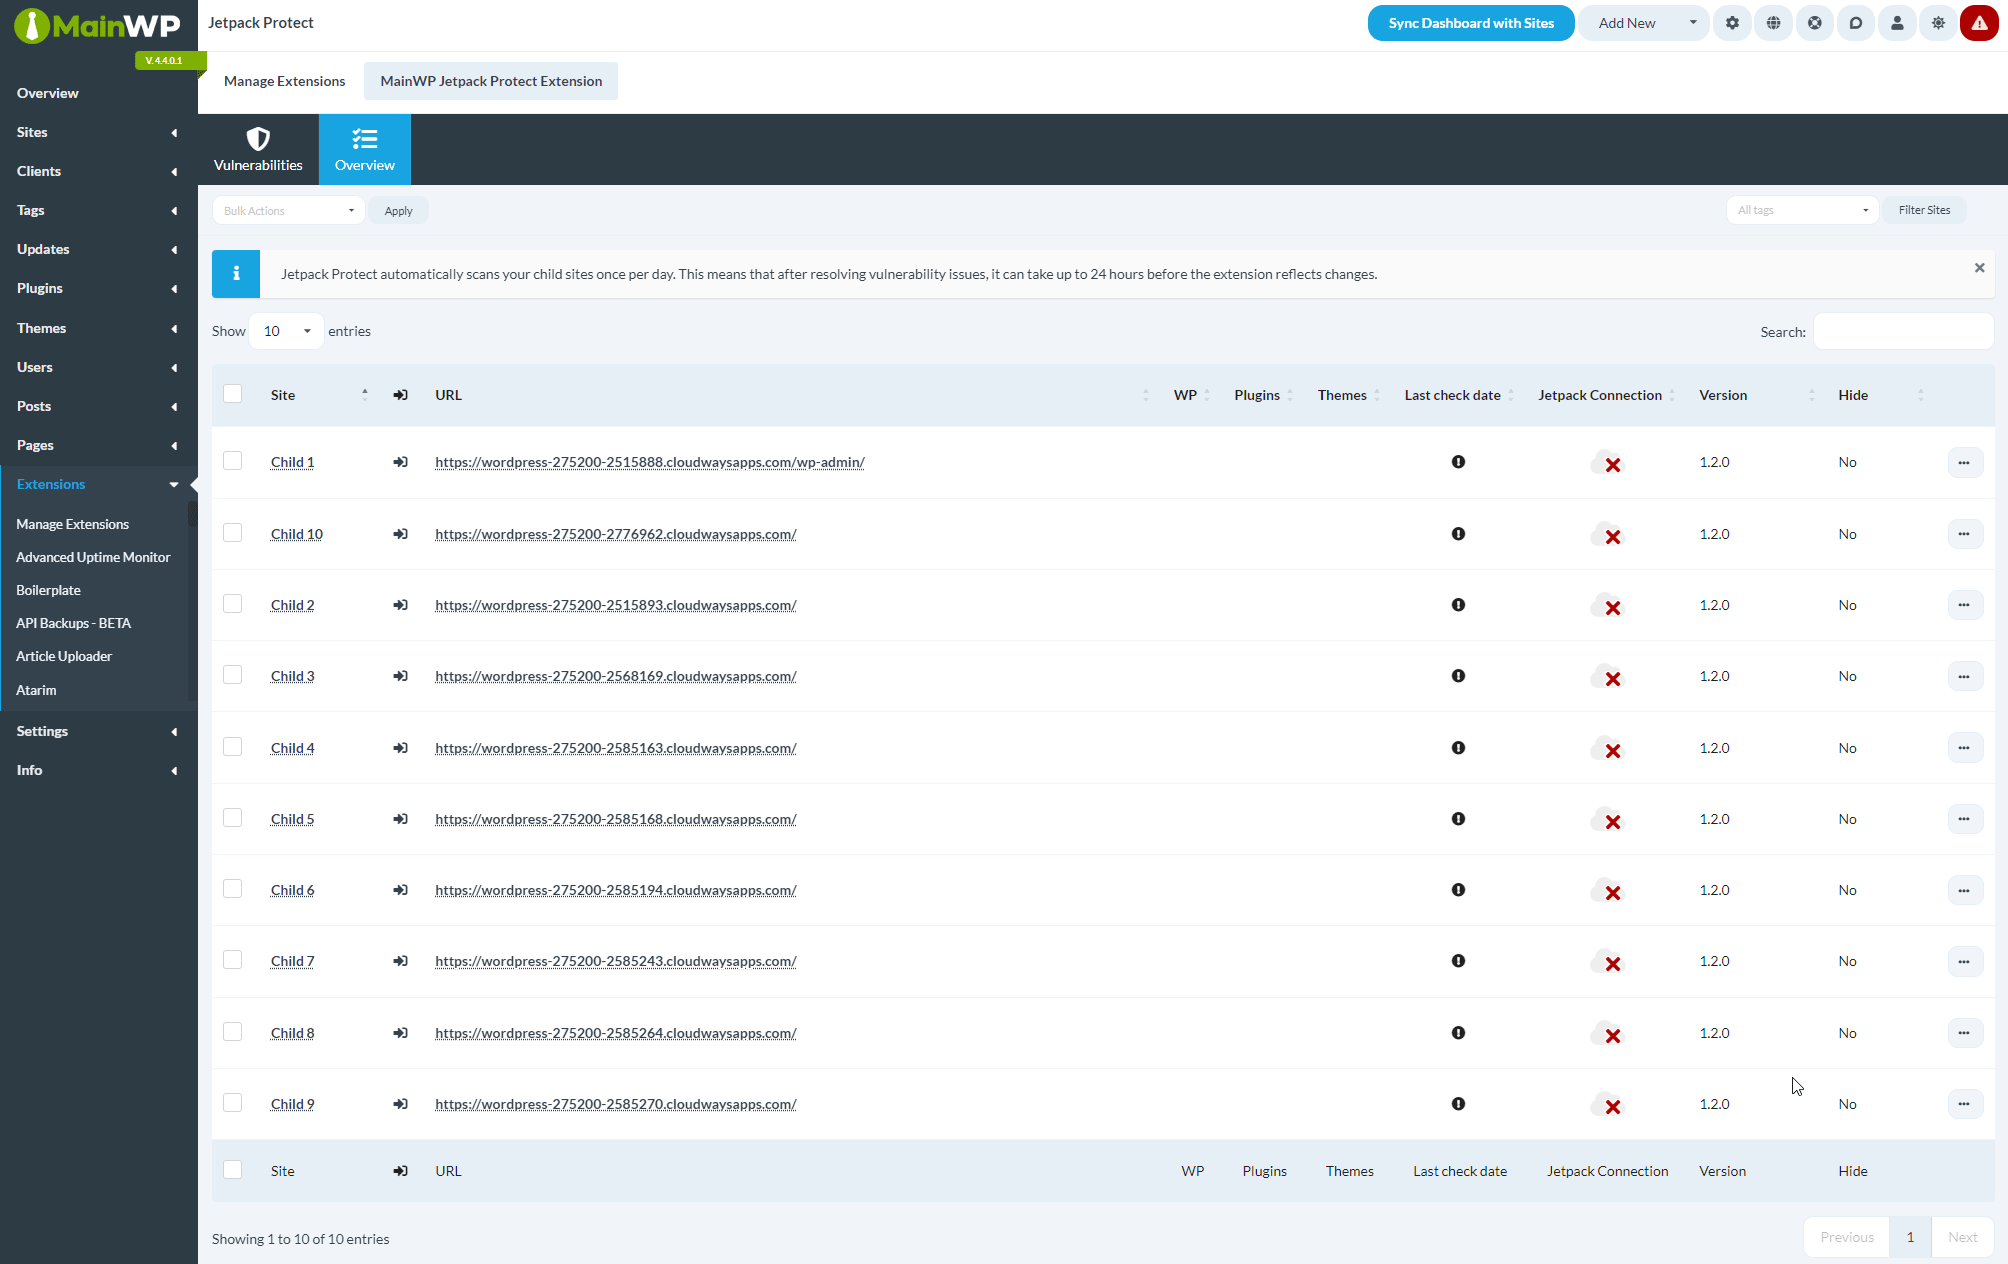
Navigate to MainWP Dashboard > Add-ons > Security > Jetpack Protect.NOTE: If you don’t immediately see all Child Sites on which you’ve installed Jetpack Protect plugin, please Synchronize all sites.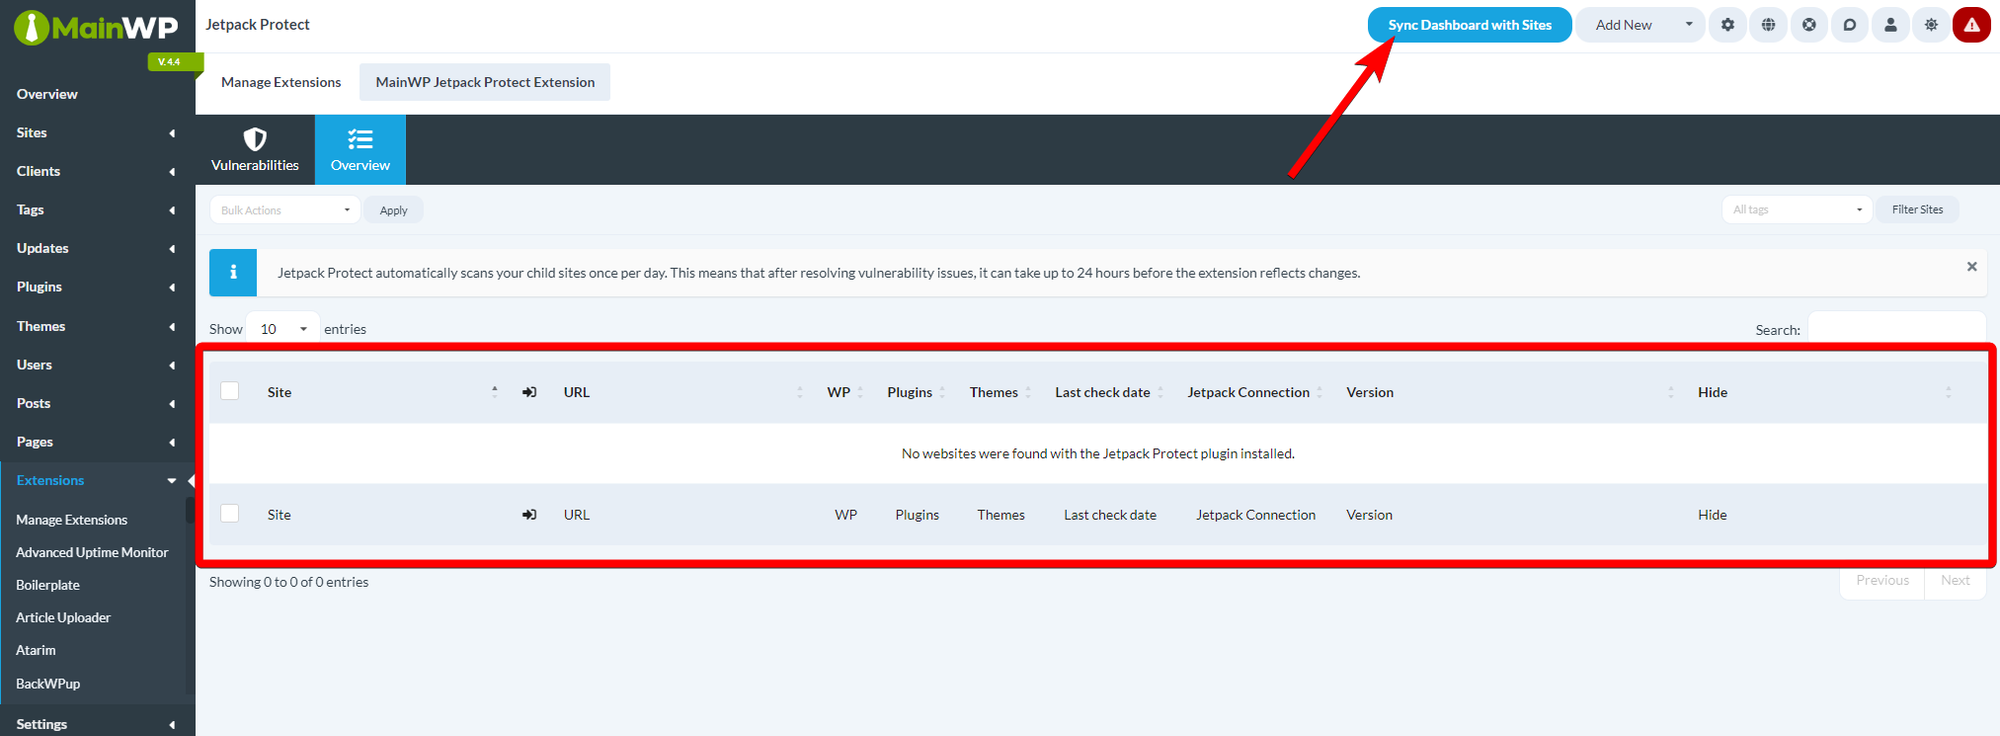
You should now see all sites in the table, with the red X icon in the Jetpack Connection column
You should now see all sites in the table, with the red X icon in the Jetpack Connection column
To connect the Jetpack extension to the Jetpack plugin
To connect the Jetpack extension to the Jetpack plugin
- Select all sites in the table
- From the Bulk actions menu, select Connect Jetpack
- Click Apply button
Related Resources
- Security Add-ons - Browse all security tools
- Jetpack Scan Extension - Premium malware scanning
- Vulnerability Checker Extension - Alternative vulnerability scanning