What You’ll Learn
- Installing the add-on and BackWPup plugin
- Creating global and per-site backup jobs
- Scheduling and triggering backups
- Managing backup files and settings
Integration Add-on - This add-on extends MainWP to work with BackWPup. Requires BackWPup to be installed on your child sites.
Installing the BackWPup add-on
The MainWP BackWPup add-on needs to be installed only on your MainWP Dashboard site. You can install it as any other MainWP add-on.Installing the BackWPup Plugin
For the proper use of the MainWP BackWPup Add-on, you need to install the BackWPup Plugin on your child sites. The plugin does not need to be installed on the MainWP Dashboard site.Install from MainWP Dashboard
After the search results appear, locate the Plugin, select the Install this Plugin option
After the search results appear, locate the Plugin, select the Install this Plugin option
In the Installation Options box, make sure that the Activate after installation option is selected
In the Installation Options box, make sure that the Activate after installation option is selected
Install directly on Child Site
Important Notes:
After installing the BackWPup Plugin, it is required to Synchronize your sites, so your MainWP Dashboard becomes aware that the Plugin has been installed and activated.
BackWPup Dashboard
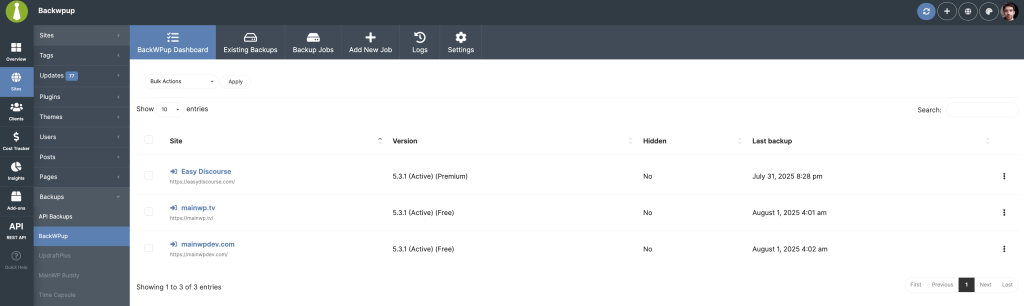
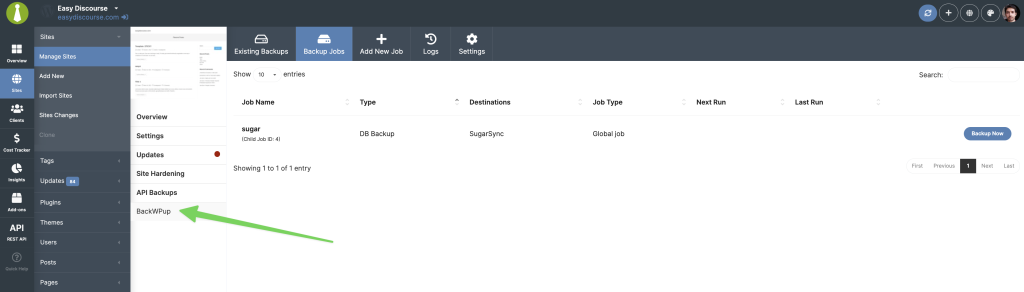
From the MainWP > Sites > Backups > BackWPup > BackWPup Dashboard page, you can monitor all of your child sites where you have the BackWPup plugin installed. In the sites list, you will be notified if the plugin has an update available (the row will be highlighted in yellow) or if the plugin is deactivated (highlighted in red).Available Actions
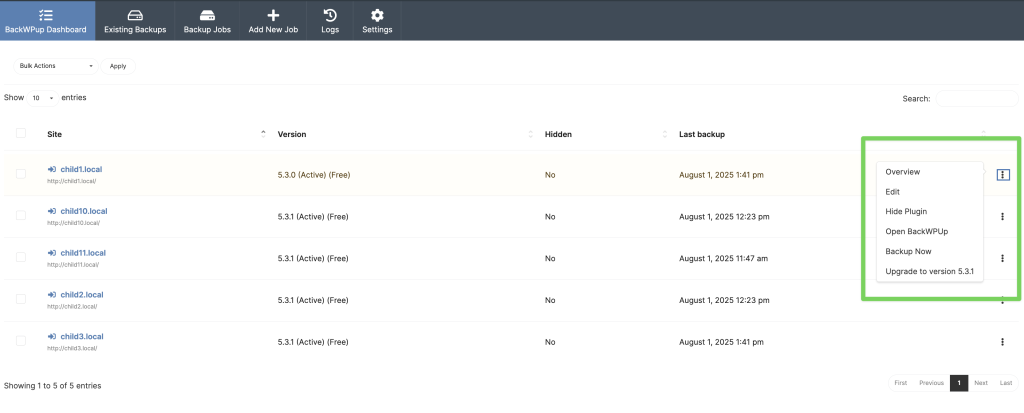
- Hide/Unhide the BackWPup plugin on the child site
- Open BackWPup plugin page on the Child Site
- Use the Backup Now action
- Update the plugin on the child site when an update is available
- Activate it if it is deactivated
Important Notes:
If you know that you have the BackWPup plugin installed on a child site, but the child site doesn’t appear in the list, try to re-sync your sites.Manage BackWPup Backups
The BackWPup Add-on allows you to manage the BackWPup plugin backups directly from your MainWP Dashboard. This includes:- Creating new backup jobs
- Edit created backup jobs
- Triggering backup jobs
- Deleting backup jobs
- Downloading existing backups
- Deleting existing backups
Create a BackWPup Job
Create a Global Job
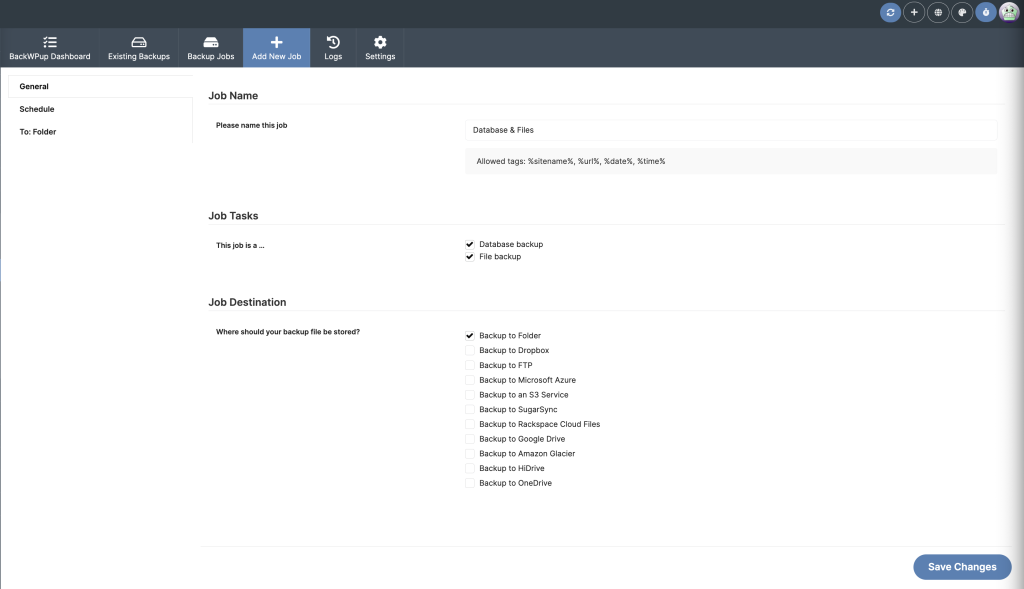
- Go to the MainWP > Sites > Backups > BackWPup > Add New Job page
- In the Job Name option box, Enter a Name for the Backup Job
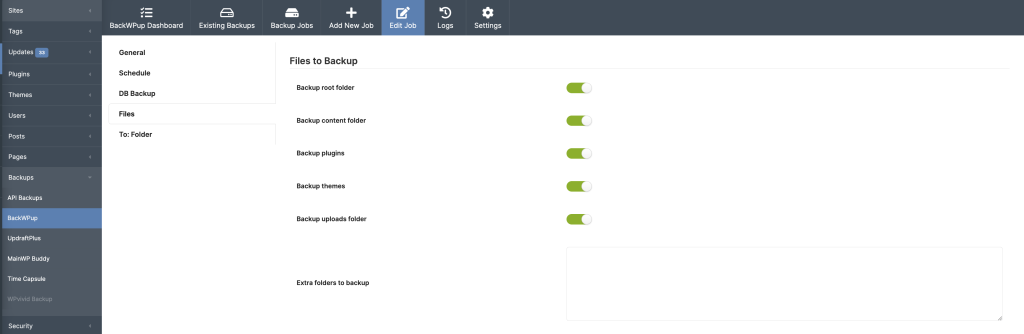
- In the Job Tasks option box, set tasks that you want to include in this Job: Database and/or Files
- Select the Desired Job Destinations
-
Next, select the Schedule in the sidebar on the left to configure the Scheduled execution time\
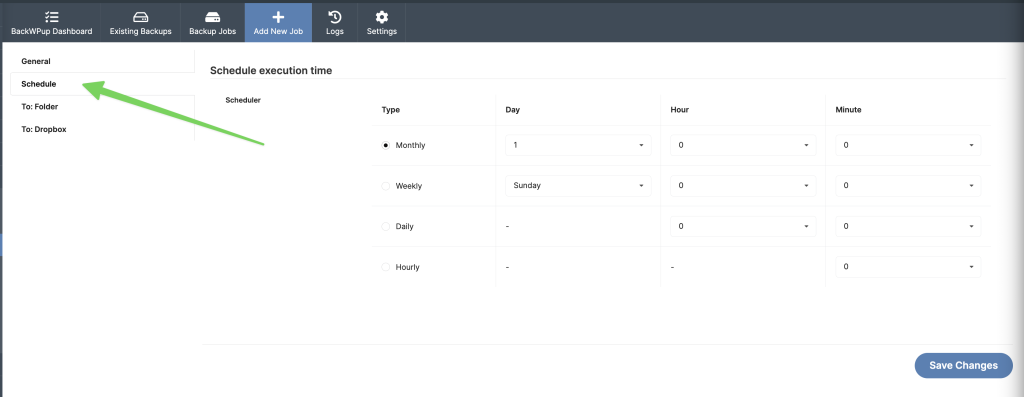
-
Next, select the enabled Remote Storage options on the left to configure them\
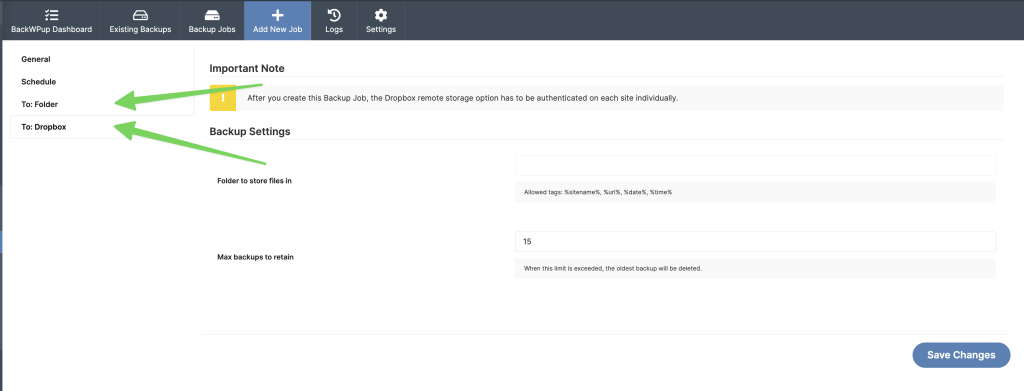
- Finally, click Save Changes
Create a Backup Job on a Single Site
Job Additional Settings
Edit a BackWPup Job

Edit Global Job
Edit Job on a Single Site
Trigger BackWPup Job

Trigger Global Schedule
Trigger Schedule on a Single Site
Delete BackWPup Job

Delete Global Job
Delete Job on a Single Site
Manage BackWPup Backup Files
Download Backup Files
In the top right of the page, select the desired child site from the dropdown, and click Apply
In the top right of the page, select the desired child site from the dropdown, and click Apply
Delete Backup Files
In the top right of the page, select the desired child site from the dropdown, and click Apply
In the top right of the page, select the desired child site from the dropdown, and click Apply
Manage BackWPup Settings
The MainWP BackWPup add-on allows you to manage the BackWPup plugin settings from your dashboard. If you are using the paid version of the BackWPup plugin on your child sites, go to the MainWP > Sites > Backups > BackWPup > Settings page, enable the Use premium version toggle, and click Save. This reveals the License and Encryption tabs that are available only when premium settings are enabled.Manage BackWPup Global Settings
Manage BackWPup Settings on a Single Site
Set the Overwrite General Settings option to YES and click the Save Changes button
Set the Overwrite General Settings option to YES and click the Save Changes button
Related Resources
- Backup Add-ons - Browse all backup integrations
- Manage Backups - Understanding backup management in MainWP
- Managing Plugins with MainWP - Installing plugins on child sites