What You’ll Learn
- Installing Solid Security (iThemes Security) on child sites
- Managing security settings globally and per-site
- Monitoring active lockouts and security status
- Enabling WP Cron tracking for Pro Reports
Integration Add-on - This add-on extends MainWP to work with Solid Security (formerly iThemes Security). Requires Solid Security to be installed on your child sites.
- Update, Activate and Deactivate the iThemes Security plugin from your MainWP Dashboard
- Mass configure your Ithemes Security settings across your network or customize them on individual child sites
- Manage iThemes Security plugin features from your MainWP Dashboard, such as
- Global Settings
- 404 Detection
- Away Mode
- Banned Users
- Brute Force Protection
- Database Backups
- File Change Detection
- Hide Login Area
- Secure Socket Layers
- Strong Passwords
- System Tweaks
- WordPress Tweaks
- Monitor iThemes Security Status
- Monitor iThemes Active Lockouts
iTheme Security Extension Widgets
The Extension also adds two widgets to each site’s overview page, allowing you to check security status.- Active Lockouts - This widget will show you all active lockouts. Also, it enables you to release lockouts directly from the widget.
- iThemes Security Status - This widget shows all security issues grouped by priority level. Next to each detects security issue, you can find the Fix Now button, which will take you to the correct option in the individual child site edit screen. If you want to fix the issue for only that child site, don’t forget to set Overwrite Generals Settings to YES and click the Save button.
Install and Set MainWP iThemes Security Extension
Installation of the MainWP iThemes Security Extension requires two important steps:- Installing the Extension itself on your MainWP Dashboard site
- Installing the iThemes Security Plugin on Child Sites
Installing the Extension
The MainWP iThemes Security Extension needs to be installed only on your MainWP Dashboard site. You can install it as any other MainWP Extension.Installing the Plugin
For the proper use of the MainWP iThemes Security Extension, you need to install the iThemes Security Plugin on your child sites.Install from MainWP Dashboard
Select your child sites
Select your child sites
In the Installation Options box, make sure that the Activate after installation option is selected
In the Installation Options box, make sure that the Activate after installation option is selected
Install directly on Child Site
For additional help with installing WordPress plugins, please review this help document. After installing the iThemes Security Plugin, it is required to Synchronize your sites so your MainWP Dashboard becomes aware that the plugin has been installed and activated.
Manage iThemes Security Settings
 The MainWP iThemes Security Extension allows you to manage iThemes Security plugin settings. It provides you the ability to manage the following settings:
- Global Settings
- File Changes
- SSL
- Notification Center
- Admin User
- Change Database Table Prefix
- Ban Users
- Database Backups
- Local Brute Force
- Network Brute Force
- Two-Factor
- System Tweaks
- WordPress Tweaks
- Hide Backend
- Security Check PRo
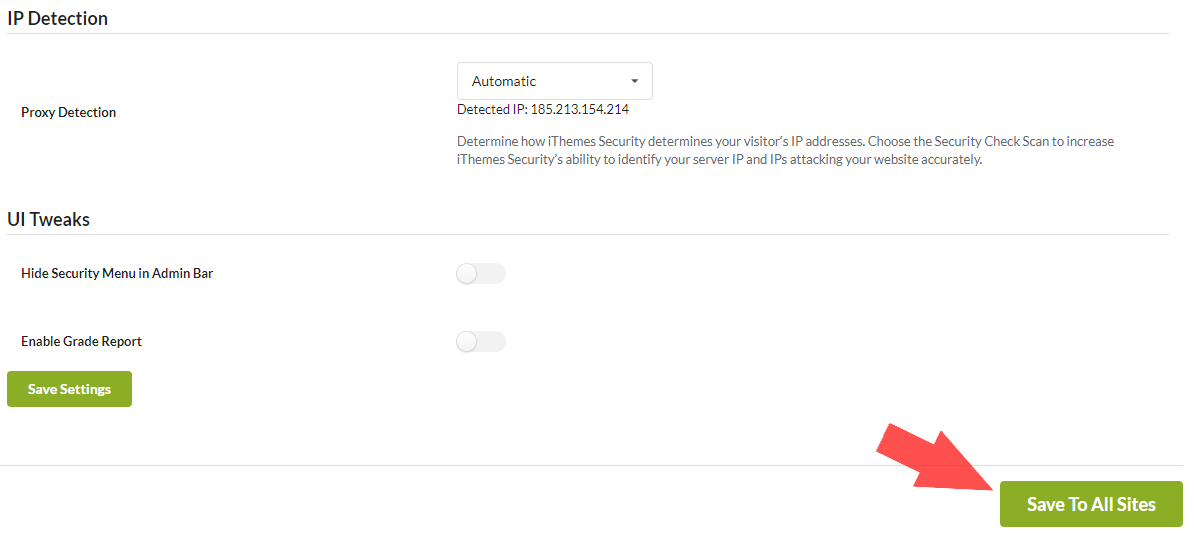
Update iThemes Security Settings on All Your Sites
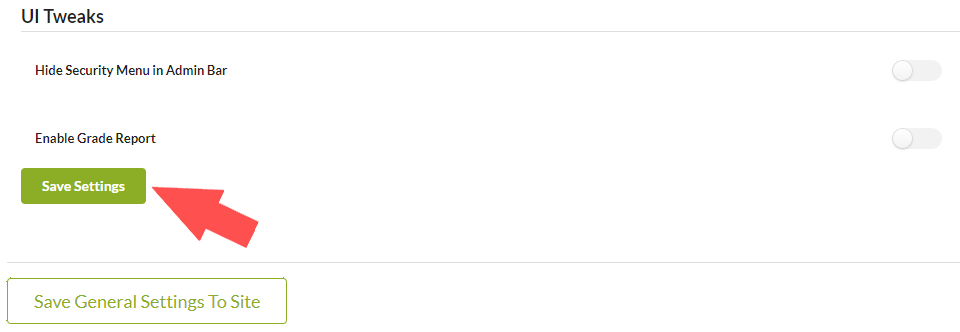
Update iThemes Security Settings on a Single Site
Locate the site where you want to update settings and open the Individual Child site overview
Locate the site where you want to update settings and open the Individual Child site overview
Set the Overwrite General Settings option to YES and click the Save Settings button at the bottom of the page
Set the Overwrite General Settings option to YES and click the Save Settings button at the bottom of the page
iThemes Security Dashboard
From the MainWP > Add-ons > iThemes Security > Overview page, you can monitor all of your child sites where you have the iThemes Security plugin installed. In the sites list, you will be notified if the plugin has an update available or if the plugin is deactivated.- In case the plugin is not activated, the Activate action will appear in the corresponding site row
- In case there is a new version of the plugin, the Update action will appear in the corresponding site row
Available Actions
From the MainWP > Add-ons > iThemes Security > Overview page**,** you can hide/unhide the iThemes Security plugin on your child sites, and quickly access the plugin settings on a child site or the WP Admin section. Actions are provided in the actions menu. If you know that you have the plugin installed on a child site, but the child site doesn’t appear in the list, try to re-sync your sites.Scheduled scans are not showing up in Pro Reports
For the scheduled scans to show in Pro Reports, WP Cron Tracking must be enabled in the MainWP Child plugin settings.
Related Resources
- Security Add-ons - Browse all security tools
- Wordfence Extension - Alternative security integration
- Pro Reports Extension - Create client reports