
What You’ll Learn
- Checking domain expiration dates across all sites
- Reading expiration status in the dashboard and Overview widgets
- Entering domain info manually for unsupported TLDs
- Scheduling automated domain checks
- Overriding general settings for individual sites
- Using Pro Reports tokens for domain data
Supported TLDs
TLD lookup support
Domain Monitor attempts lookups through RDAP first. If RDAP does not return usable domain data, the add-on falls back to its built-in WHOIS server map for TLDs with a configured WHOIS server. For current TLD lookup references, use these maintained external sources:- IANA RDAP DNS bootstrap data - Current RDAP service coverage by TLD.
- IANA Root Zone Database - Current TLD registry records, including WHOIS server details where available.
Install and Set Domain Monitor Extension
Go to your MainWP Dashboard
Go to Add-ons > Manage Add-ons
Click the Install Add-ons button
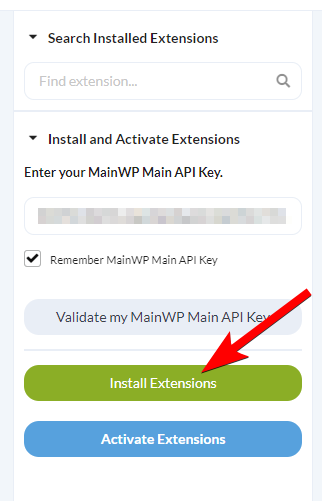
Locate the Domain Monitor Extension and select it
Click the Install button
Once the installation process is complete, click the Activate Add-ons button
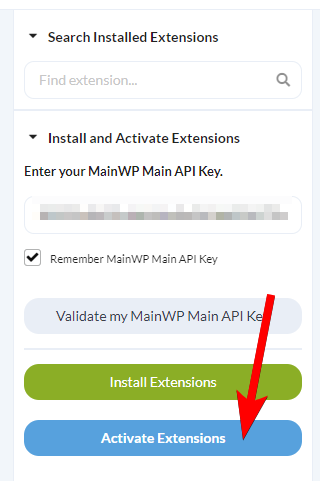
After successful installation, proceed to the add-on settings
Set your preferences, Save Settings, and you are ready to audit your sites.
Check Domains
Go to Add-ons > Monitoring > Domain Monitor > Dashboard
Locate the Check All Sites Domains button

Click it, and wait until the add-on completes the process.
Unscanned Sites
Sites that have not been checked yet are highlighted in the Domain Monitor dashboard so you can spot them at a glance:- The row is shaded yellow.
- The Expires column shows a Not checked button instead of remaining days. Click it to run a check for that site.
- Domain fields with no data display N/A.
- The Domain Info action is disabled until the first successful check completes.
Expiration Status
Domain Monitor uses hourglass icons and short status messages to show how close each domain is to expiration:- Green hourglass - The domain expires in 30 or more days.
- Yellow hourglass - The domain expires in fewer than 30 days.
- Red hourglass - The domain expires today or has already expired.
- Grey hourglass - No expiration data is available for the domain.
Overview Widgets
Domain Monitor adds widgets to your MainWP Dashboard Overview pages:- The main Overview page widget lists all monitored domains with their expiration dates and status icons.
- The individual site Overview page widget shows the site’s domain, its expiration status, and the saved domain profile. If no domain data is saved yet, the widget prompts you to recheck the domain or add the data manually.
Enter Domain Info Manually
If your domain is not on the list of supported TLDs, you can add information manually by following the steps below.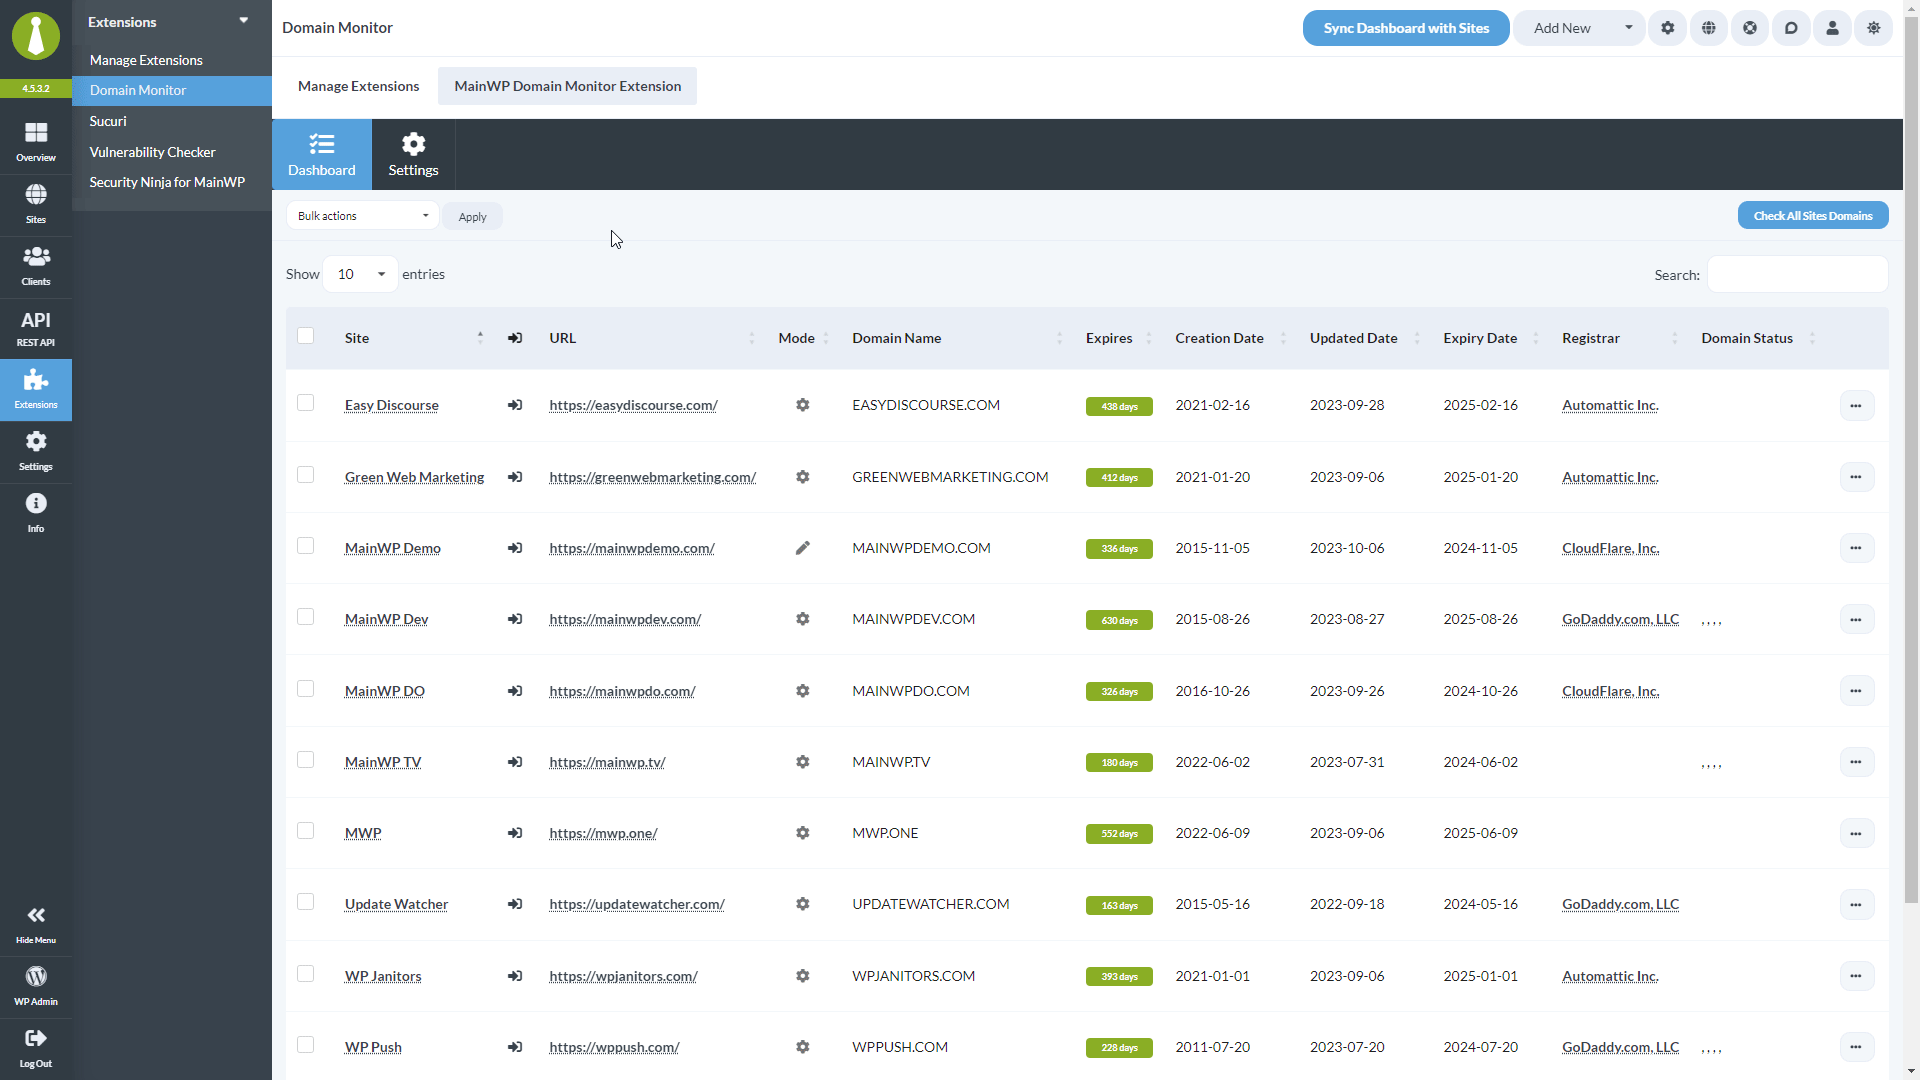
Go to Add-ons > Monitoring > Domain Monitor > Dashboard
Choose Domain Info from the site's Actions menu
Open the Settings tab
Toggle on the Manual Domain information entry option and click Save Settings
Open the Edit Domain Info tab
Enter or change the desired information, and click Save Settings
See Domain Info
Go to Add-ons > Monitoring > Domain Monitor > Dashboard
Locate the site or domain and choose Domain Info from the Actions menu
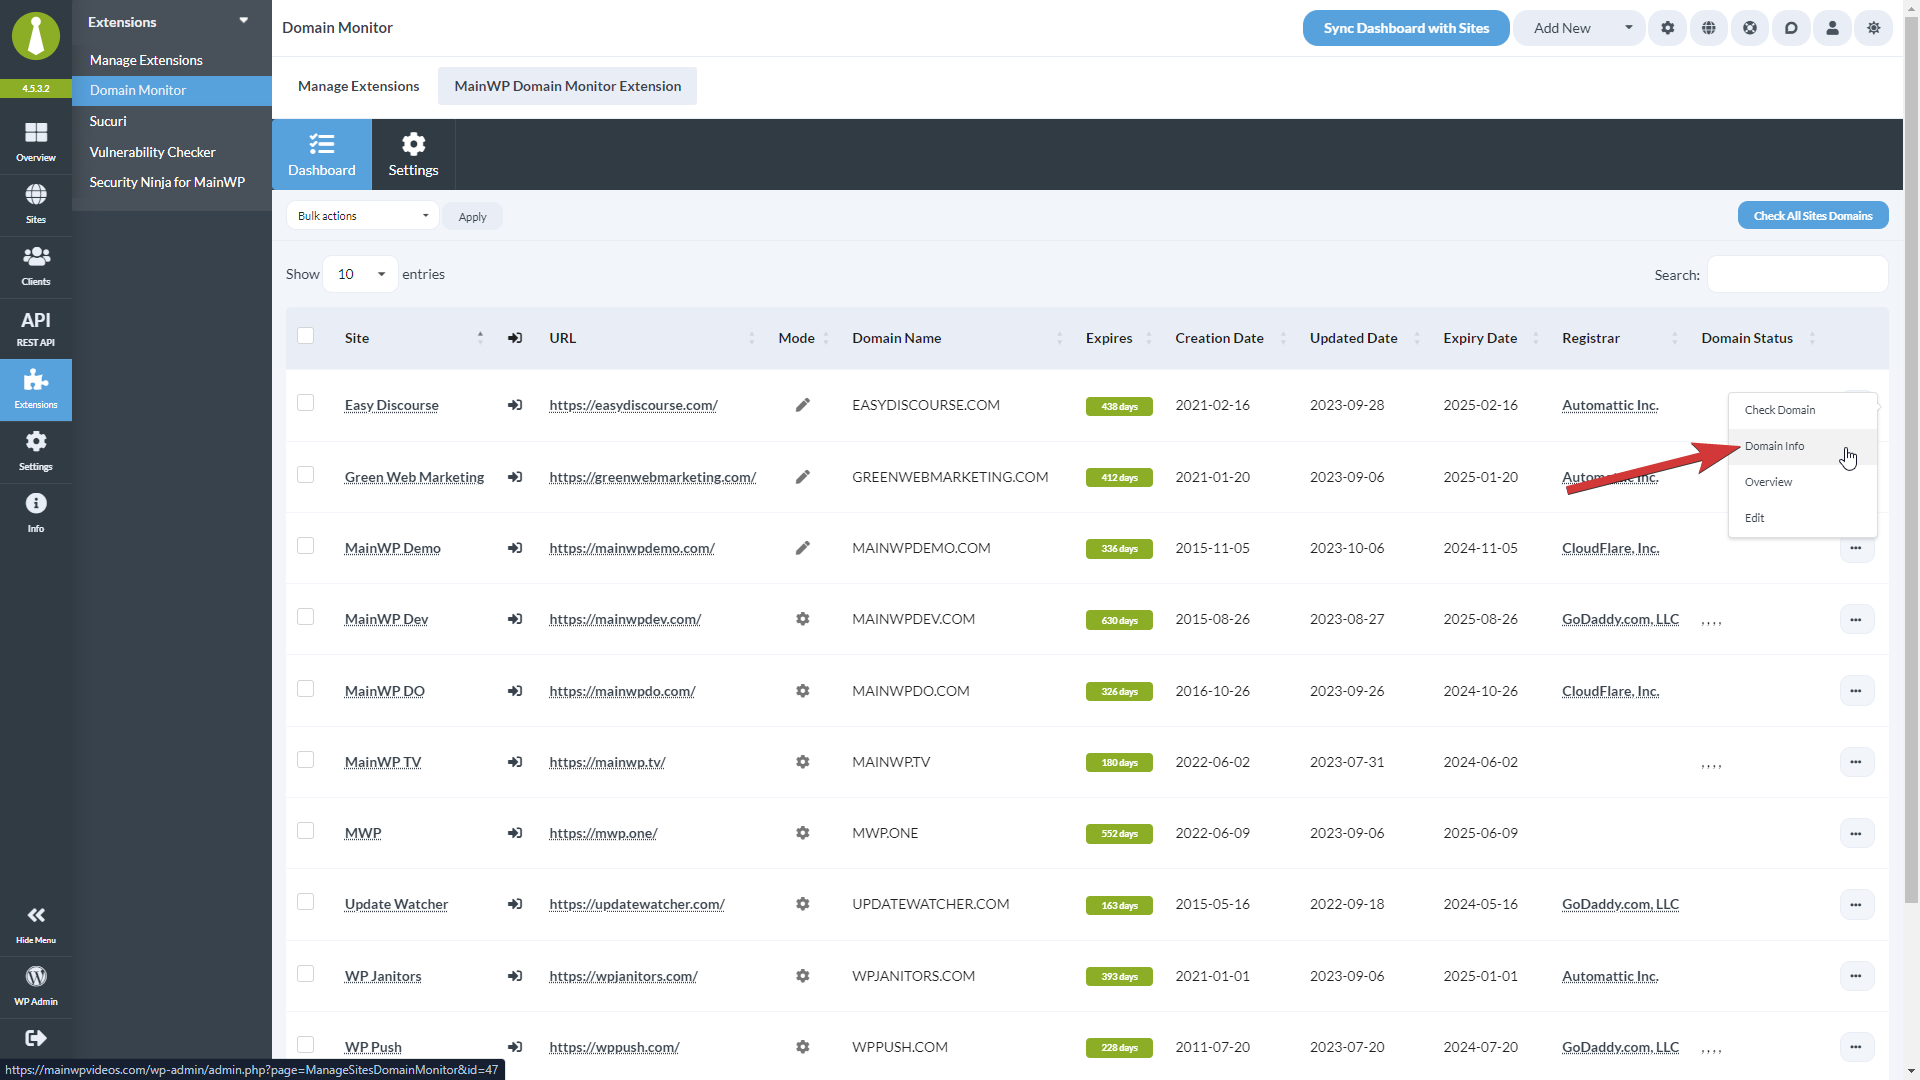
Once redirected to the report page, you can review all details
Schedule Automated Checks
Go to Add-ons > Monitoring > Domain Monitor > Settings
Locate the Automatically check domains option and enable it
Locate the Automated domain checks frequency option and set how often you want checks to run
Click Save Settings
Domain Monitor Settings
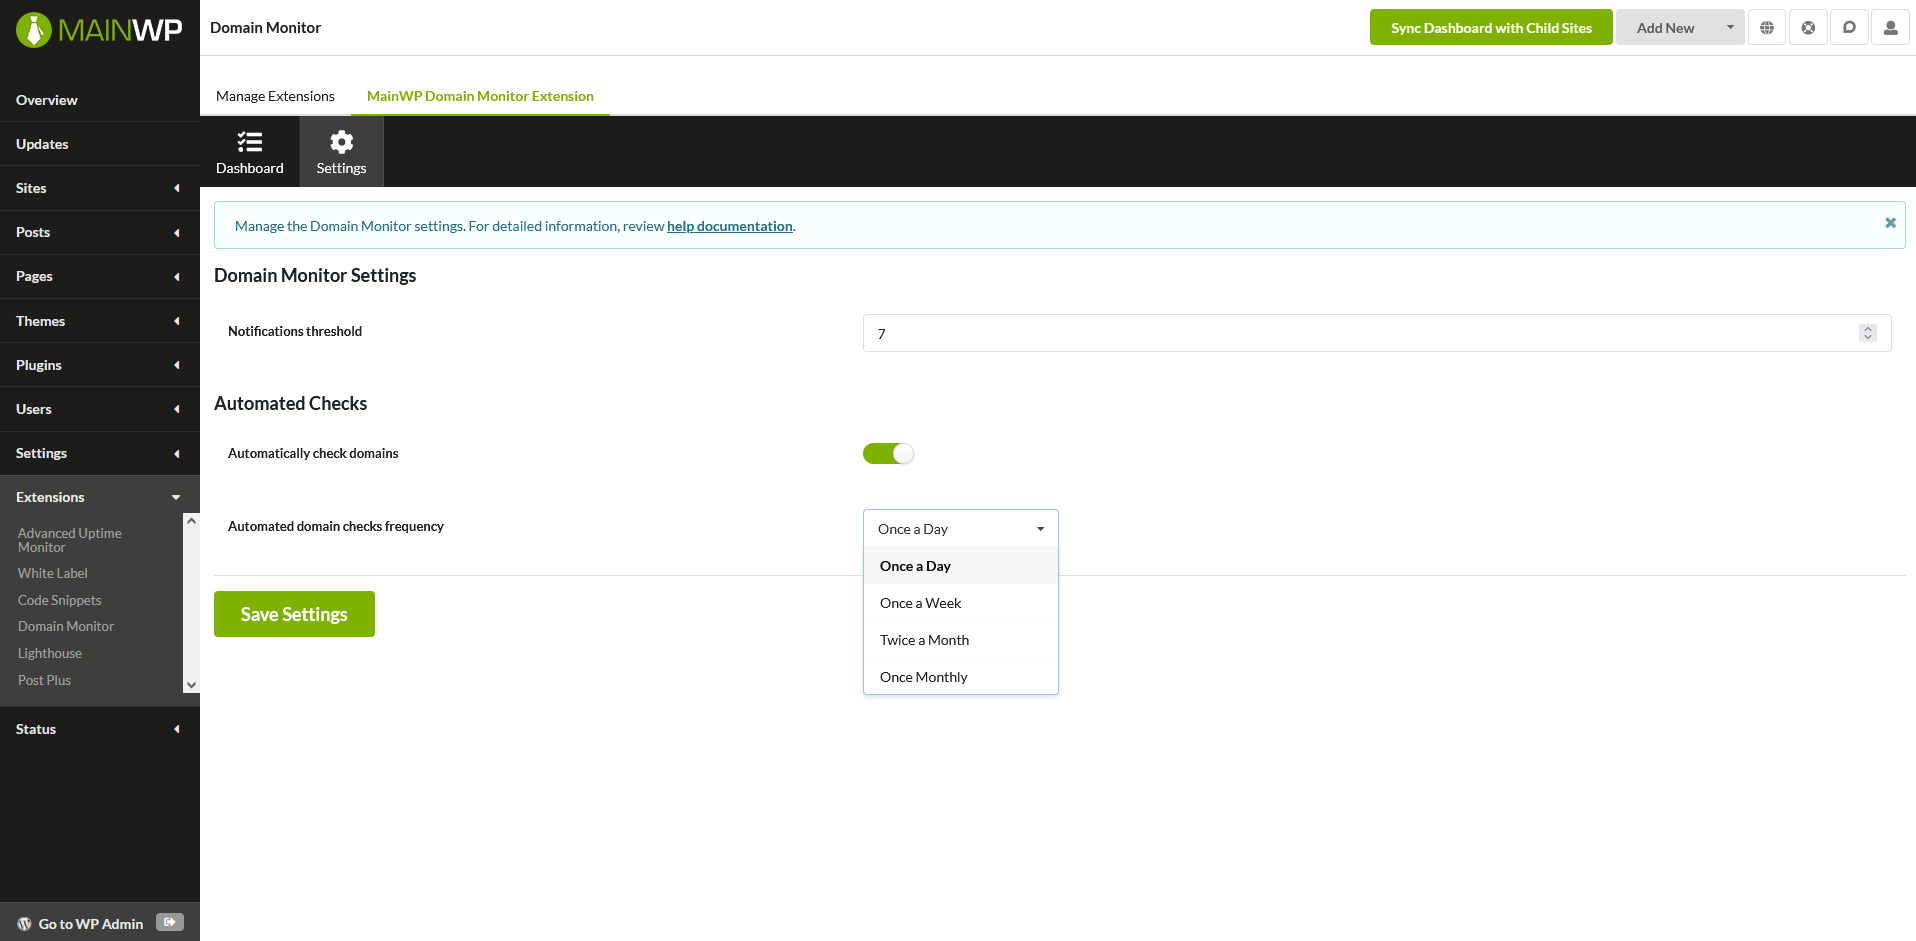
- Notifications threshold - Set the threshold for notifications. If the domain expiration is less in the set number of days, an email will be sent.
- Automatically check domains - If you want the add-on to automatically run checks, enable this feature.
- Automated domain checks frequency - If automated checks are enabled, here you can set how often you want them to run.
Individual Site Settings
You can override the general settings for a specific child site:Go to Add-ons > Monitoring > Domain Monitor > Dashboard
Choose Domain Info from the site's Actions menu
Open the Settings tab
Enable the Overwrite general settings option
Set your preferences and click Save Settings
Check Sites via WP CLI
Check one or more sites:Domain Monitor REST API
MainWP REST API calls, including Domain Monitor endpoints, full documentation, and examples, are available in the MainWP Postman workspace. Refer to our REST API documentation for more details on enabling REST API and managing API keys.Available Reports Tokens
[domain.monitor.domain.name]- Displays the domain name.[domain.monitor.registrar]- Displays the domain registrar.[domain.monitor.updated.date]- Displays the domain updated date.[domain.monitor.creation.date]- Displays the domain creation date.[domain.monitor.expiry.date]- Displays the domain expiry date.[domain.monitor.expires]- Displays the number of days left before the domain expires.[domain.monitor.status]- Displays the domain status.[domain.monitor.last.check]- Displays the last check timestamp.
Related Resources
- Monitoring Add-ons - Browse all monitoring tools
- SSL Monitor - Monitor SSL certificates
- Pro Reports Extension - Include domain data in reports