
What You’ll Learn
- Understanding matching CPTs between Dashboard and child sites
- Registering custom post types on your Dashboard
- Creating and managing CPT posts remotely
- Bulk editing custom post type content
What is Matching CPT?
There are three required arguments for each CPT:- CPT Slug
- CPT Plural Label
- CPT Singular Label
WooCommerce Products
If you want to use this extension to publish WooCommerce Products to your child site(s), it is enough to install the WooCommerce plugin on your dashboard site. The extension will automatically create support for Products.Important Notes
MainWP Custom Post Types extension DOES NOT register CPTs on your child sites. It only allows you to manage existing CPTs. To properly use it, you need to have the same CPT on your MainWP Dashboard and child site(s). It doesn’t matter if a CPT on your child sites has been created by a plugin, registered with a snippet in the functions.php, or added by your WordPress theme; this extension will be able to manage it as long as you can create the Matching CPT on your MainWP Dashboard site.Register Custom Post Types on Your MainWP Dashboard Site
To do this, you have two options:Create a code snippet and add it to the functions.php
Use a third-party plugin to register CPTs on your MainWP Dashboard site
Create a New CPT Post
Log in to your MainWP Dashboard
Go to MainWP Dashboard > Add-ons > Administrative > Custom Post Type
In the Custom Post Types box, you will be able to see all registered CPTs on your MainWP Dashboard
Locate the one you want to publish to your Child Site(s)
Click the Add New button
You will be sent to the Add New screen
Enter the CPT post title, content, and metadata
Select your Child Sites where you want to publish
Click the Publish button
Manage Custom Post Types
The Custom Post Types extension allows you to manage custom post type content on your websites. It will allow you to create new CPT posts on your managed sites remotely, edit, change the status for existing CPT posts, move them to Trash, or delete trashed posts. On the MainWP Dashboard > Sites > Content Operations > Manage Posts page, you can find existing CPT posts and manage them without logging into each child site separately.Log in to your MainWP Dashboard
Go to MainWP Dashboard > Sites > Content Operations > Manage Posts
In the Search Options, set your search preference
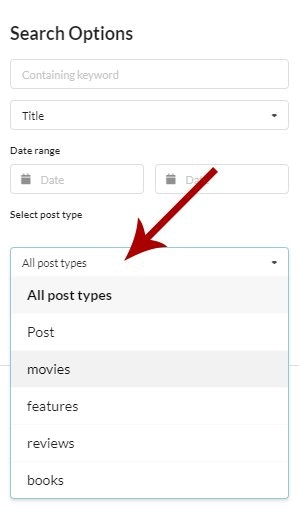
- The keyword field will allow you to find CPT posts where an entered word has been used.
- Date Range will narrow down the search to posts that have been published in the selected date range.
- Select post type will allow you to target a specific post type
Select wanted Child Sites
Click the Show Posts button
Edit a CPT Post
Log in to your MainWP Dashboard
Go to MainWP Dashboard > Sites > Content Operations > Manage Posts
In the Search Options, set your search preferences
Select wanted Child Sites
Click the Show Posts button
Once the list of found posts appears, locate the CPT Post you want to edit
Click the Edit action in the actions menu.
View a CPT Post
Log in to your MainWP Dashboard
Go to MainWP Dashboard > Sites > Content Operations > Manage Posts
In the Search Options, set your search preferences
Select wanted Child Sites
Click the Show Posts button
Once the list of found posts appears, locate the CPT Post you want to view
Click the View action in the actions menu
Delete a CPT Post
Move CPT Post(s) to Trash
Log in to your MainWP Dashboard
Go to MainWP Dashboard > Sites > Content Operations > Manage Posts
In the Search Options, set your search preferences
Select wanted Child Sites
Click the Show Posts button
Once the list of found posts appears, locate the CPT Post you want to move to Trash
Click the Trash action in the actions menu
Delete Permanently
Since WordPress allows you to permanently delete only posts that are currently in Trash, before you can permanently delete them, you need to send them to Trash. Once they are in Trash, the Delete action will be available.Bulk Edit CPT posts
Log in to your MainWP Dashboard
Go to the desired custom post type list
Locate the post and click Edit
Make the appropriate changes and select wanted Child Sites
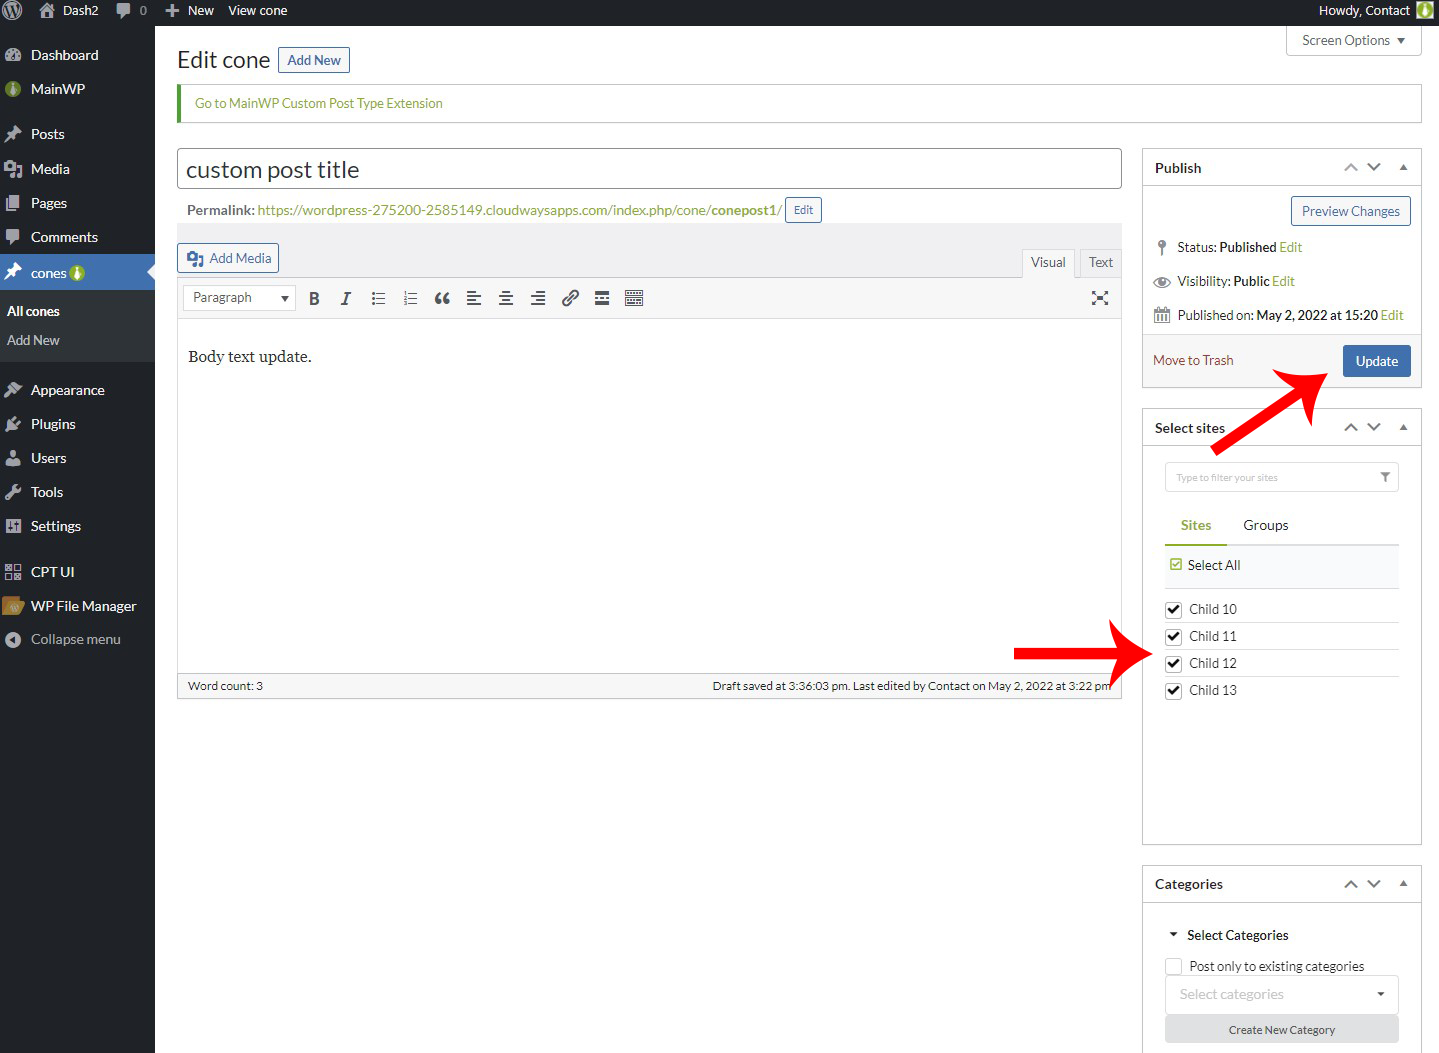
Click the Update button
Related Resources
- Posts/Pages Add-ons - Browse all content tools
- Manage Posts - Post management guide
- WooCommerce Status Extension - WooCommerce integration