What You’ll Learn
- White labeling the MainWP Child plugin
- Hiding the plugin from clients
- Managing available white label controls
- Adding branded support forms
- Resetting white label settings
Extension Add-on - This add-on provides standalone functionality within MainWP Dashboard. No third-party plugins required.
The MainWP White Label Extension lets you rebrand the MainWP Child plugin on client sites. You can replace the plugin name and author information with your own branding, hide the plugin entirely from the plugins list, restrict client access to certain WordPress features, and add a branded support contact form.
White Label no longer includes child-site plugin and update hiding controls (for example, hiding Plugins/update pages or disabling update checks) due to WordPress.org compliance requirements. See Removed hiding options.
Features Overview
| Feature | Description |
|---|---|
| White Label | Replace plugin name, description, author, and URIs with your own branding |
| Hide Plugin | Make the MainWP Child plugin invisible in the client’s plugins list |
| Remove & Disable | Restrict access to selected WordPress and MainWP Child admin areas |
| WordPress Options | Customize login images, favicons, dashboard widgets, footer text, and admin CSS |
| Support Form | Add a branded contact form to child site admin areas |
White Label the MainWP Child Plugin
Rebrand how the MainWP Child plugin appears in the WordPress plugins list. The same White Label tab and MainWP Child White Label Settings section also includes the option to visually hide the plugin, so you can configure the branding fields, the hide option, or both at the same time.- All Sites (Global)
- Single Site
Navigate to White Label settings
Go to MainWP > Add-ons > White Label and select the White Label tab.
Configure the MainWP Child white label settings
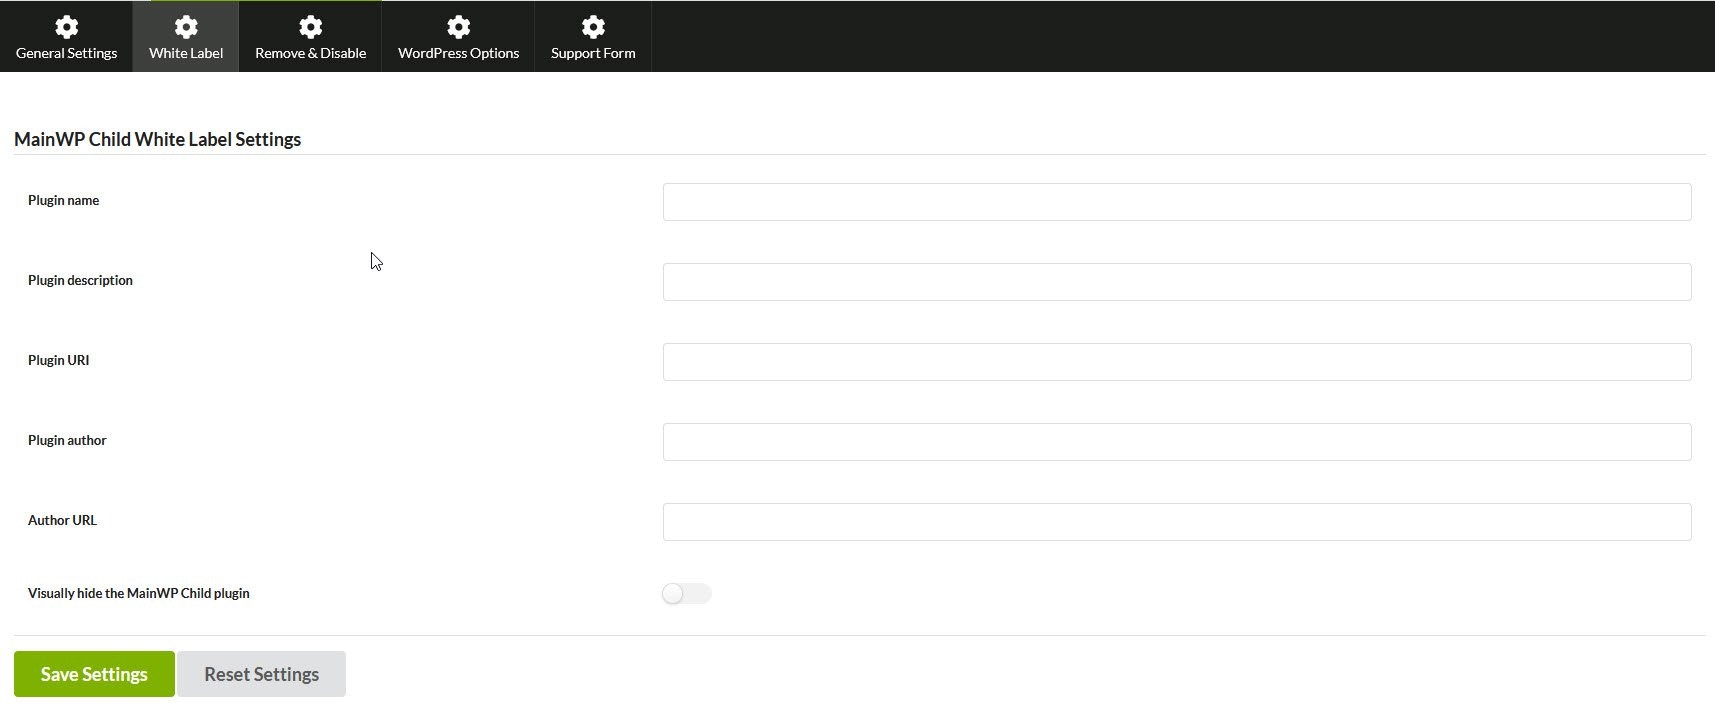
| Field | Description |
|---|---|
| Visually hide the MainWP Child plugin | Hide the plugin from the WordPress plugins list |
| Plugin name | Your custom plugin name |
| Plugin description | Your custom description |
| Plugin URI | Link to your website or plugin page |
| Plugin author | Your name or company name |
| Author URI | Link to your author page |

Leave fields empty (except Plugin name) to hide that information rather than display the original. Hiding the plugin does not disable the other branding fields, so if you use reporting or other areas that still surface the child plugin details, set the branding fields as well so those views use your custom plugin information instead of the default MainWP Child details. To remove white labeling entirely, delete the Plugin name and save.
Remove & Disable Functions
Restrict client access to WordPress features and MainWP Child settings.- All Sites (Global)
- Single Site
Go to MainWP > Add-ons > White Label and select the Remove & Disable Options tab.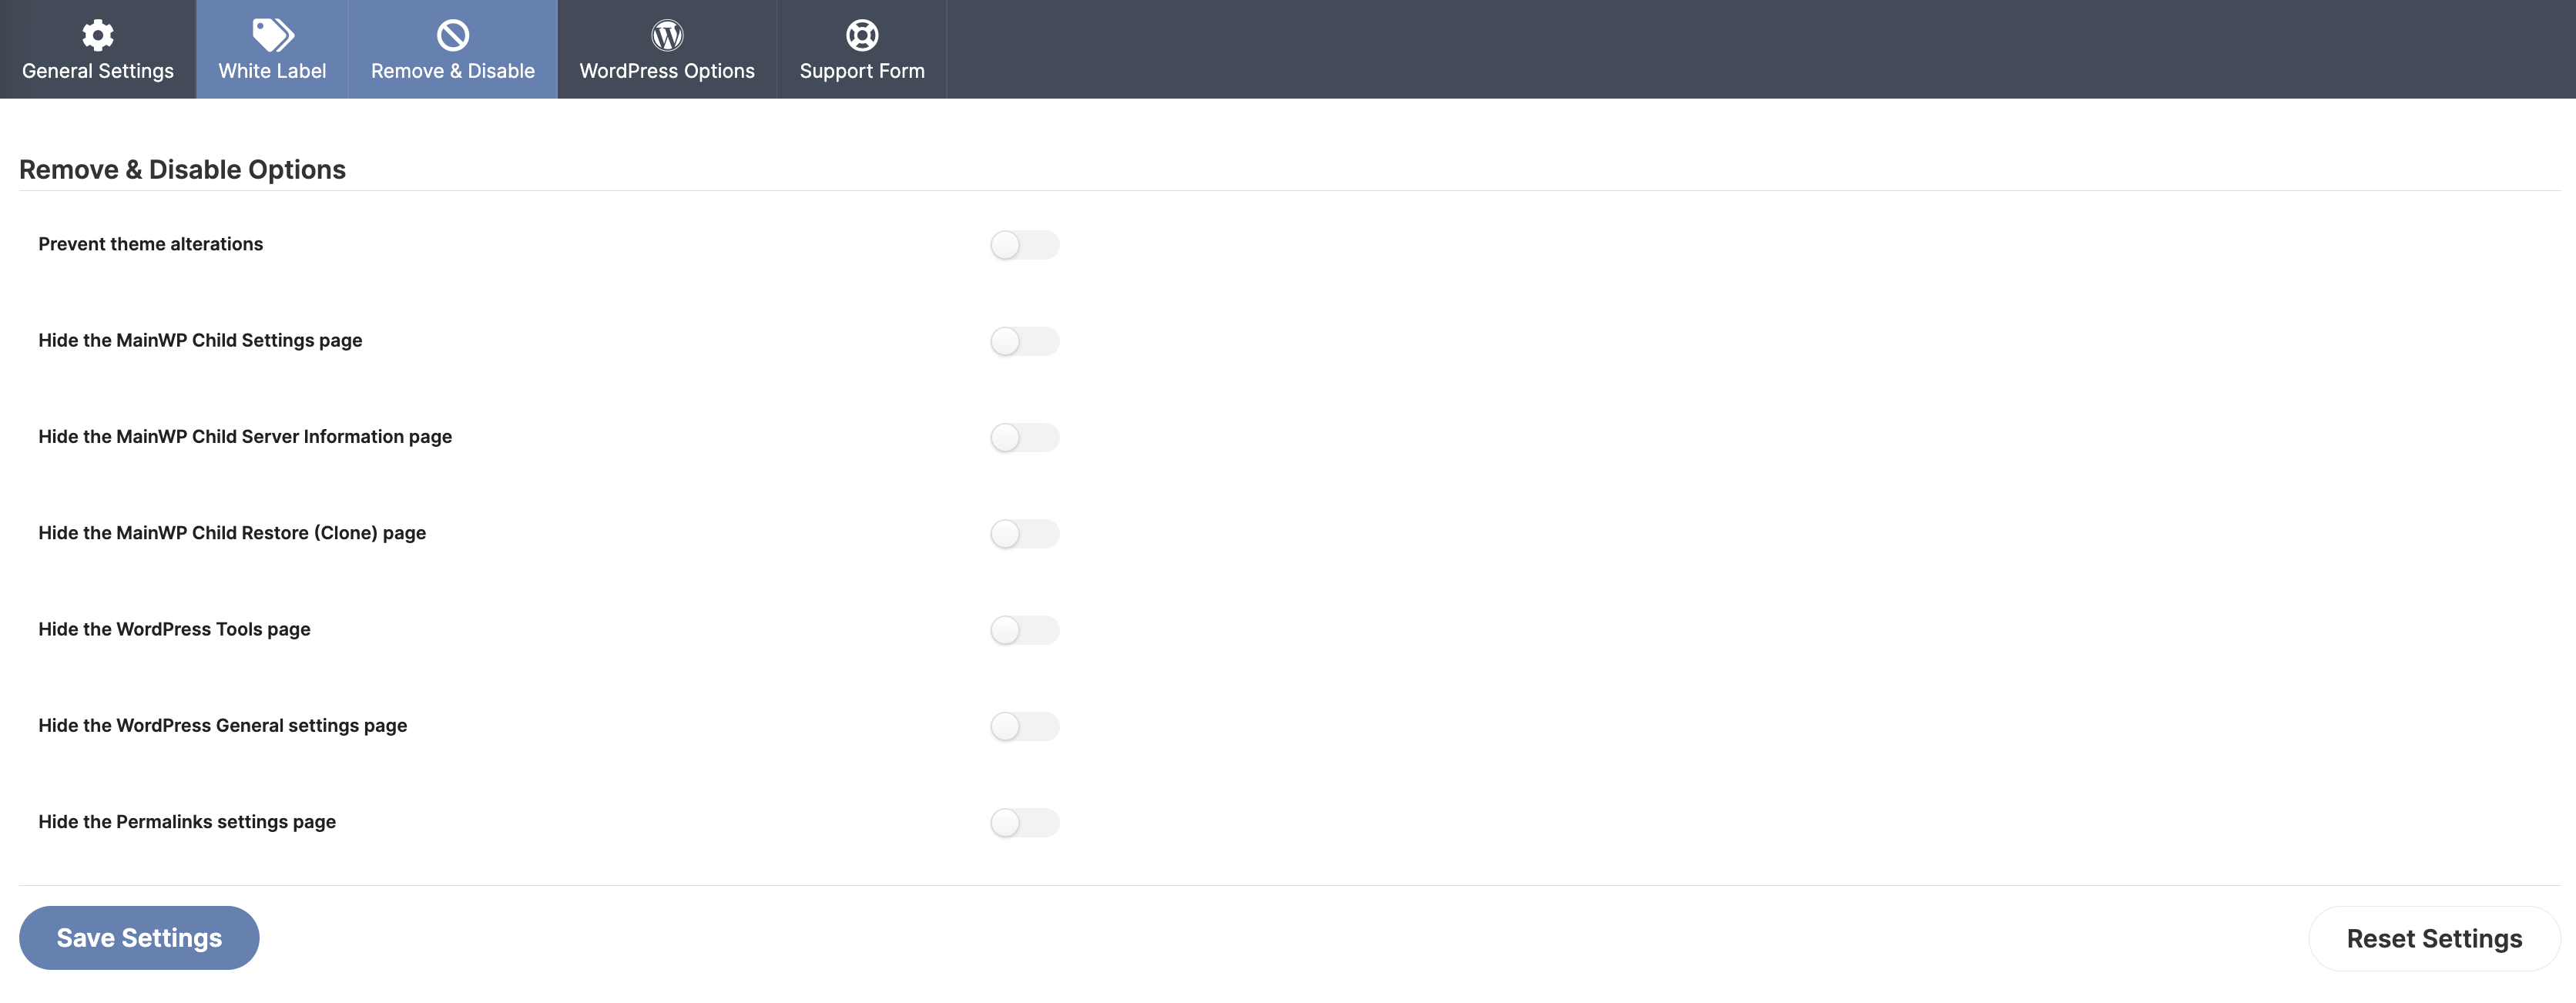
Available Options
| Option | Effect |
|---|---|
| Prevent theme alterations | Locks the current theme and prevents switching to another theme |
| Hide the MainWP Child Settings page | Removes the MainWP Child Settings page |
| Hide the MainWP Child Server Information page | Removes the MainWP Child Server Information page |
| Hide the MainWP Child Restore (Clone) page | Removes the MainWP Child Restore (Clone) page |
| Hide the WordPress Tools page | Removes the Tools menu from WP Admin |
| Hide the WordPress General settings page | Removes the Settings menu from WP Admin |
| Hide the Permalinks settings page | Removes the Permalinks settings page from WP Admin |
WordPress Options
Customize WordPress admin areas, login pages, and site-wide elements on child sites.- All Sites (Global)
- Single Site
Go to MainWP > Add-ons > White Label and select the WordPress Options tab.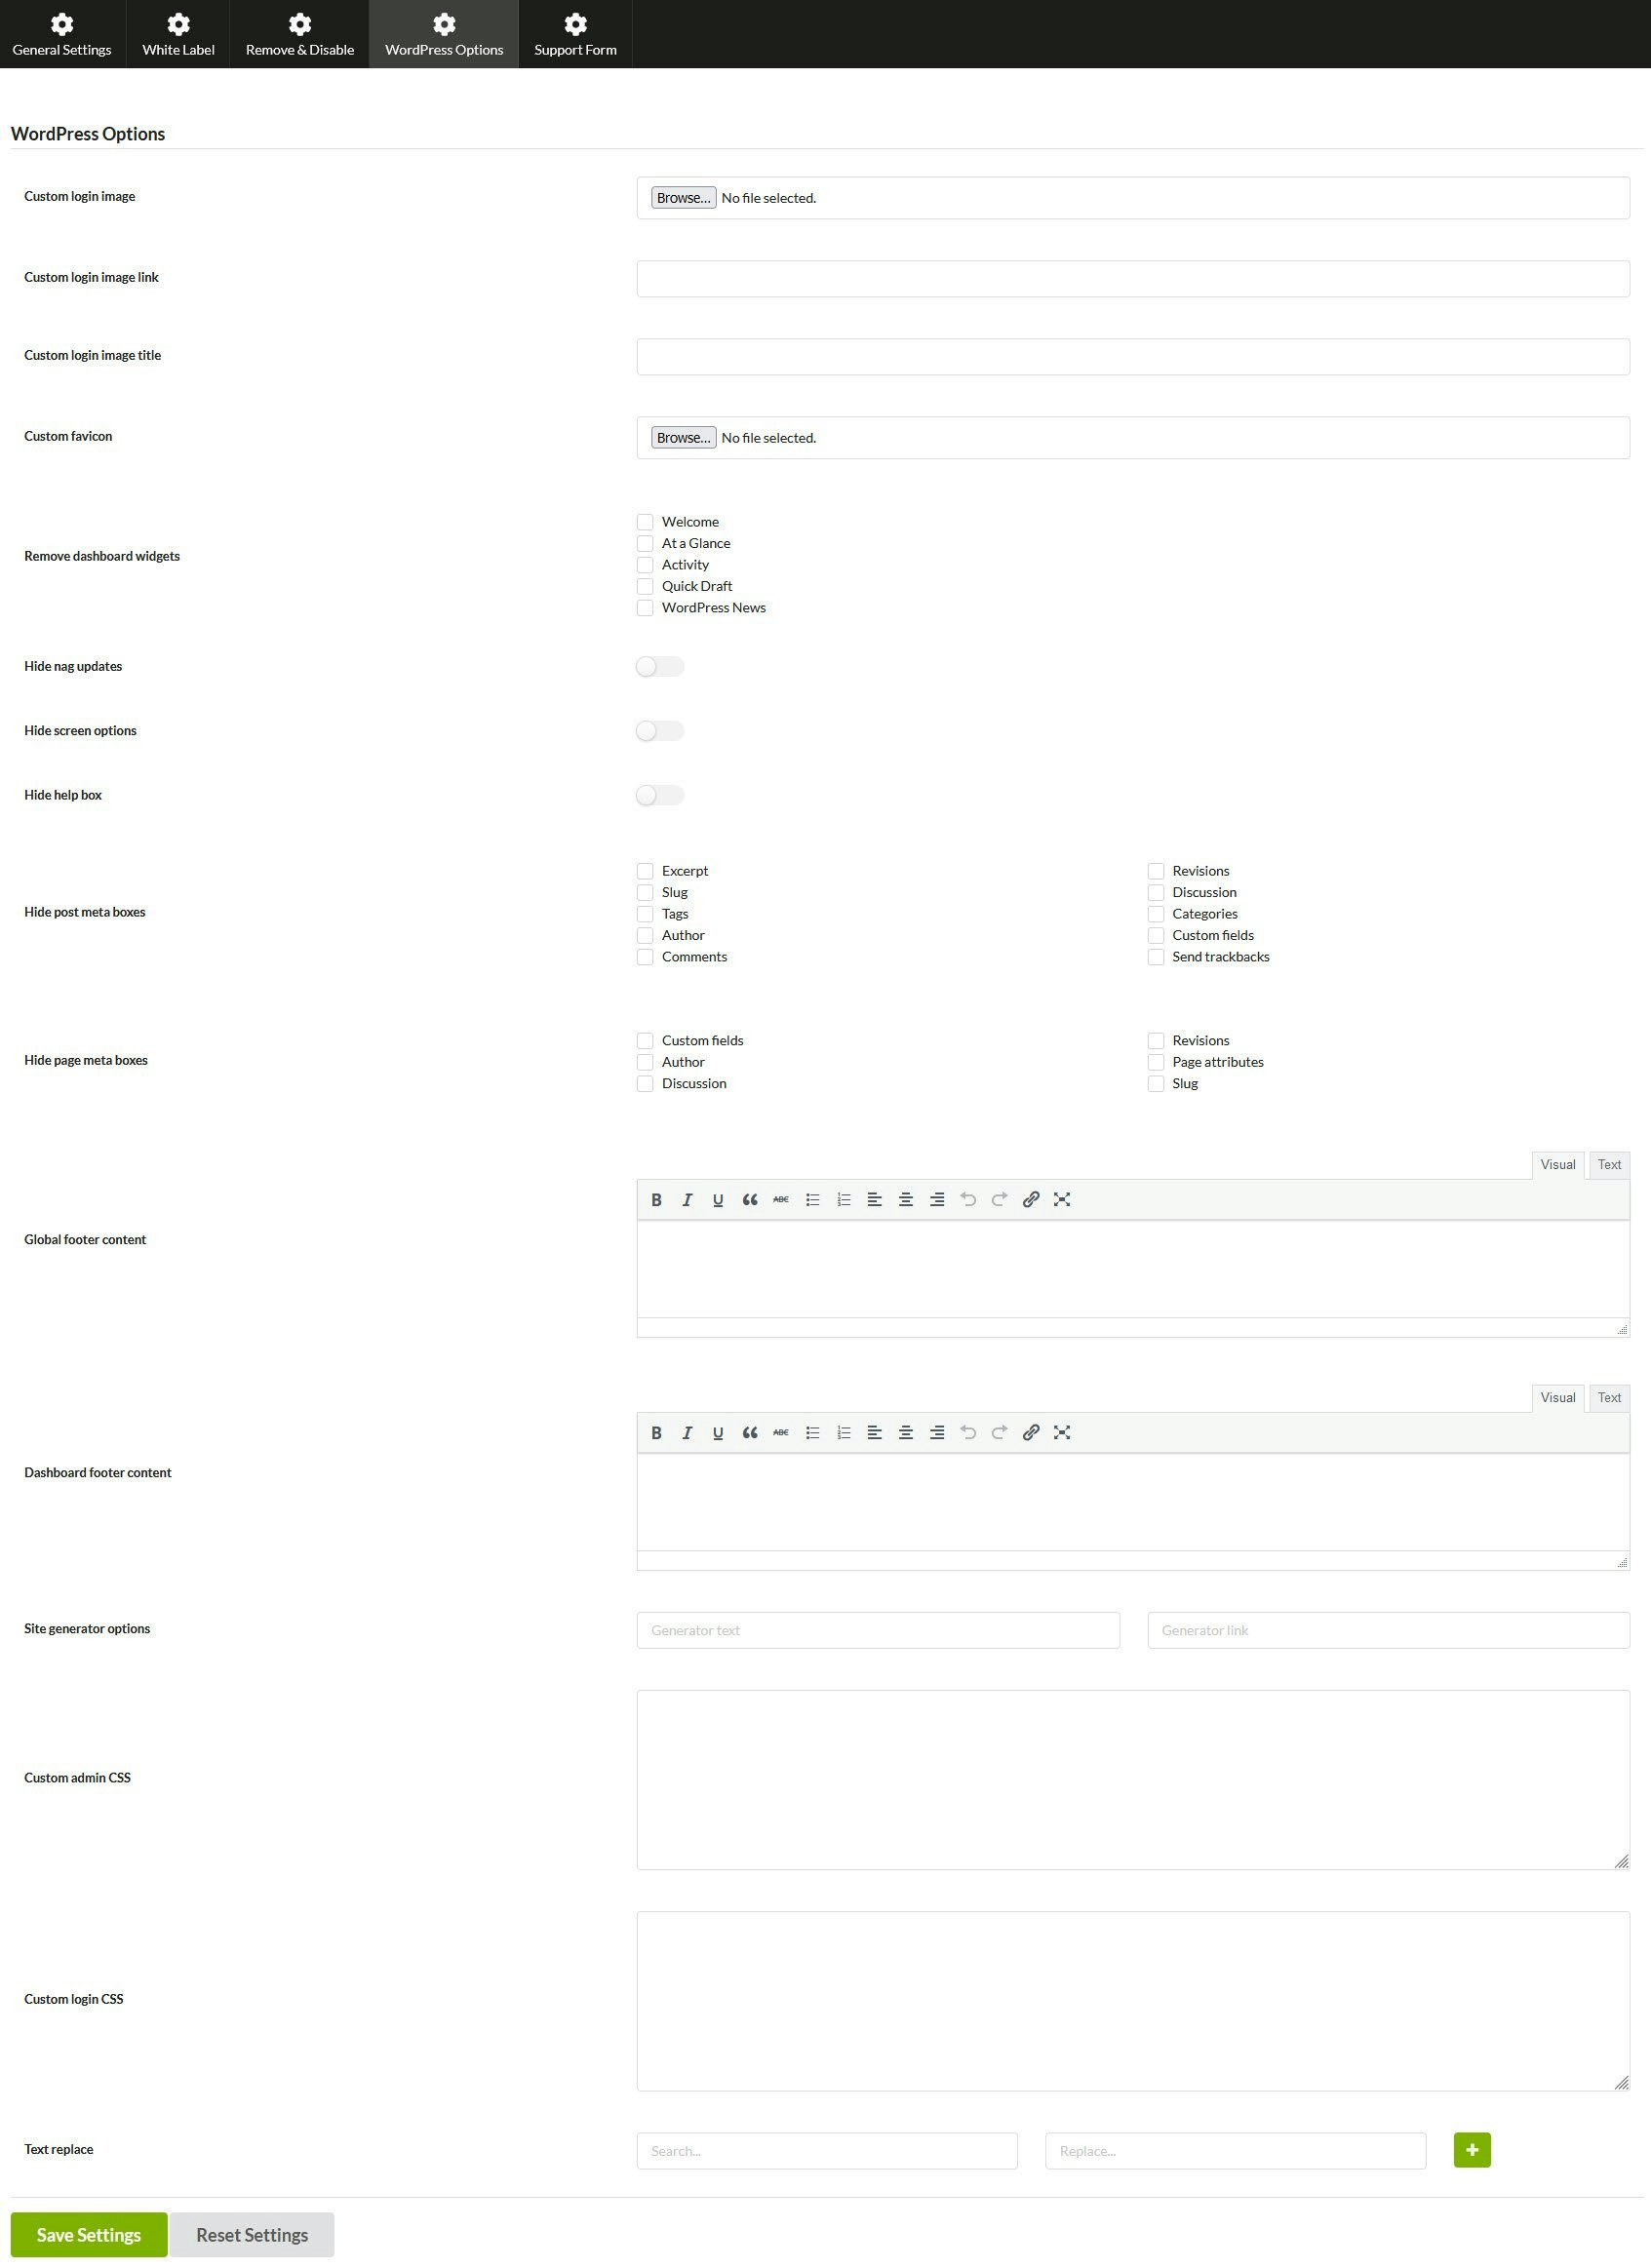
Available Options
| Option | Description |
|---|---|
| Custom login page image | Upload a custom image for the WordPress login page |
| Custom login image URL | Set the destination URL for the login image |
| Custom login image title | Set the login image title text |
| Custom website favicon | Upload a custom favicon for the site |
| Hide default WordPress dashboard widgets | Hide selected default dashboard widgets |
| Suppress update notifications for WordPress core | Hide WordPress core update notifications |
| Hide screen options | Hide the Screen Options tab |
| Hide help box | Hide the Help tab |
| Hide default WordPress post meta boxes | Remove selected post editor meta boxes |
| Hide default WordPress page meta boxes | Remove selected page editor meta boxes |
| Global Footer Content | Add content to the front-end footer |
| Dashboard Footer Content | Replace “Thank you for creating with WordPress” in admin footer |
| Site Generator Options | Replace the default generator text and link |
| Custom Admin CSS | Add CSS to customize the admin area |
| Custom Login CSS | Add CSS to customize the login page |
| Text Replace | Find and replace text strings throughout the admin area |
Support Form
Add a branded contact form to child site admin areas so clients can reach you directly.- All Sites (Global)
- Single Site
Go to MainWP > Add-ons > White Label and select the Support Form tab.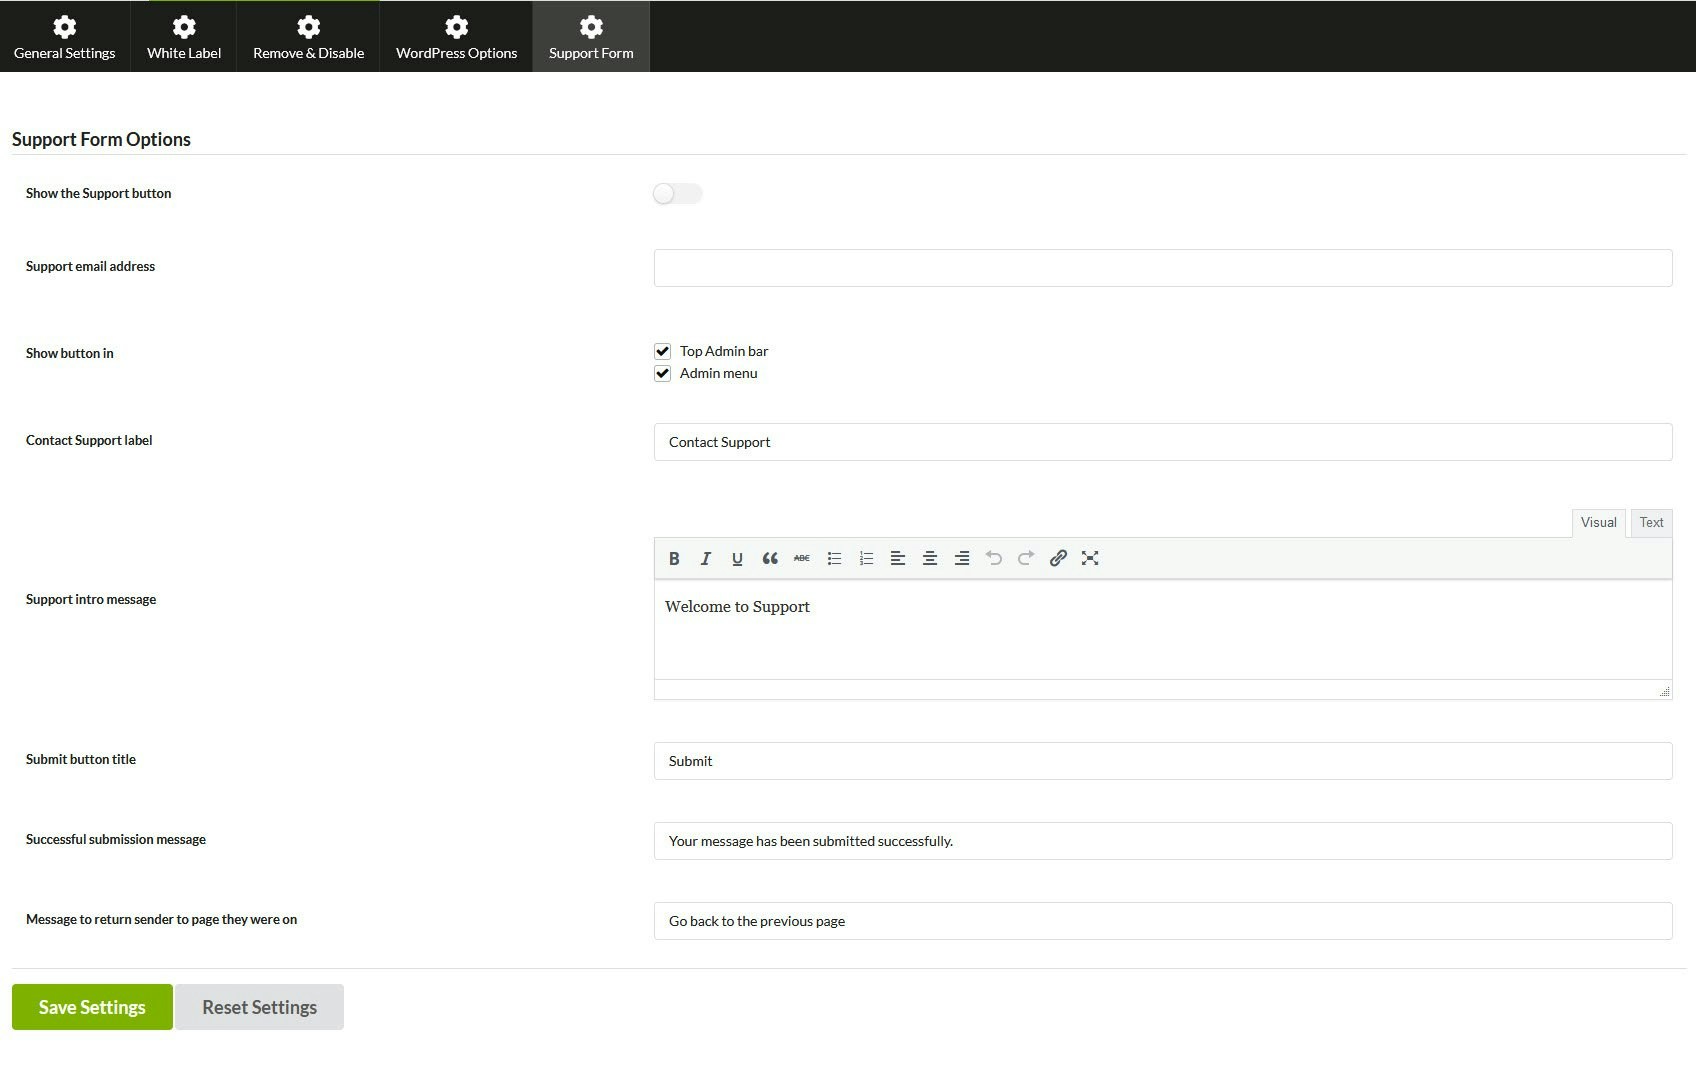
Configuration Options
| Setting | Description |
|---|---|
| Activate the Support feature | Enable or disable the support form |
| Designated support contact email | Set the email address that receives support messages |
| Position of the “Contact Support” button | Show the button in the Top Admin bar, Admin menu, or both |
| Contact Support button title | Set the text displayed on the support button |
| Support introduction message | Set the message shown above the contact form |
| Submit Button Title | Text on the form submit button |
| Successful Submission Message | Confirmation message after form submission |
| Message to return sender to page they were on | Set the text for the return link after submission |
The support form remains disabled if the Designated support contact email field is empty.
Reset White Label Options
To reset all white label settings to defaults:White Label Master Reset
If a child site becomes disconnected and you cannot see the MainWP Child plugin (because it was hidden) or other white label options are stuck, use one of these methods to reset.Option 1: Reset Tool (Recommended)
Download and install the Reset MainWP Child Plugin Settings plugin on the child site. It resets all MainWP Child settings and deactivates itself automatically.Option 2: Manual Code Edit
Locate the MainWP Child class file
Find
site_root/wp-content/plugins/mainwp-child/class/class-mainwp-child.phpEdit the file
Find the
public function __construct( $plugin_file ) function (around line 210). After the line containing this->update();, add:Option 3: Functions.php Filter
Add this code to the active theme’s functions.php on the child site:Exclude Specific Users from White Labeling
Themainwp_child_branding_init_options filter lets you disable white label settings for specific users on child sites.
Exclude by User ID
This example excludes user ID 1 from white label settings:Exclude by Username
This example excludes the user “bogdan” from white label settings:Related Resources
- Removed hiding options - Change details and manual code option
- Team Control Extension - Role-based access control
- Pro Reports Extension - Branded client reports
- Agency Add-ons - Browse agency add-ons