What You’ll Accomplish
- Install plugins from WordPress.org or ZIP files on multiple sites
- Activate and deactivate plugins across selected sites
- Delete unused plugins from child sites
- Update plugins individually or in bulk
- Configure automatic updates for trusted plugins
Prerequisites
- MainWP Dashboard installed and activated
- At least one child site connected to your Dashboard
- Administrator access to your Dashboard site
Install Plugins
MainWP provides three methods for installing plugins:| Method | Best For |
|---|---|
| WordPress.org | Free plugins from the official directory |
| Upload ZIP | Premium plugins or custom plugins |
| Favorites | Quick installation of commonly used plugins (requires Favorites Extension) |
Install from WordPress.org
Search for plugin
Under the Install from WordPress.org tab, use the Search plugins field to find the plugin.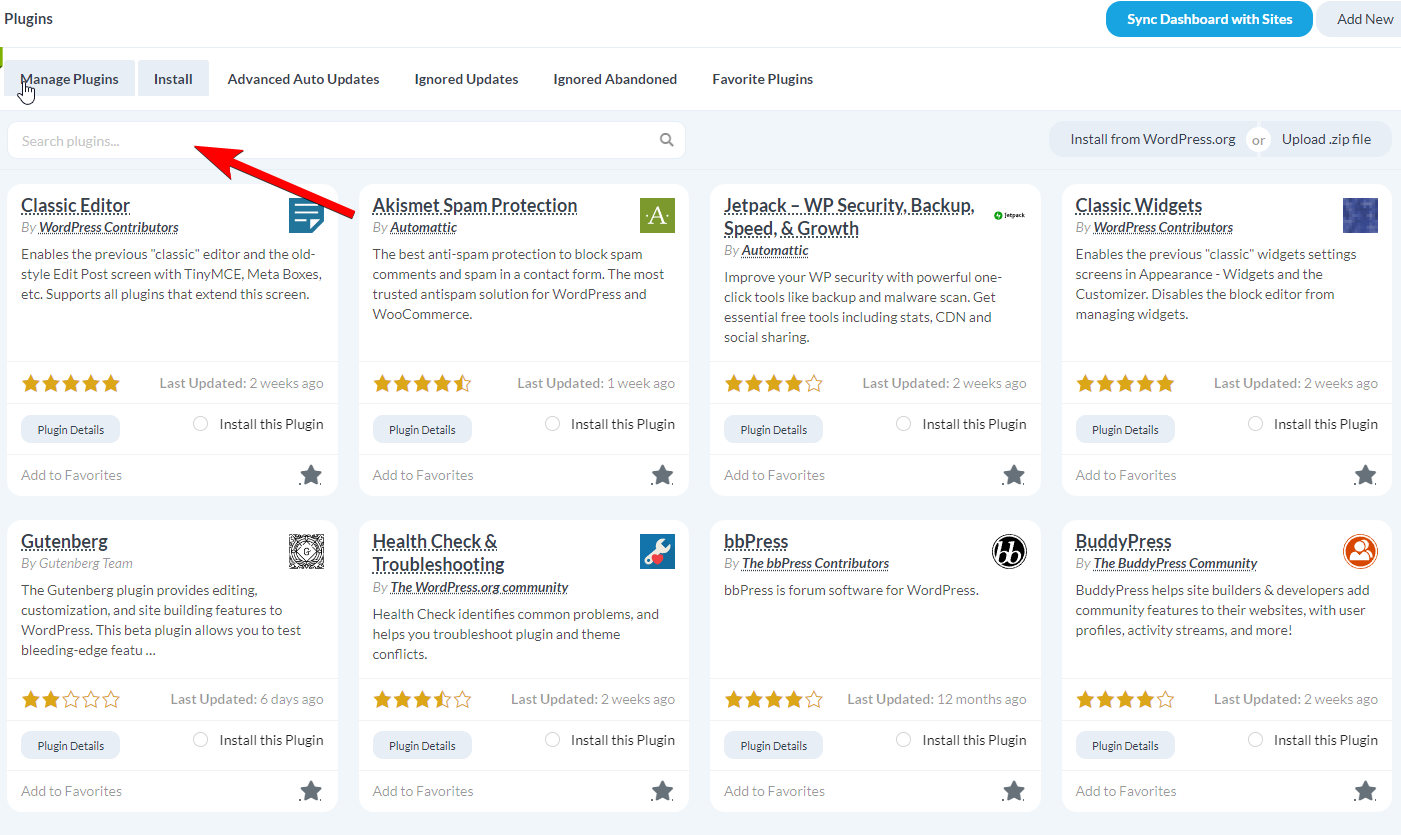
Select sites
In the Select Sites box, choose the sites where you want to install the plugin.
Set installation options
Configure the installation options: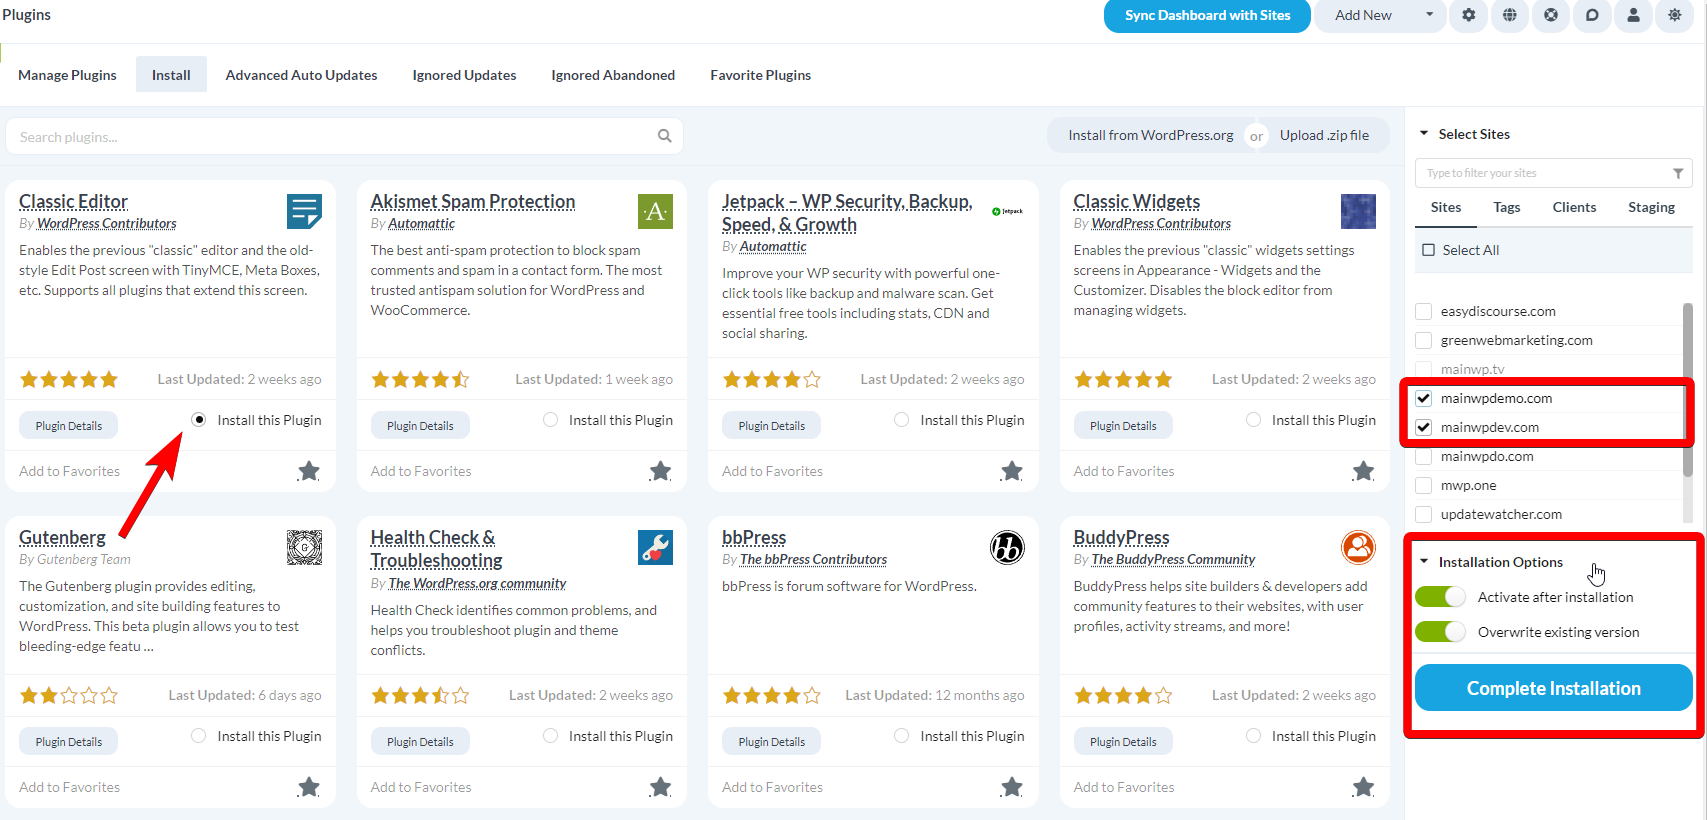
| Option | Description |
|---|---|
| Activate after installation | Automatically activate the plugin after installing |
| Overwrite existing version | Replace the plugin if already installed on the site |
Install by Upload
Select sites
In the Select Sites box, choose the sites where you want to install the plugin.
Set installation options
Configure the installation options: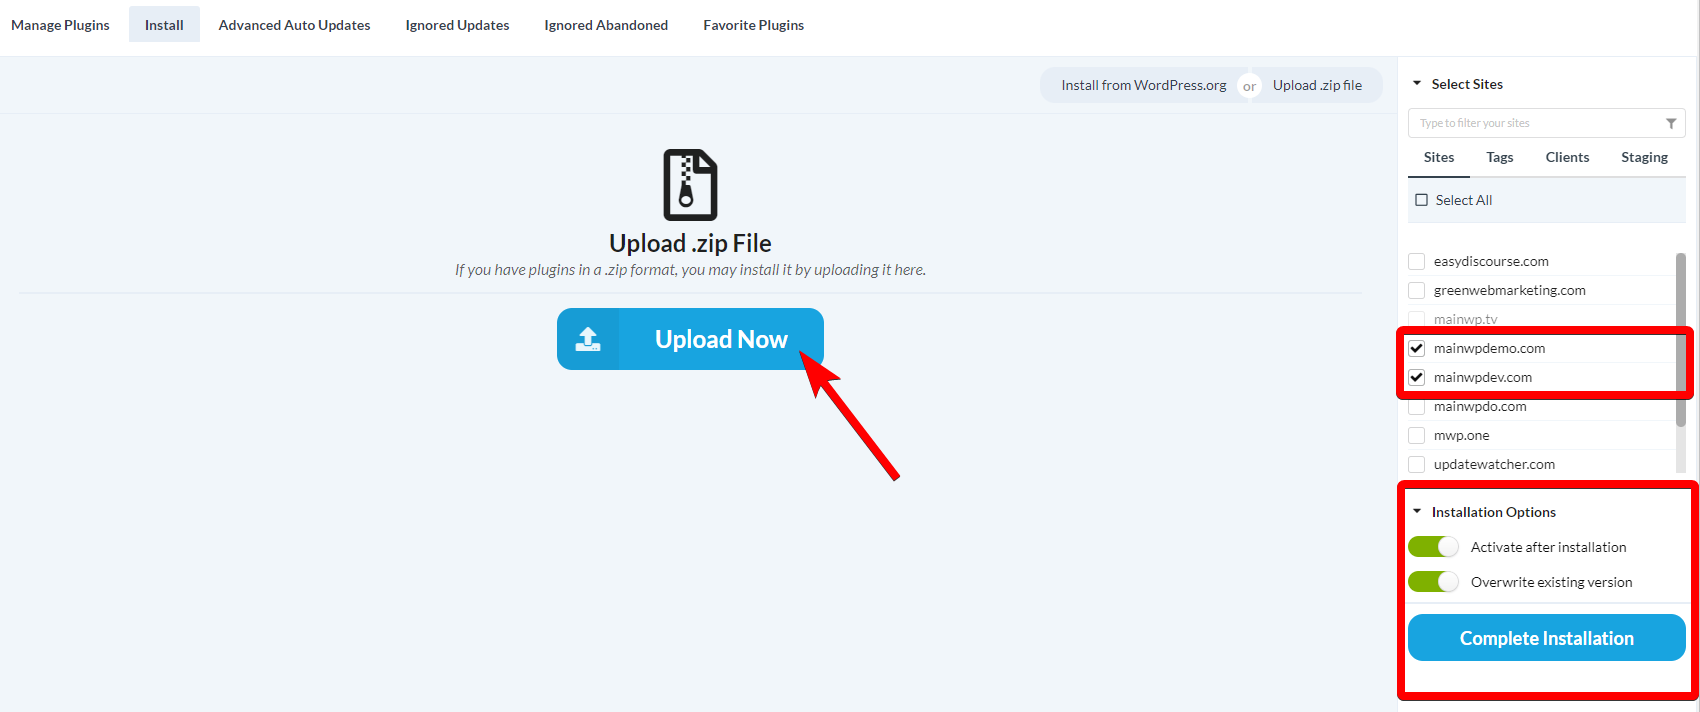
| Option | Description |
|---|---|
| Activate after installation | Automatically activate the plugin after installing |
| Overwrite existing version | Replace the plugin if already installed on the site |
Your server must allow uploads of the plugin’s file size. Check Maximum File Size on your Server Information page.
Install from Favorites
Select and install plugins from your saved favorites using the MainWP Favorites Extension. Once you have a list of favorite plugins, this provides the quickest way to set up new sites.Activate Plugins
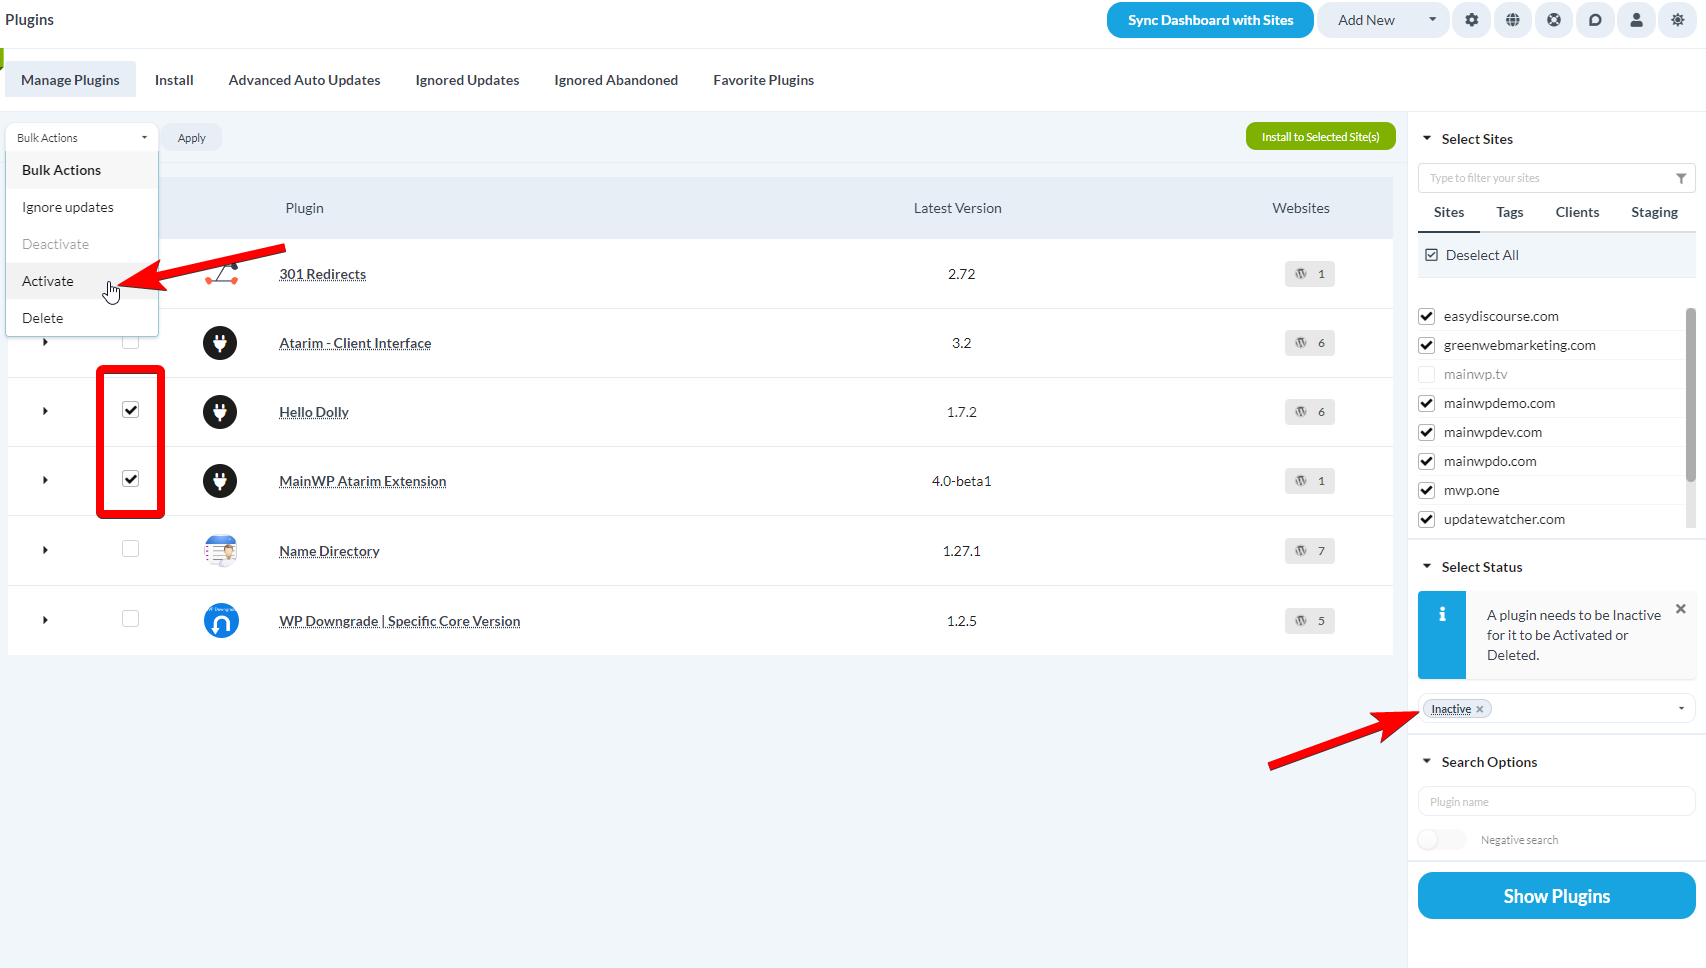
Filter inactive plugins
In the Search Plugins section, set Status to Inactive. Optionally enter a plugin name.
Select sites
In the Select Sites box, choose the sites to search.
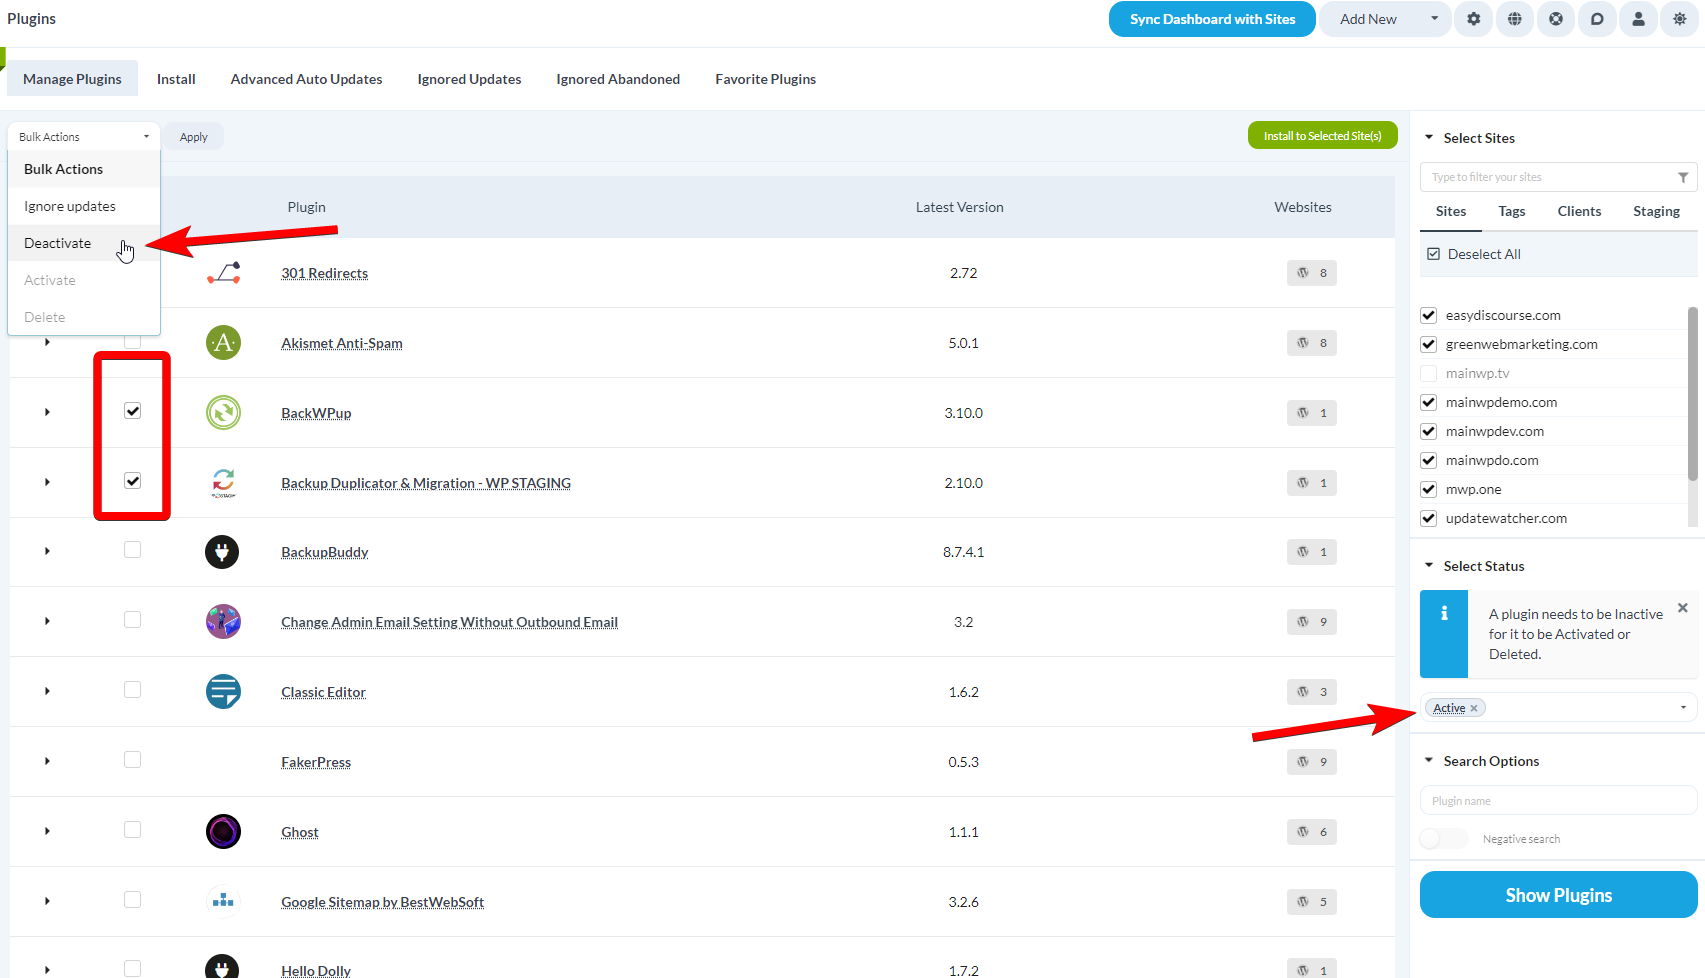
Deactivate Plugins
Filter active plugins
In the Search Plugins section, set Status to Active. Optionally enter a plugin name.
Select sites
In the Select Sites box, choose the sites to search.
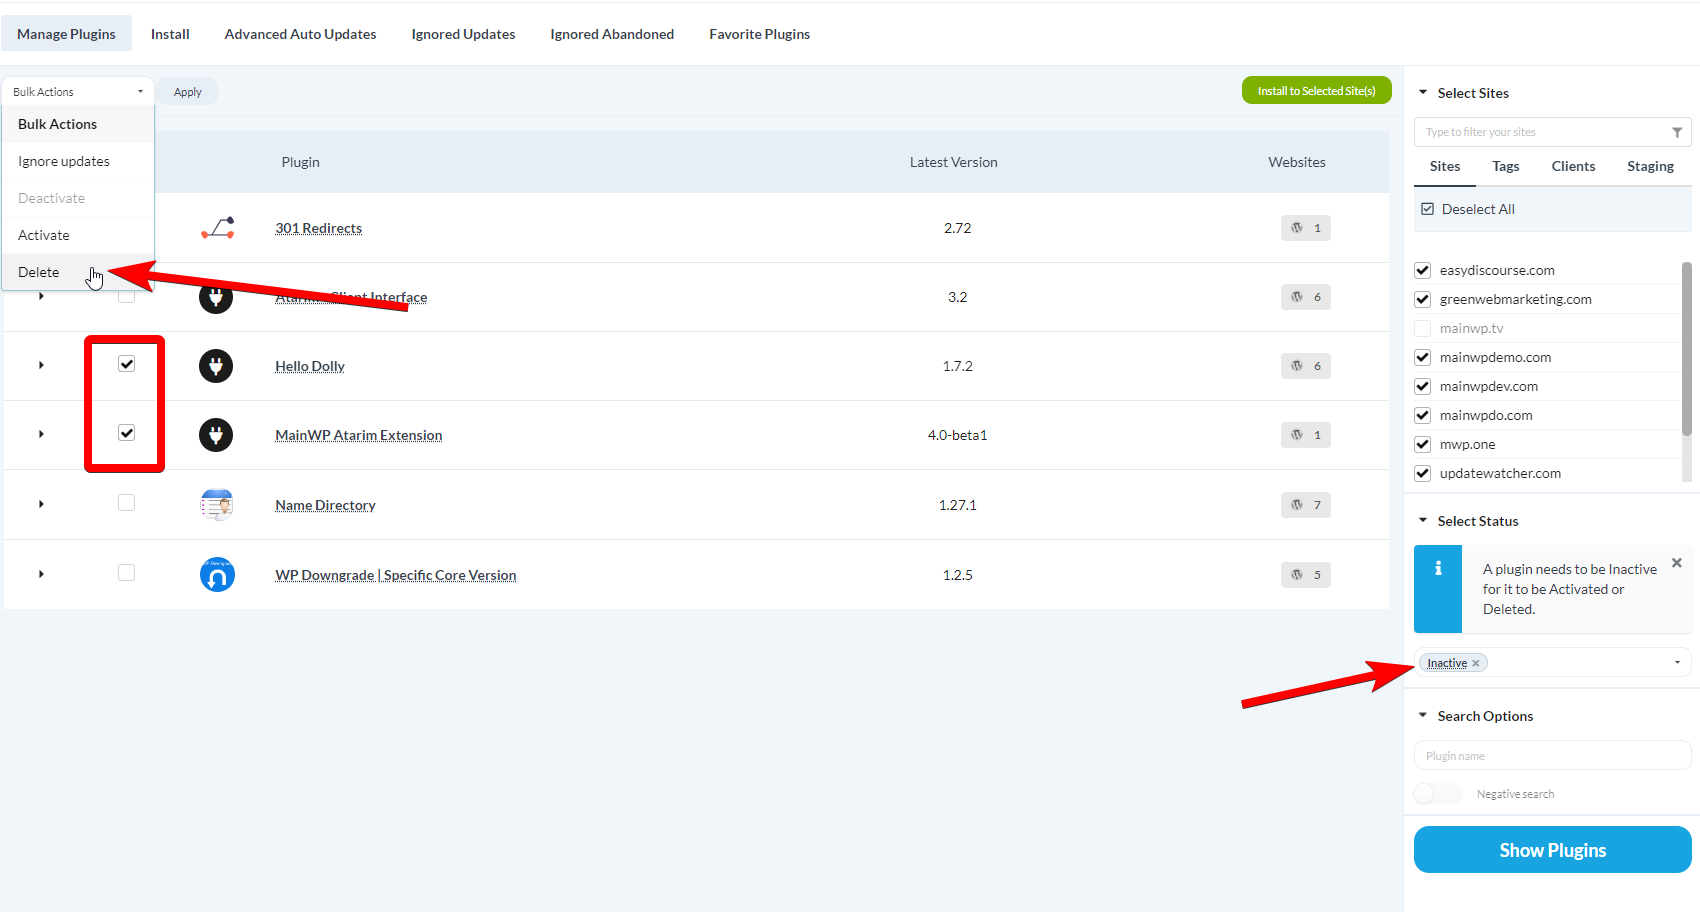
Delete Plugins
You can delete active and inactive plugins. If a selected plugin is active, MainWP deactivates it during deletion.Filter plugins by status
In the Search Plugins section, set Status to Active, Inactive, or Active & Inactive. Optionally enter a plugin name.
Select sites
In the Select Sites box, choose the sites to search.
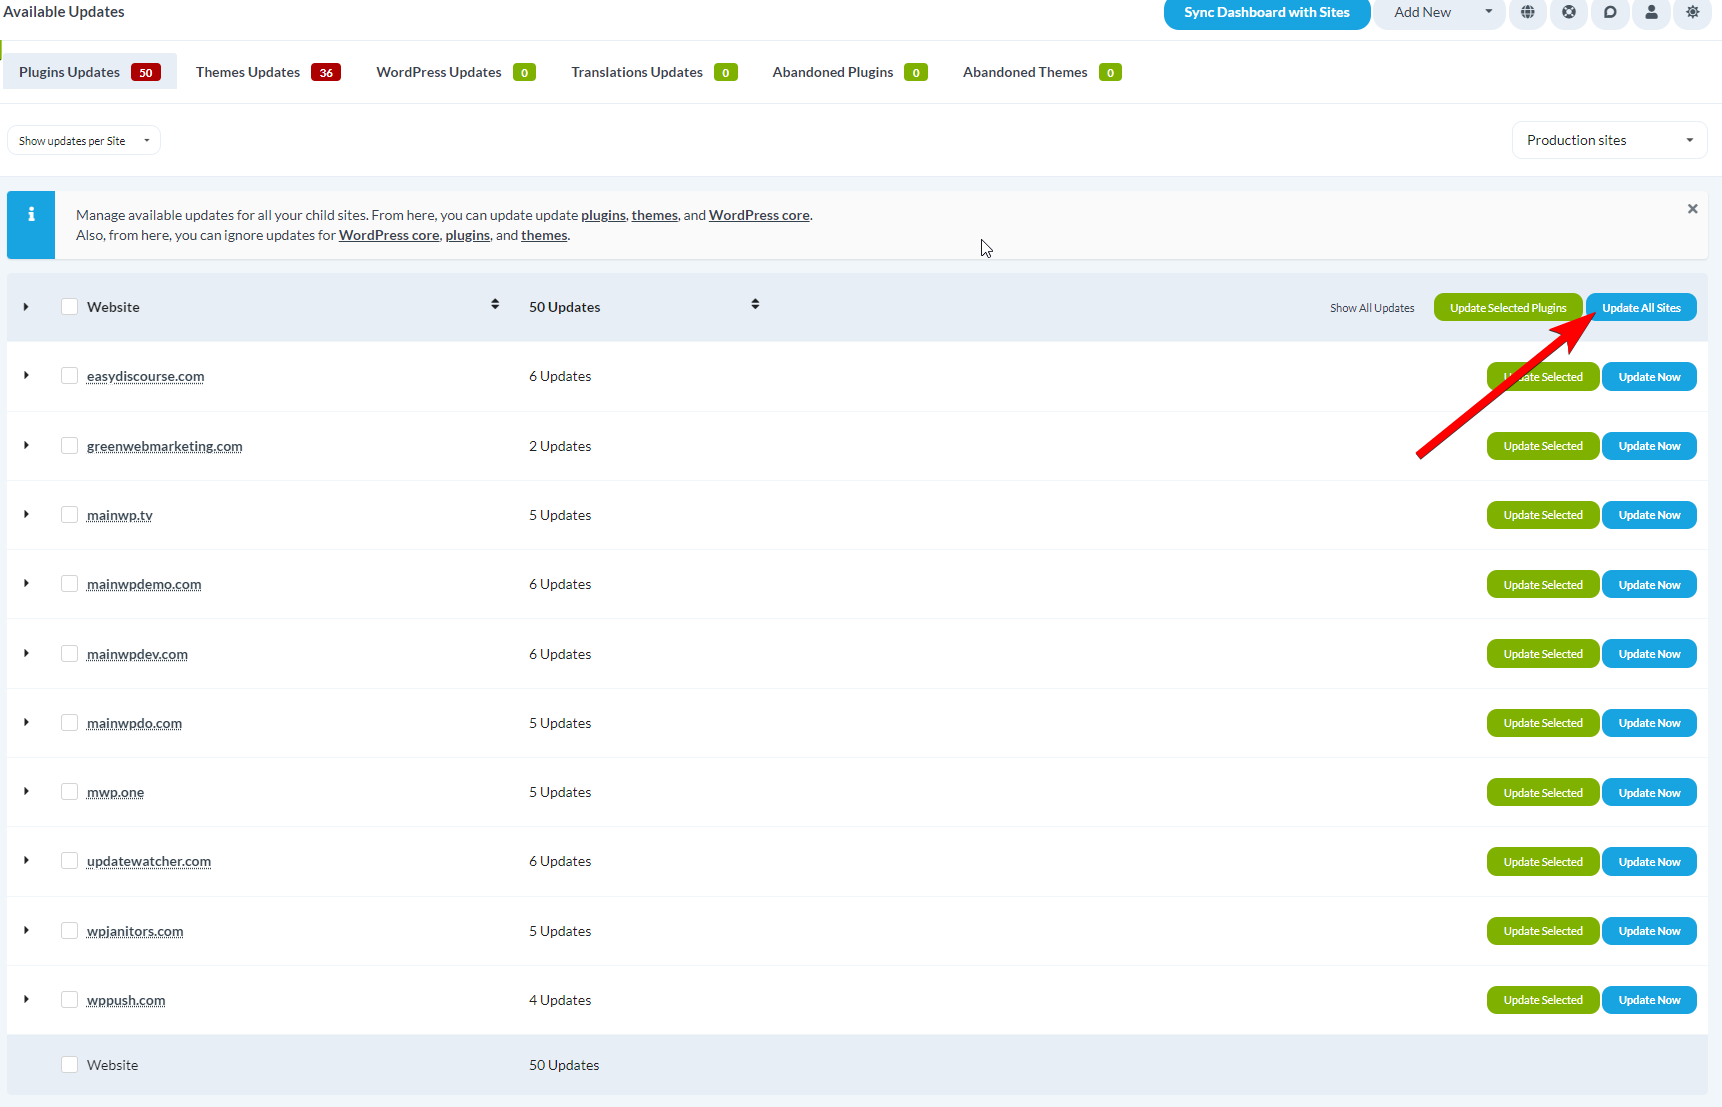
Update Plugins
Synchronize your child sites before running updates to ensure all available updates are displayed.Update All Plugins on All Sites
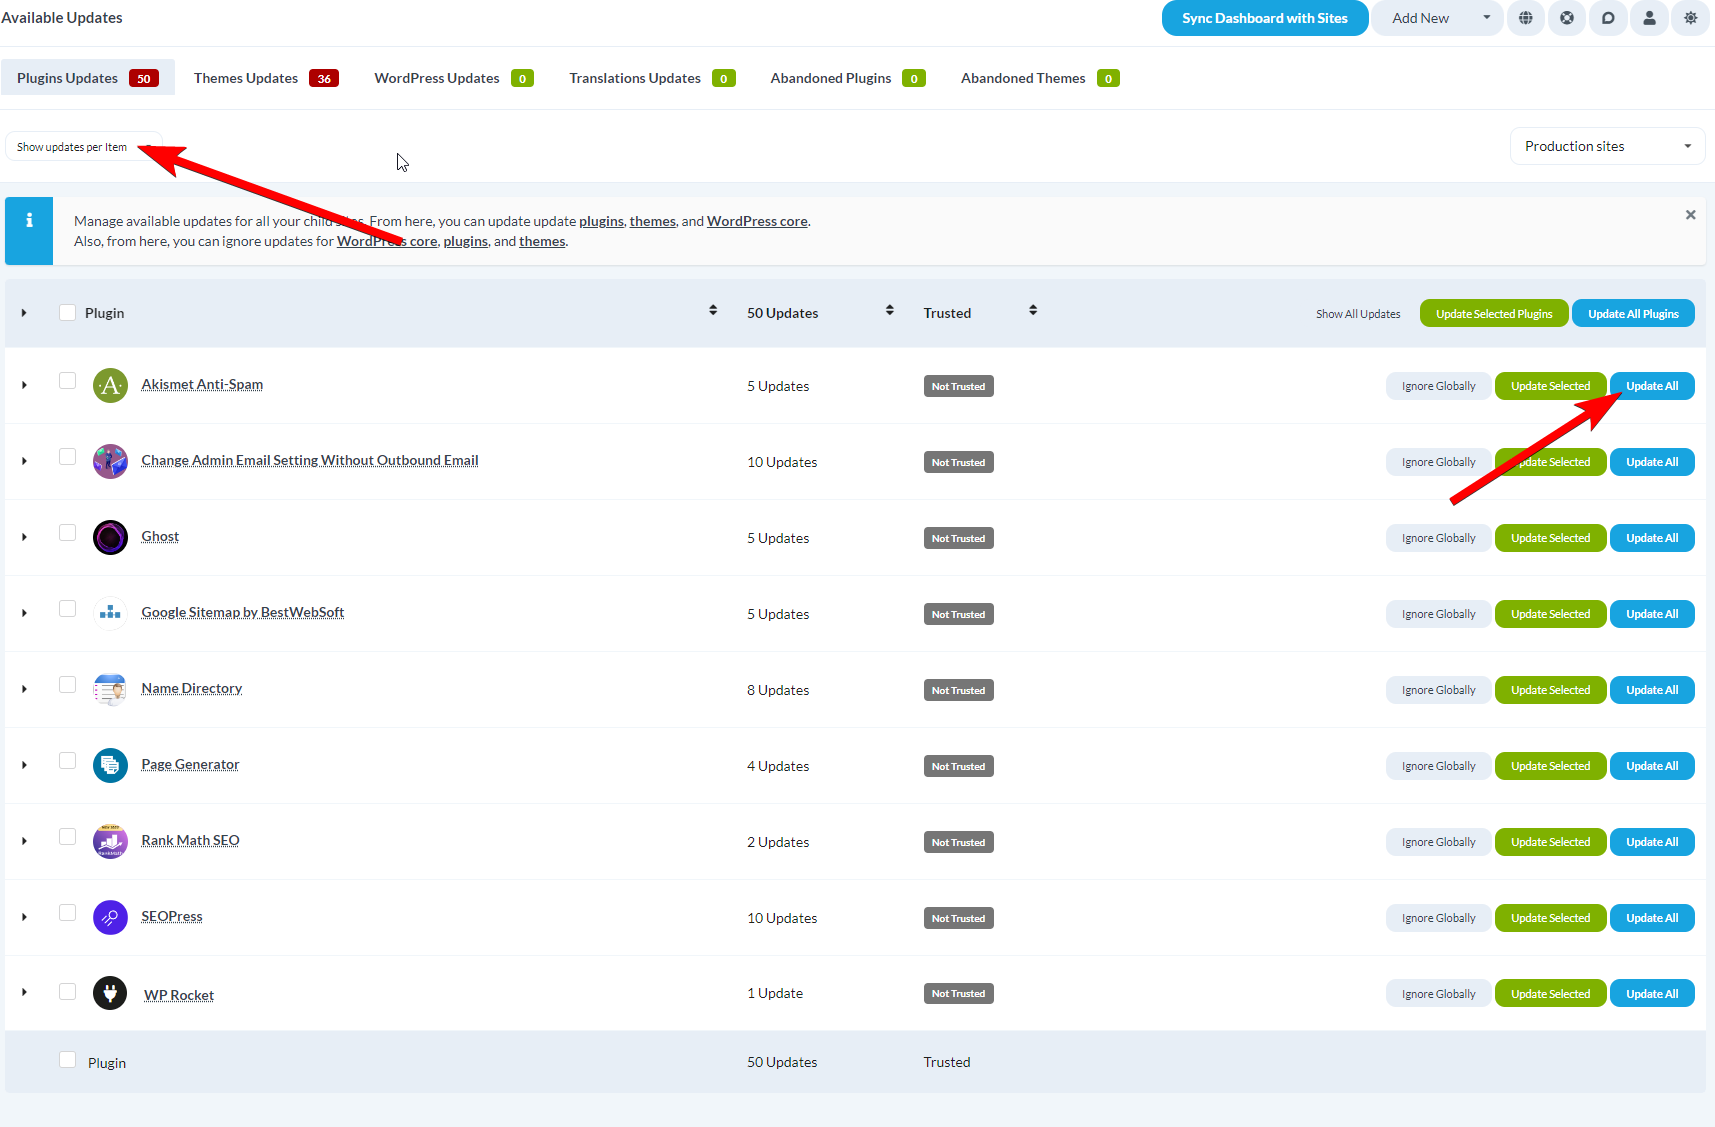
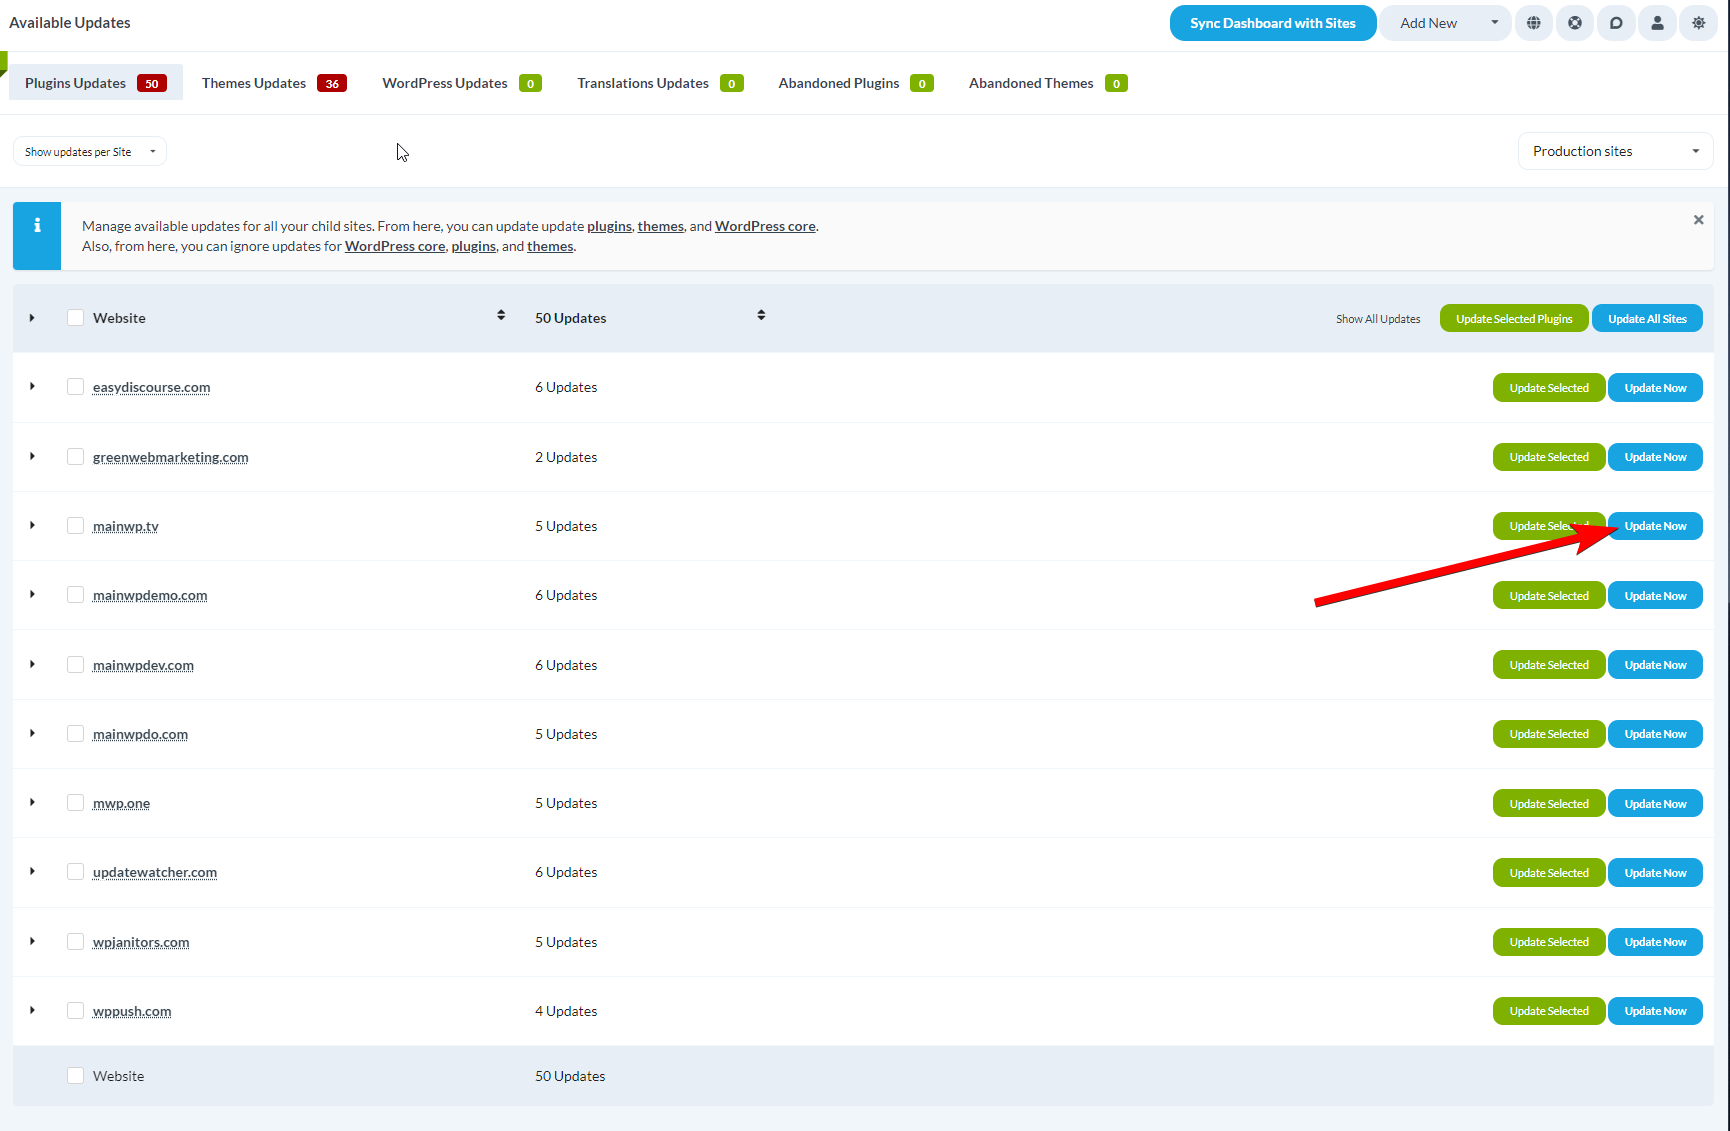
Update a Single Plugin on All Sites
Update All Plugins on a Single Site
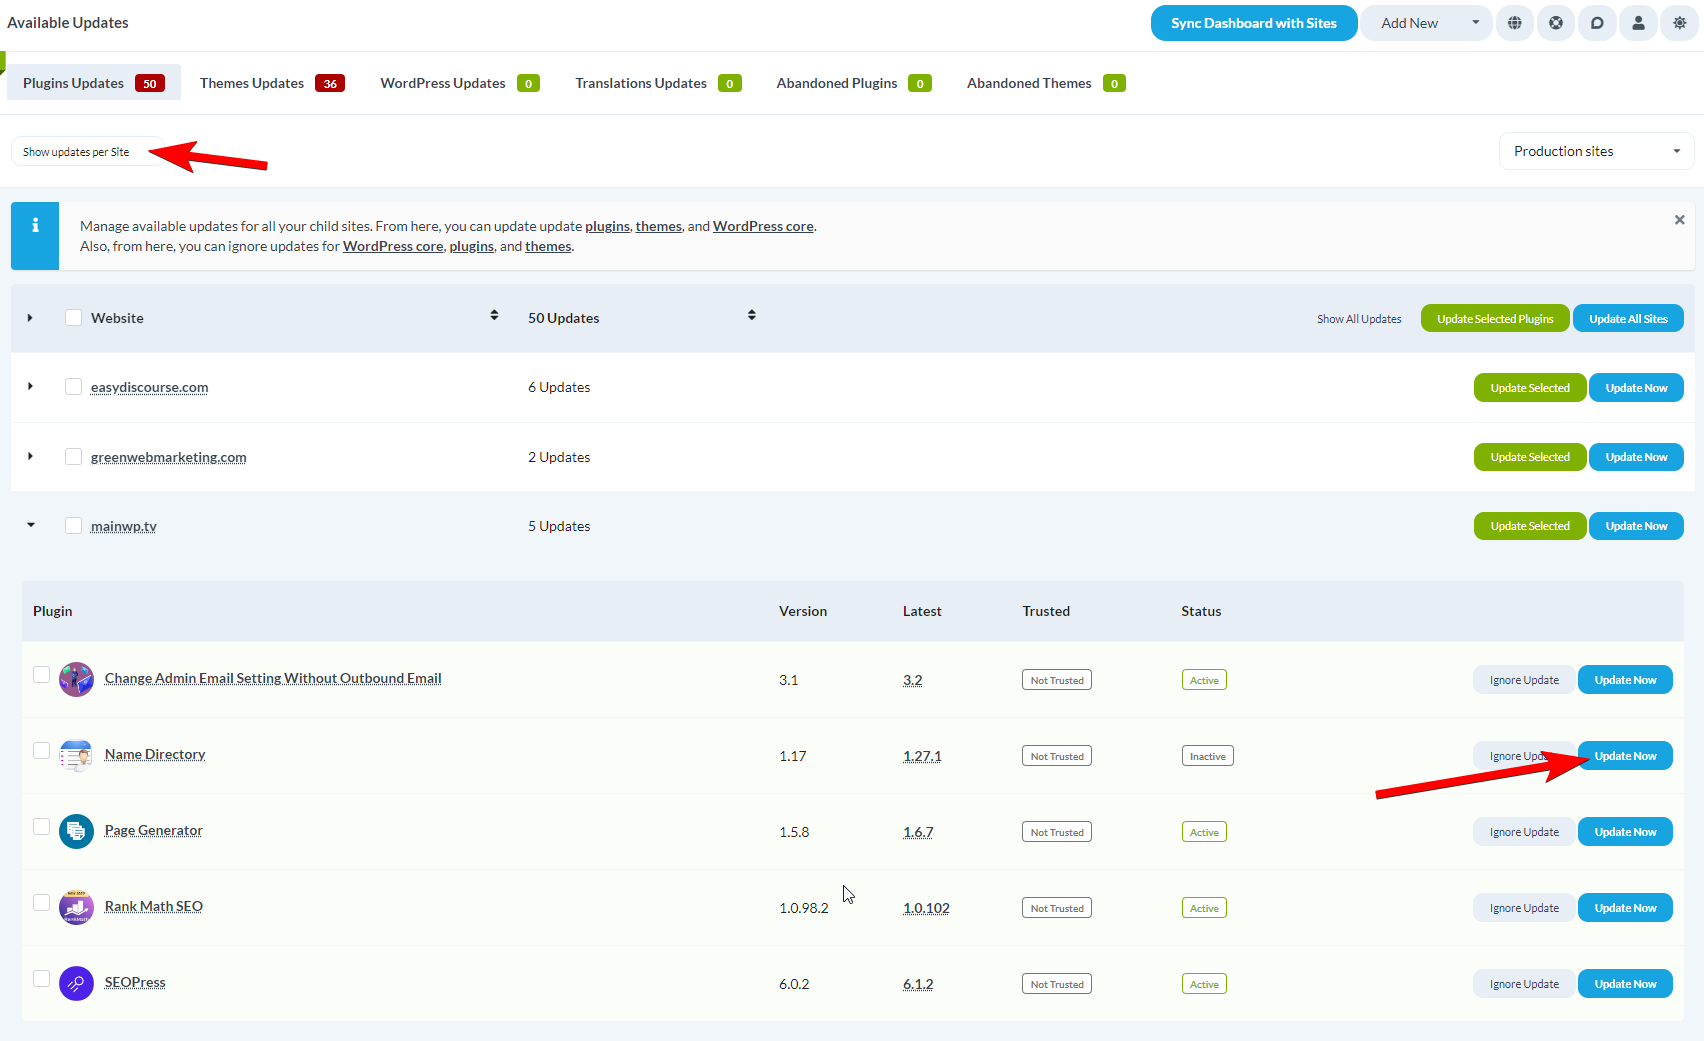
Update a Single Plugin on a Single Site
View Plugin History
Use the History action to review plugin change activity by site and by day.Open a plugin row with History
Open plugin rows in MainWP > Plugins > Manage Plugins, MainWP > Updates > Plugins Updates, or plugin rows on an individual site Operations page.
Review activity details
Review actions in chronological order. Each record shows the action, user, source (Dashboard or WP Admin), timestamp, and version change when available.
Switch history views
Use Day History to group actions by date, then use Plugin History to switch to plugin-grouped actions for that day.
If no logs are available, you may see “This plugin has no recorded activity in Dashboard Insights.” Check Network Activity and Dashboard Insights settings to confirm logging and retention are configured.
Configure Automatic Updates
Automatic updates require two configuration steps: enabling the feature and marking plugins as trusted.Enable Auto Updates
Mark Plugins as Trusted
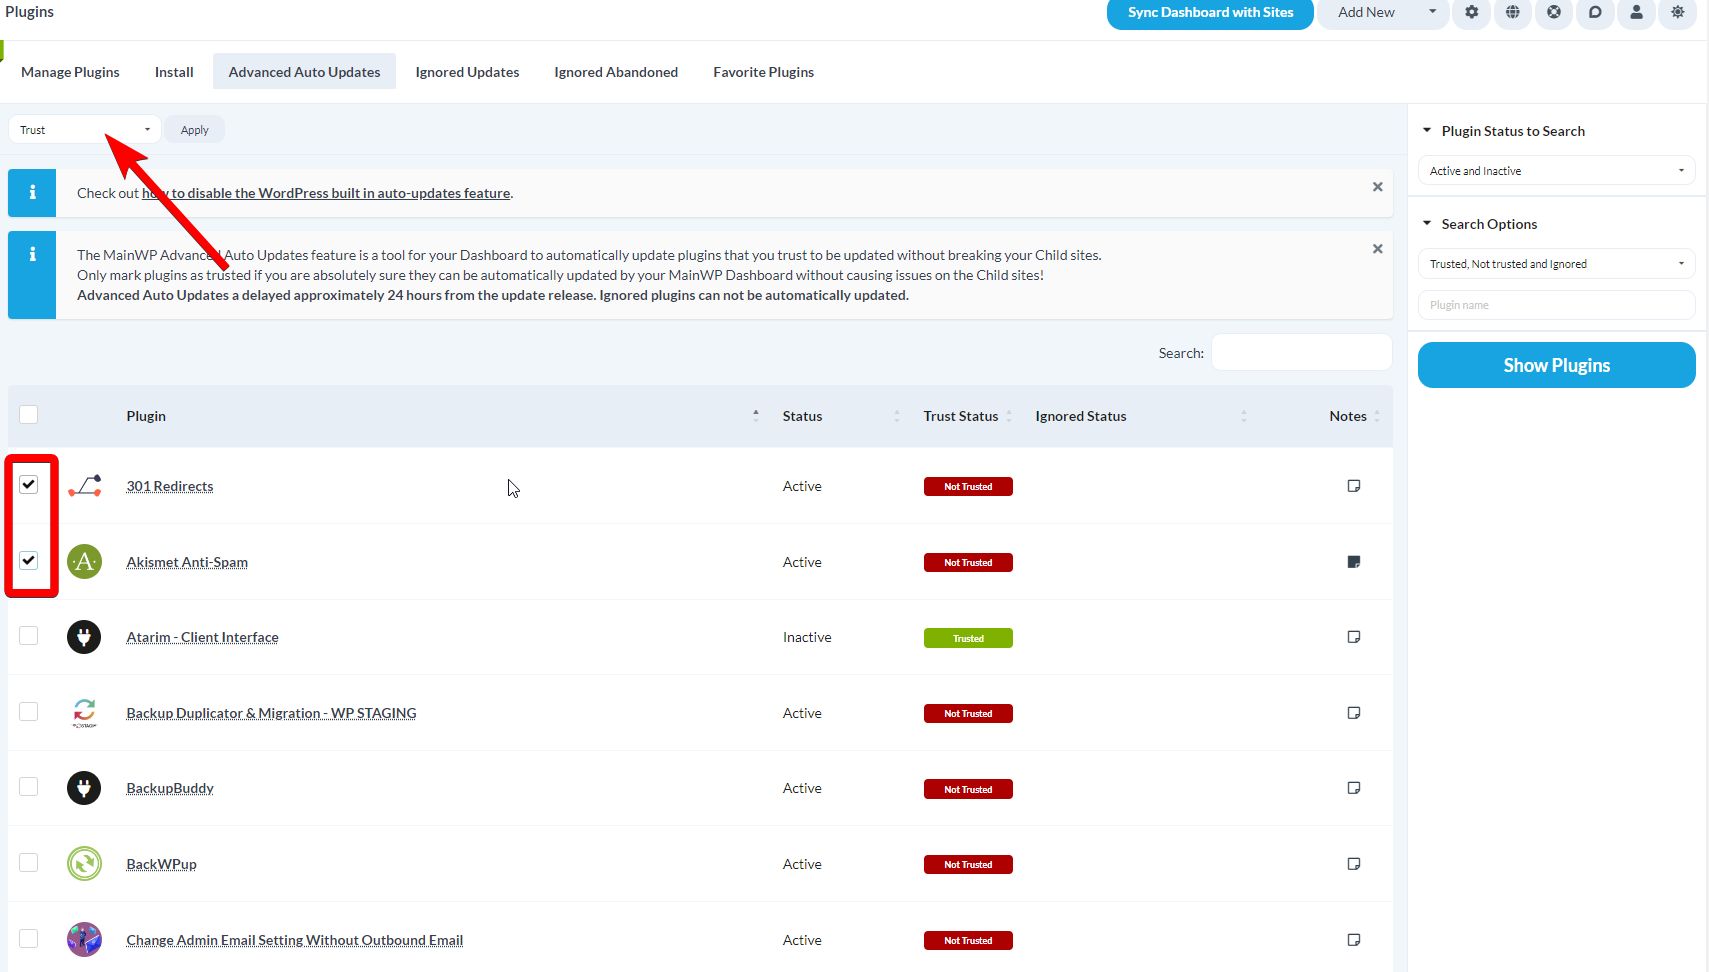
Marking a plugin as Trusted means you trust this plugin and allow MainWP to update it automatically.
Auto Updates Timing
- Updates may take up to 24 hours after MainWP detects a new version
- Auto updates require WP Cron to be triggered regularly
- Consider using Uptime Robot to ping your Dashboard site for reliable cron execution
Self-Check Checklist
- Plugins install successfully on selected sites
- Plugin activation and deactivation work across sites
- Plugin updates complete without errors
- Auto updates are configured for trusted plugins
- Deleted plugins are removed from child sites
Related Resources
- Check for Abandoned Plugins - Identify outdated plugins
- Favorites Extension - Quick plugin installation from saved lists
- Manage Updates - Update management overview