What You’ll Learn
- How to add custom menu items to the navigation
- How to control menu position
- How to customize menu icons
Prerequisites
- MainWP Dashboard version 4.5 or newer
- Custom Dashboard extension (free) or access to your theme’s functions.php
Add a Custom Menu Entry
Open Custom Dashboard
Navigate to the Custom Dashboard extension settings.
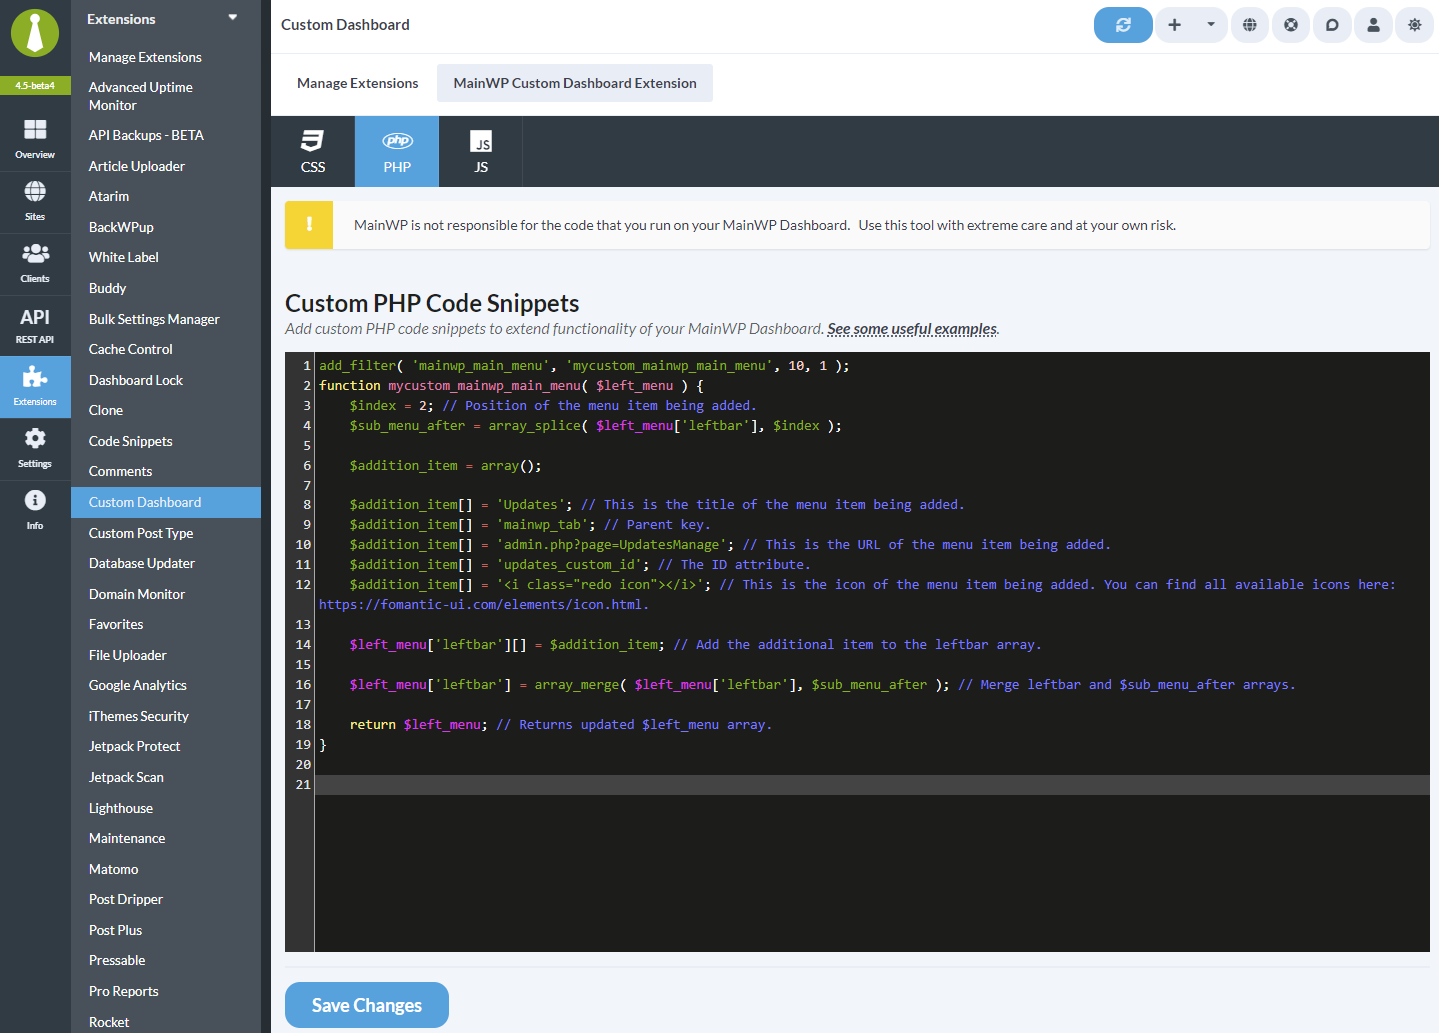
Customize the values
Modify the
$addition_item[] values for your needs:| Value | Description | Example |
|---|---|---|
| Title | Text displayed in menu | 'My Custom Page' |
| Menu key | Use a unique internal key | 'my_custom_page' |
| URL | Page URL or admin slug | 'admin.php?page=MyPage' |
| ID | HTML element ID | 'my_custom_id' |
| Icon | Fomantic UI icon HTML | '<i class="chart bar icon"></i>' |
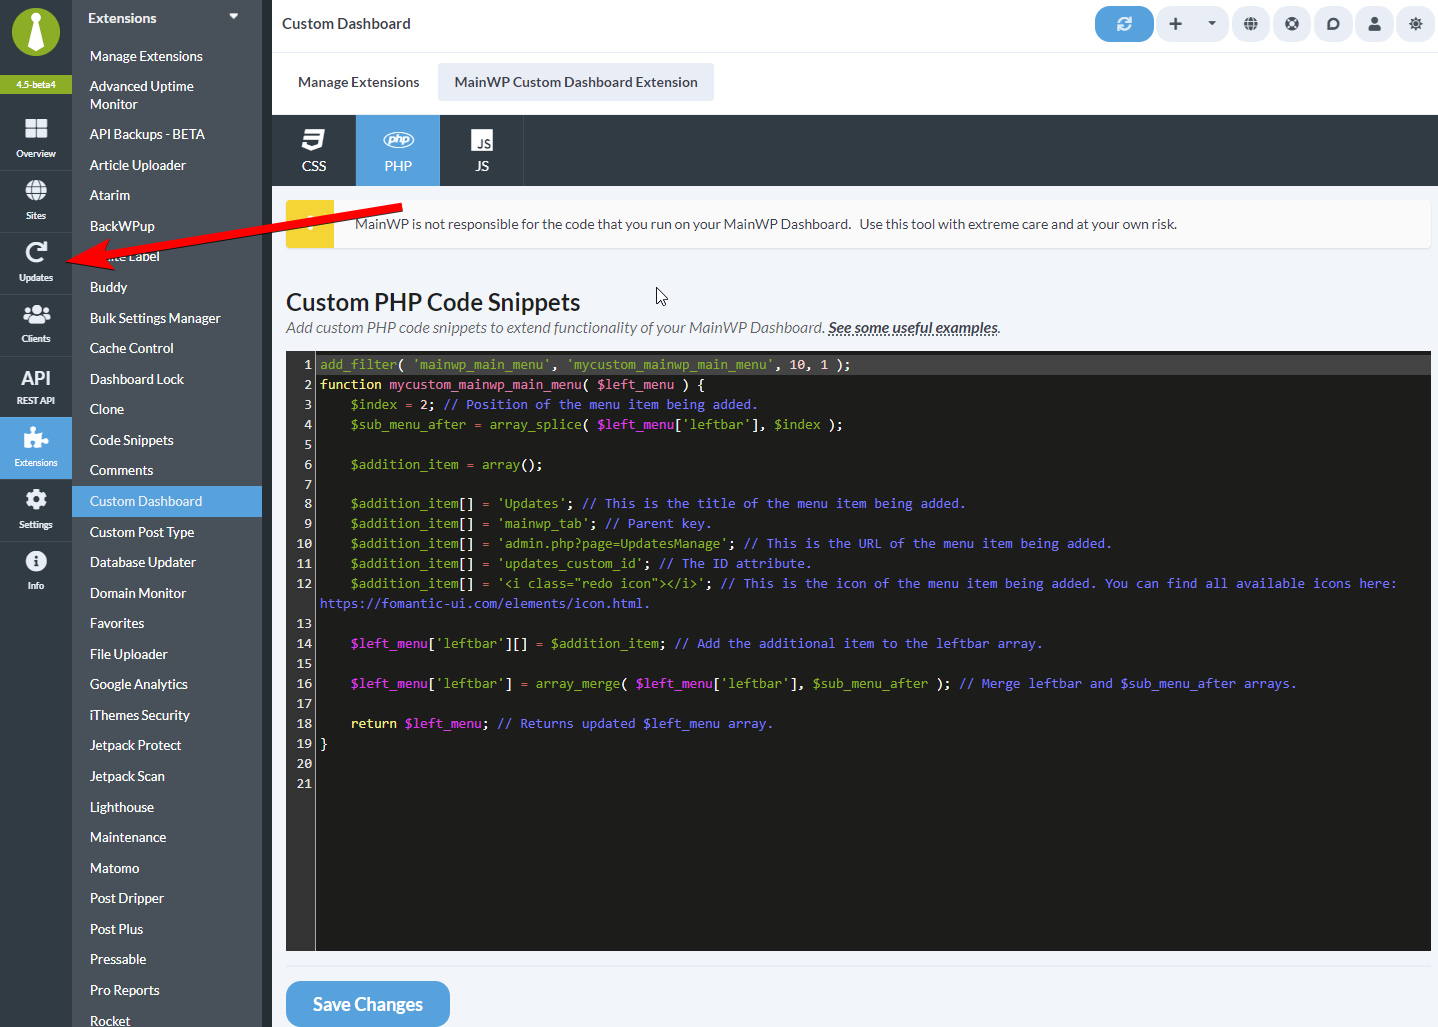
Change position (optional)
Modify the
$index value to control where the menu item appears:0= First position1= Second position2= Third position
Add an Icon
To add an icon, pass the full icon HTML from the Fomantic UI icon library:'<i class="home icon"></i>'- Home icon'<i class="cog icon"></i>'- Settings gear'<i class="chart bar icon"></i>'- Bar chart'<i class="user icon"></i>'- User icon'<i class="envelope icon"></i>'- Email icon
If you use only the class name, such as
chart bar, MainWP renders it as plain text instead of an icon.Self-Check Checklist
- Custom Dashboard extension installed
- PHP code added to PHP tab
- Menu title and URL customized
- Position index set correctly
- Changes saved
- New menu entry visible in navigation
Related Resources
- Custom Dashboard Extension - Extension documentation
- Add WP Admin Button - Add admin link to navigation
- Change Default Page After Login - Customize landing page