
What You’ll Accomplish
After following this guide, you will be able to:- Connect single or multiple WordPress sites to your Dashboard
- Import sites in bulk using CSV files
- Synchronize site data between Dashboard and child sites
- Edit site settings and manage tags
- Run security scans and fix detected issues
- Configure site health monitoring
Prerequisites
- MainWP Dashboard plugin installed and activated on your Dashboard site
- MainWP Child plugin installed and activated on each site you want to connect
- Administrator access to both Dashboard and child sites
- Valid SSL certificates recommended for secure connections
Connect Sites to Your Dashboard
Connect a Single Site
After installing the MainWP Child plugin on your website, add it to your Dashboard.Open Add New Site
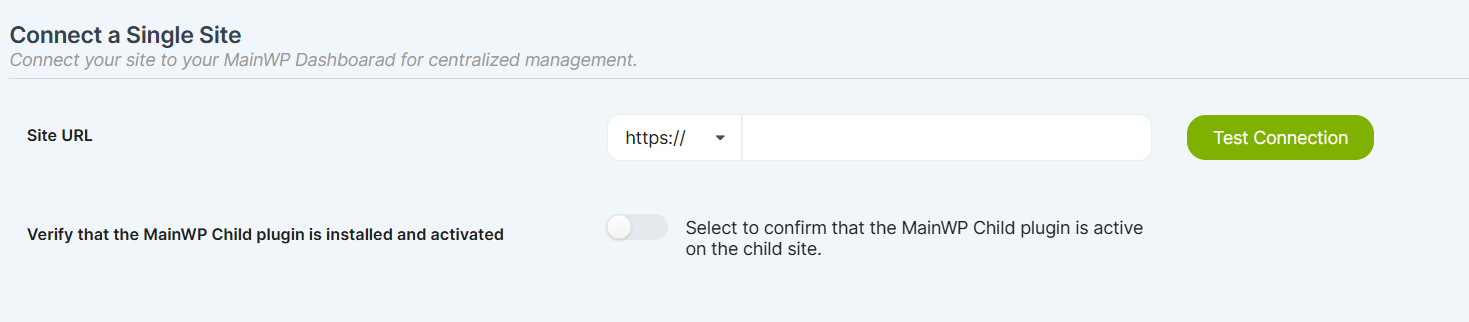
Enter site details
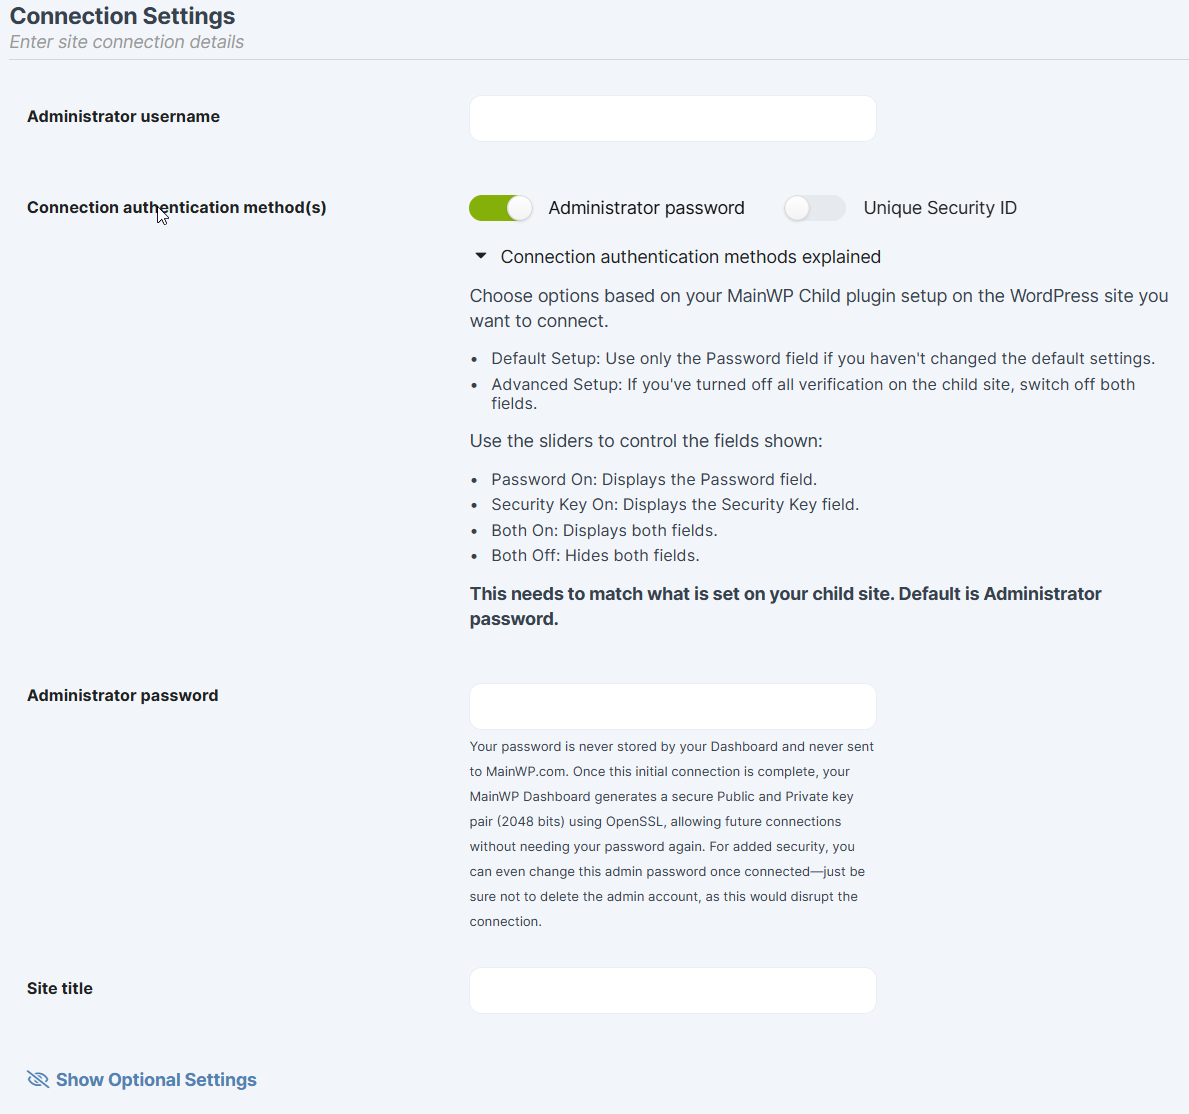
Configure authentication
your-child-site.com/wp-admin/options-general.php?page=mainwp_child_tab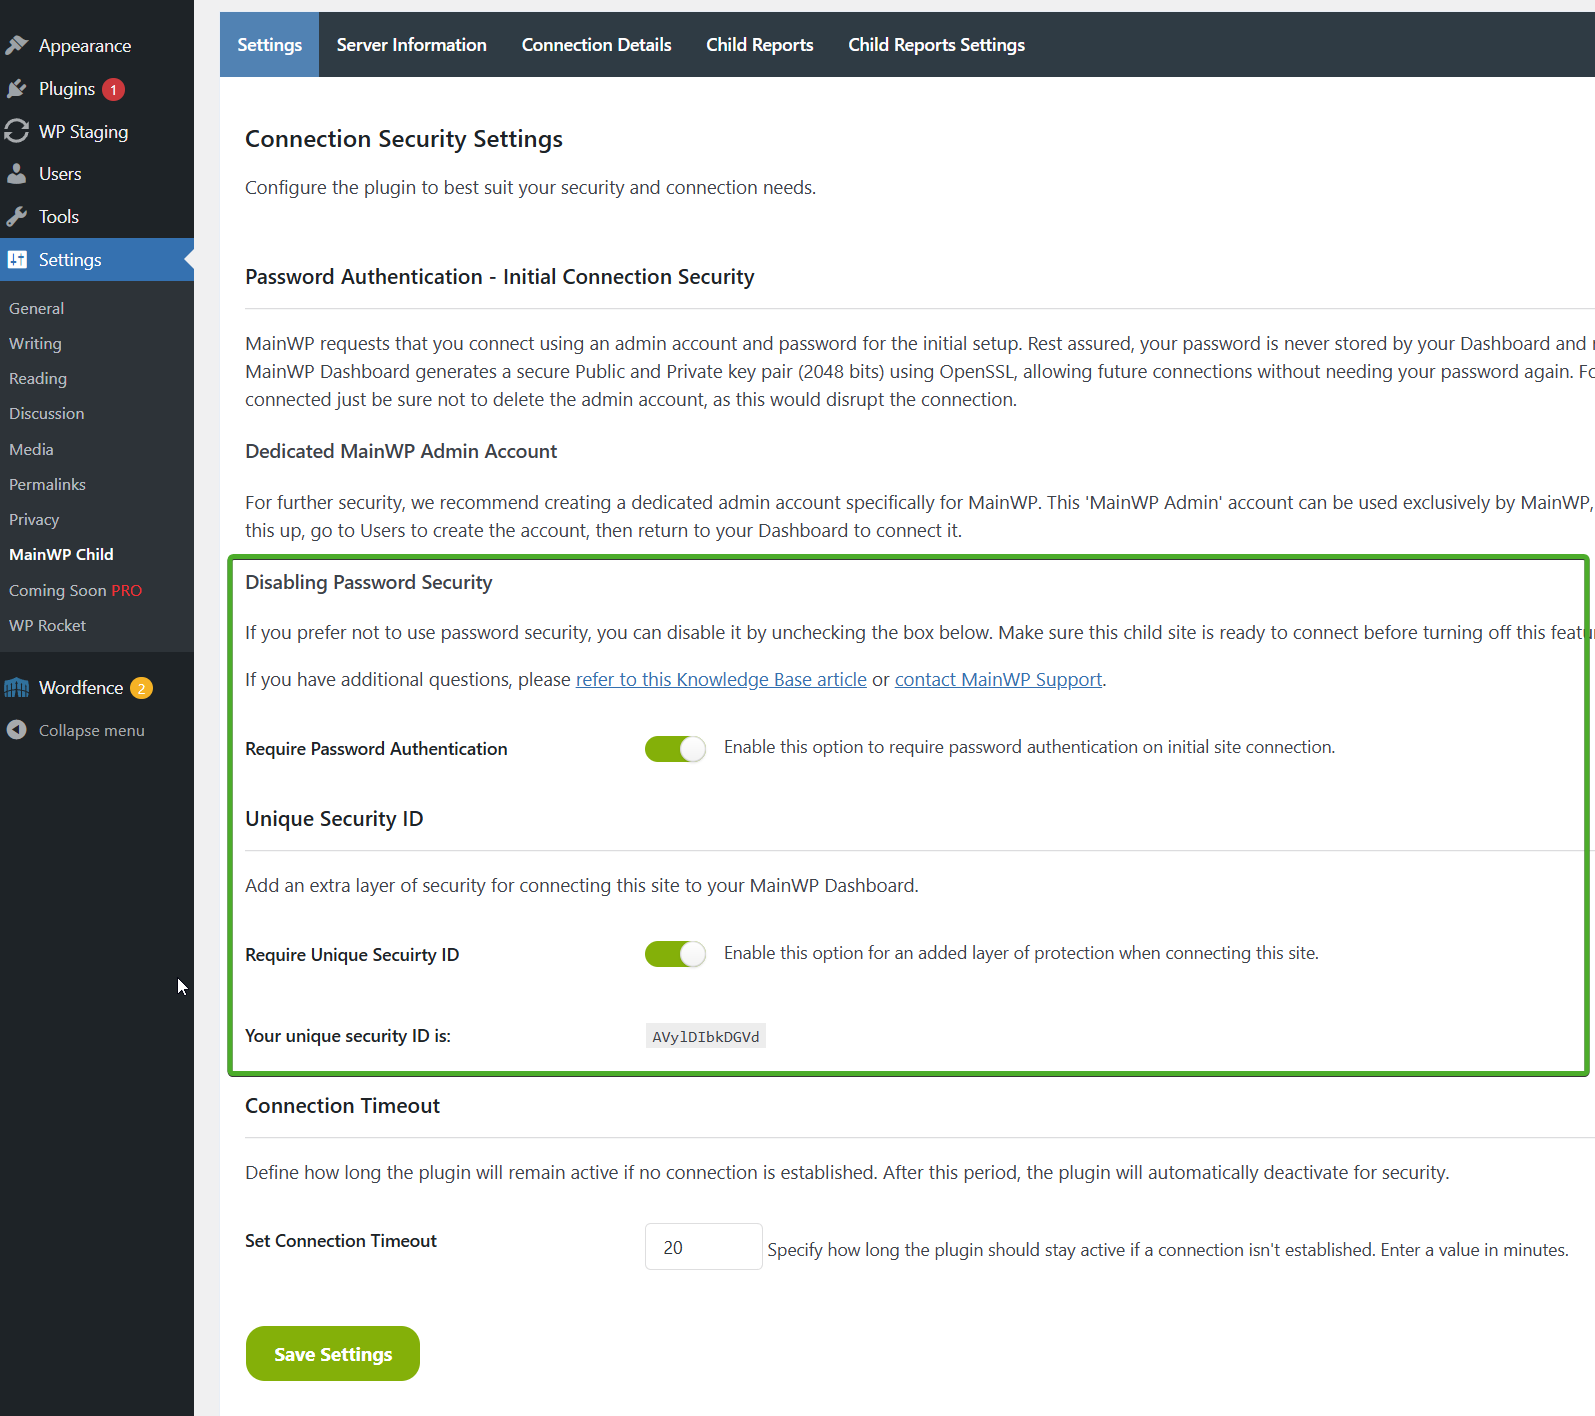
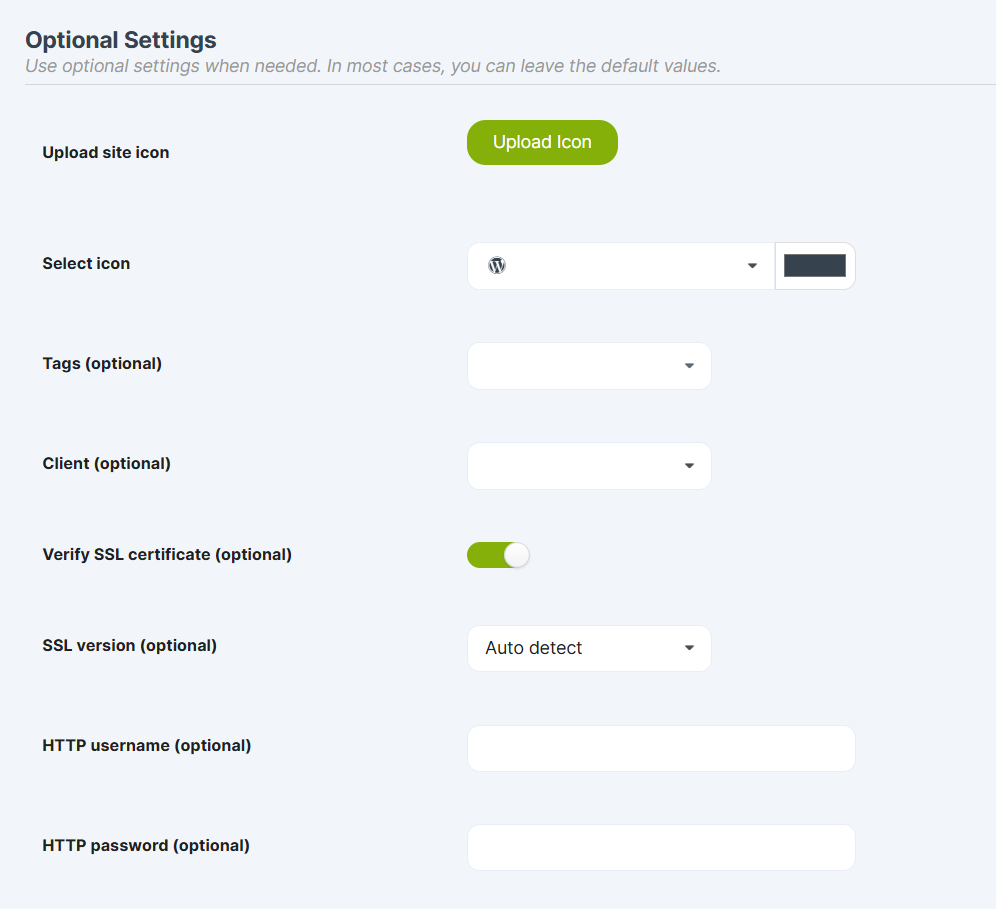
Configure optional settings
Add the site
Add-on Settings Synchronization
For installed MainWP Add-ons that support settings synchronization, the available options depend on the add-on:Connect Multiple Sites
Add several sites simultaneously using the Multiple Sites table. Prerequisite: Install and activate MainWP Child plugin on each site before connecting.Open Multiple Sites tab
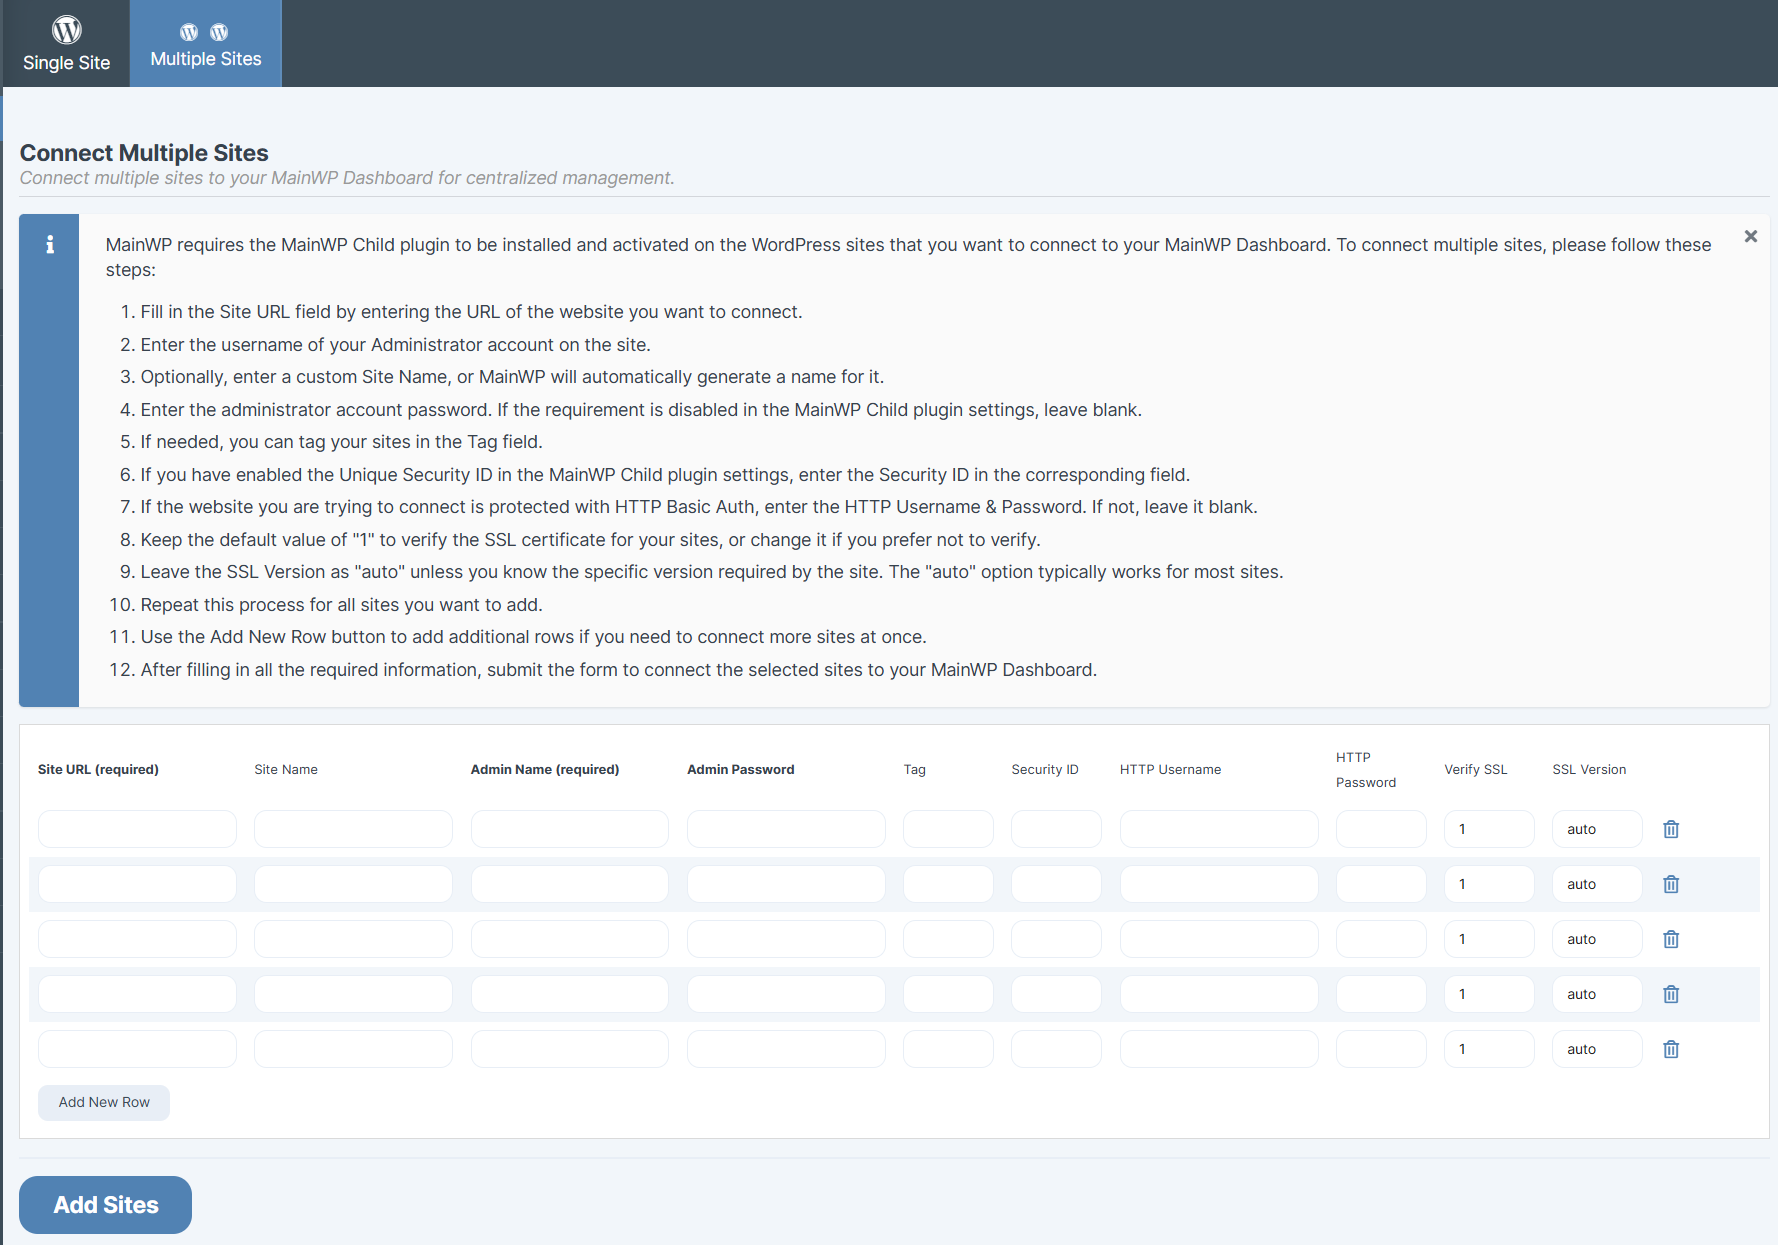
Enter required fields
Configure optional fields
Add rows and connect
Import Sites (CSV Import)
Prepare sites
Download sample CSV
Edit the CSV
Format entries
str_getcsv() and maps the fifth column (wpgroups) into the import payload, so anything you place in that column becomes the raw tag list for a site. When the importer creates a site, it splits that tag list with preg_split('/[;,]/', $params['groupnames_import']), which means commas and semicolons are treated as tag separators. Because the CSV itself is comma-delimited, the simplest way to import multiple tags is to separate them with semicolons (for example, Tag A;Tag B;Tag C).Upload and import
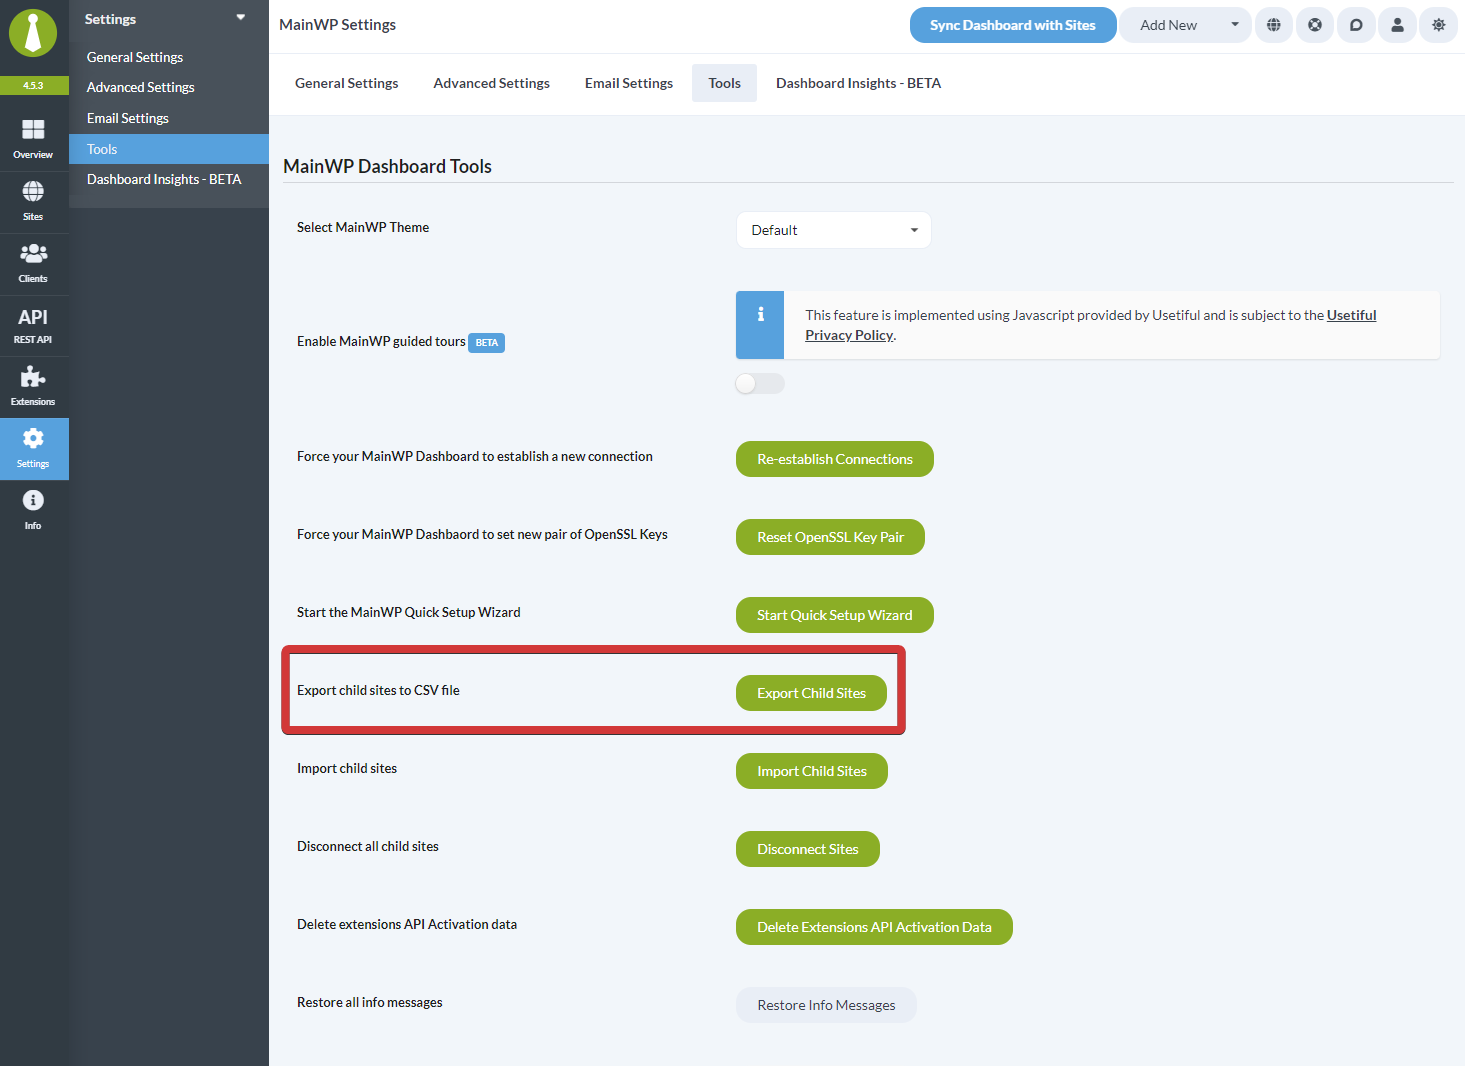
Export Sites
Open Tools
Export
Synchronize a Child Site
Regular synchronization keeps your Dashboard current with child site data.Global Synchronization
Open MainWP > Sites > Manage Sites and click Sync in the header. On an individual site page, this button syncs only that site.
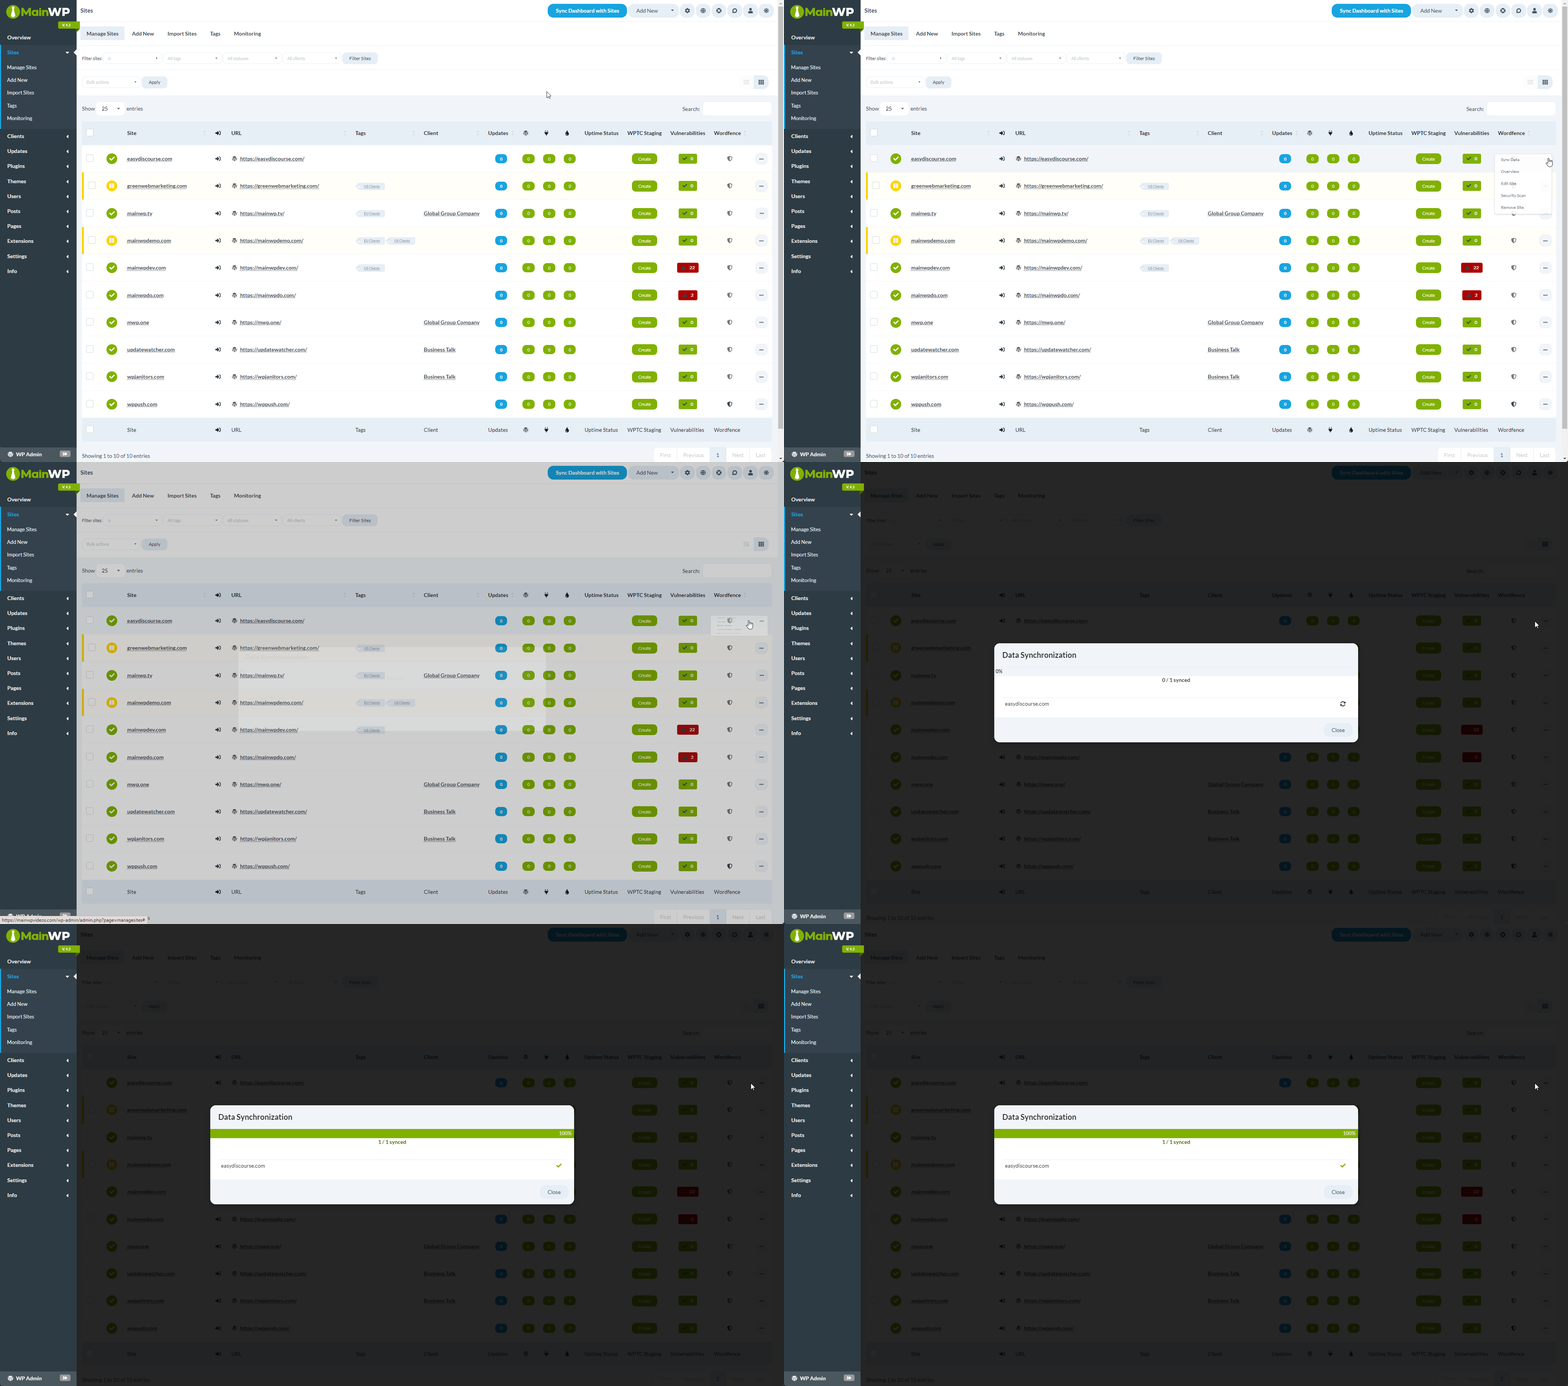
Individual Site Synchronization
Open Manage Sites
Sync the site
Child Site Cron Warnings
An individual site’s Overview can show Child site scheduled tasks have not run recently. This means the child site reported an overdue scheduled monitoring check. It concerns scheduling on that child site, and the Dashboard displays the report received during the last sync.
- Open MainWP > Sites > Manage Sites, find the site, and select Overview from its actions menu to read the warning. You can also check Settings > MainWP Child > Server Information in the child site’s WordPress admin area.
- Check the affected child’s cron configuration or ask its host to verify scheduled execution. If WordPress’s page-triggered cron is disabled, confirm that the child’s external cron job is working.
- After scheduling recovers and the child’s monitoring check runs again, use Sync Data to refresh its report in the Dashboard.
Edit Child Site Settings
Access per-site settings to update site name, administrator username, tags, and other options.Navigate to settings
General Settings
Site URL and Detected Address
Starting with MainWP Dashboard 6.2, MainWP can automatically correct supportedwww and HTTP-to-HTTPS differences using the address reported by the child site. The global Auto-correct site URLs setting is enabled by default in MainWP > Settings > Advanced Settings, under Miscellaneous Settings.
When the stored address differs from the reported address only by protocol or www, the site’s settings show The child site reports its address as: and a Use detected button. The hint is not shown for a different domain or port, or for a path-only difference.
Review the reported address
Choose Use detected
Save the settings
Lock Site URL
Lock site URL is disabled by default. Enable it when you deliberately need MainWP to keep using a particular address, such as an alternate address required by your hosting setup.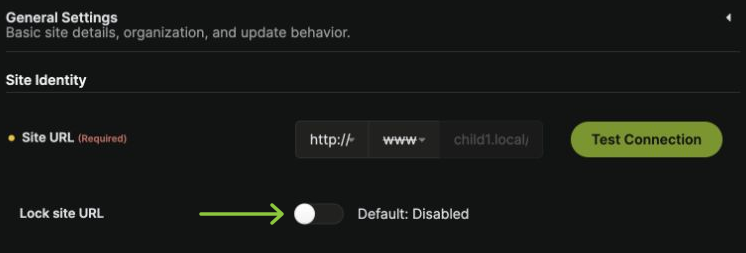
www variant. You can still change the URL manually.
If you manually change the URL to differ from the address reported by the child site, MainWP enables the lock automatically when you save. Saving an unrelated setting does not enable it. To allow automatic URL handling again, turn off Lock site URL and click Save Settings.
Advanced Options
Suspend or Unsuspend a Child Site
When a site is suspended, it stays connected in MainWP Dashboard, but MainWP pauses actions for that site without disconnecting it.- Suspended sites are excluded from sync and update operations.
- Suspended sites show the yellow pause icon in MainWP Dashboard.
- Suspended sites can be filtered with the Suspended status filter in Manage Sites.
- Unsuspending a site returns it to normal MainWP operations.
Suspend or Unsuspend a Single Site
Open site settings
Change the suspension status
Suspend or Unsuspend Multiple Sites
Select sites
Apply the bulk action
Access Child Site WP Admin
MainWP provides one-click access to child site admin areas.Navigate to Manage Sites
Access admin
Security Issues
MainWP scans child sites for known security issues and provides tools to fix them.Detected Security Issues
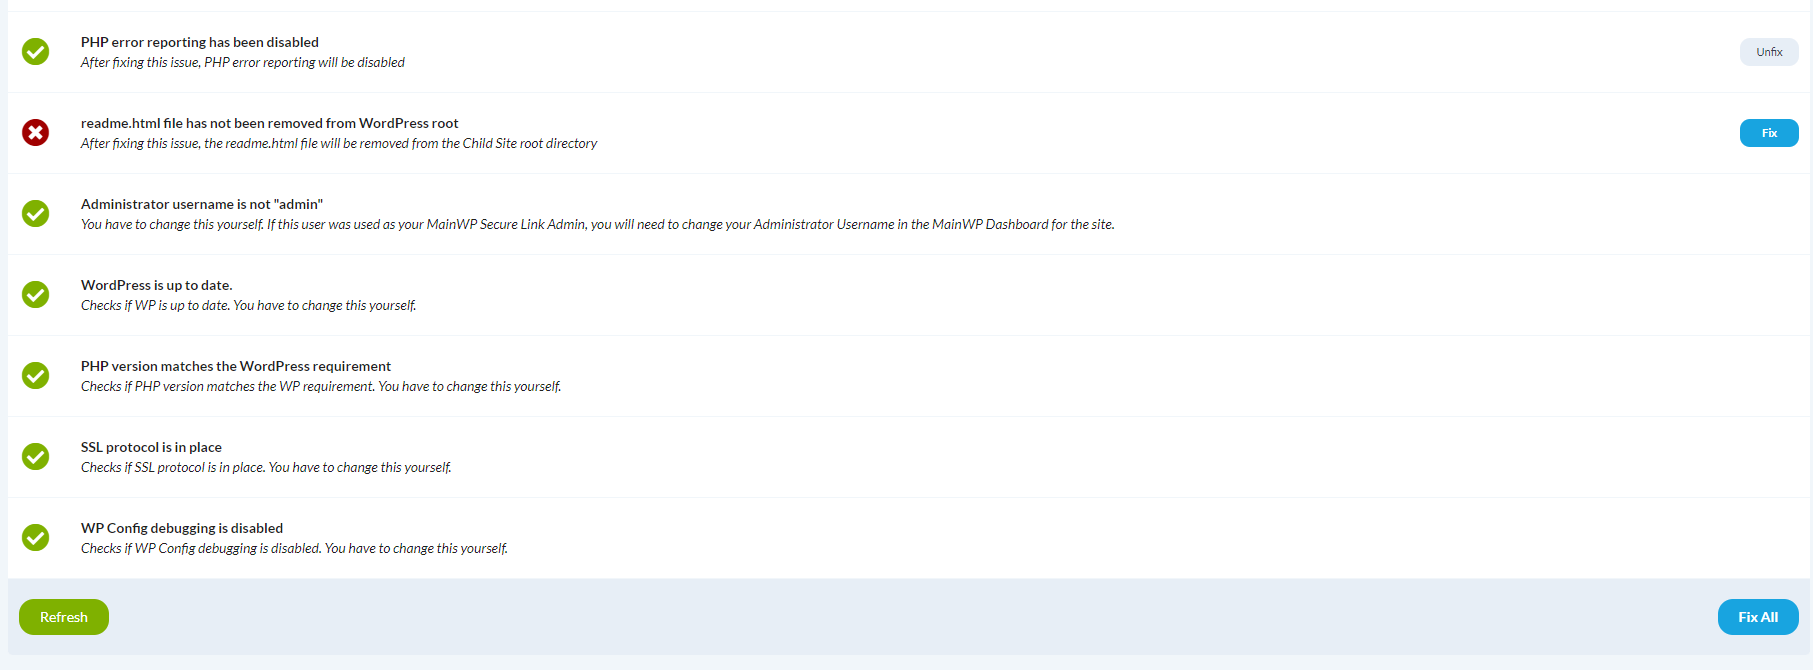
Site Hardening Scan
Navigate to Manage Sites
Open Site Hardening
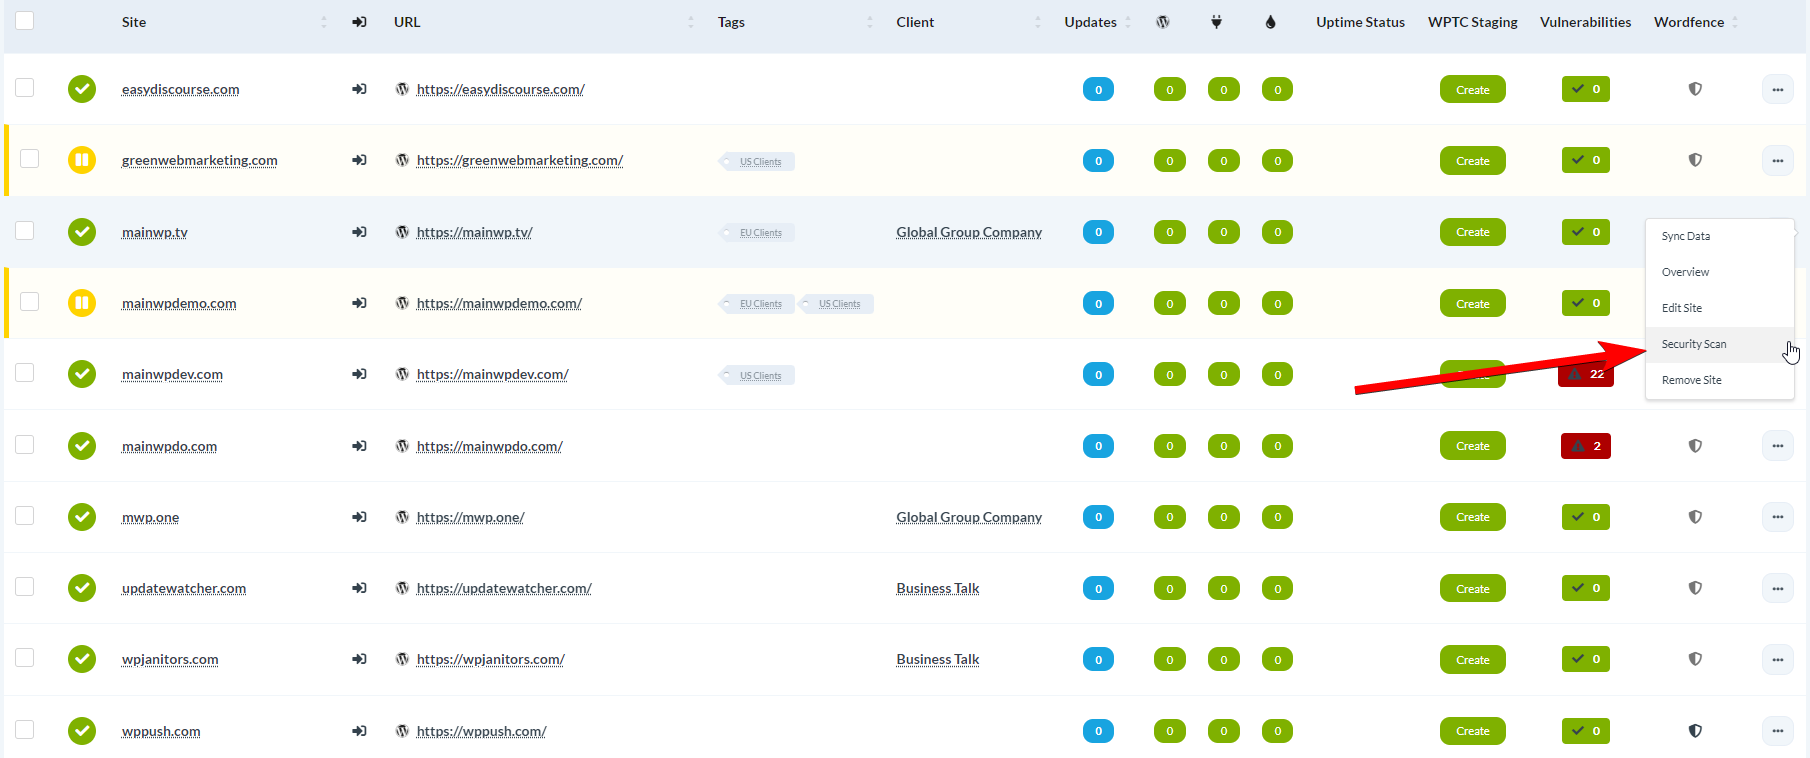
Scan site
Review and act
Reconnect a Child Site
Single Site Reconnection
Navigate to Manage Sites
Reconnect
Bulk Reconnection
Select sites
Reconnect
Delete a Child Site
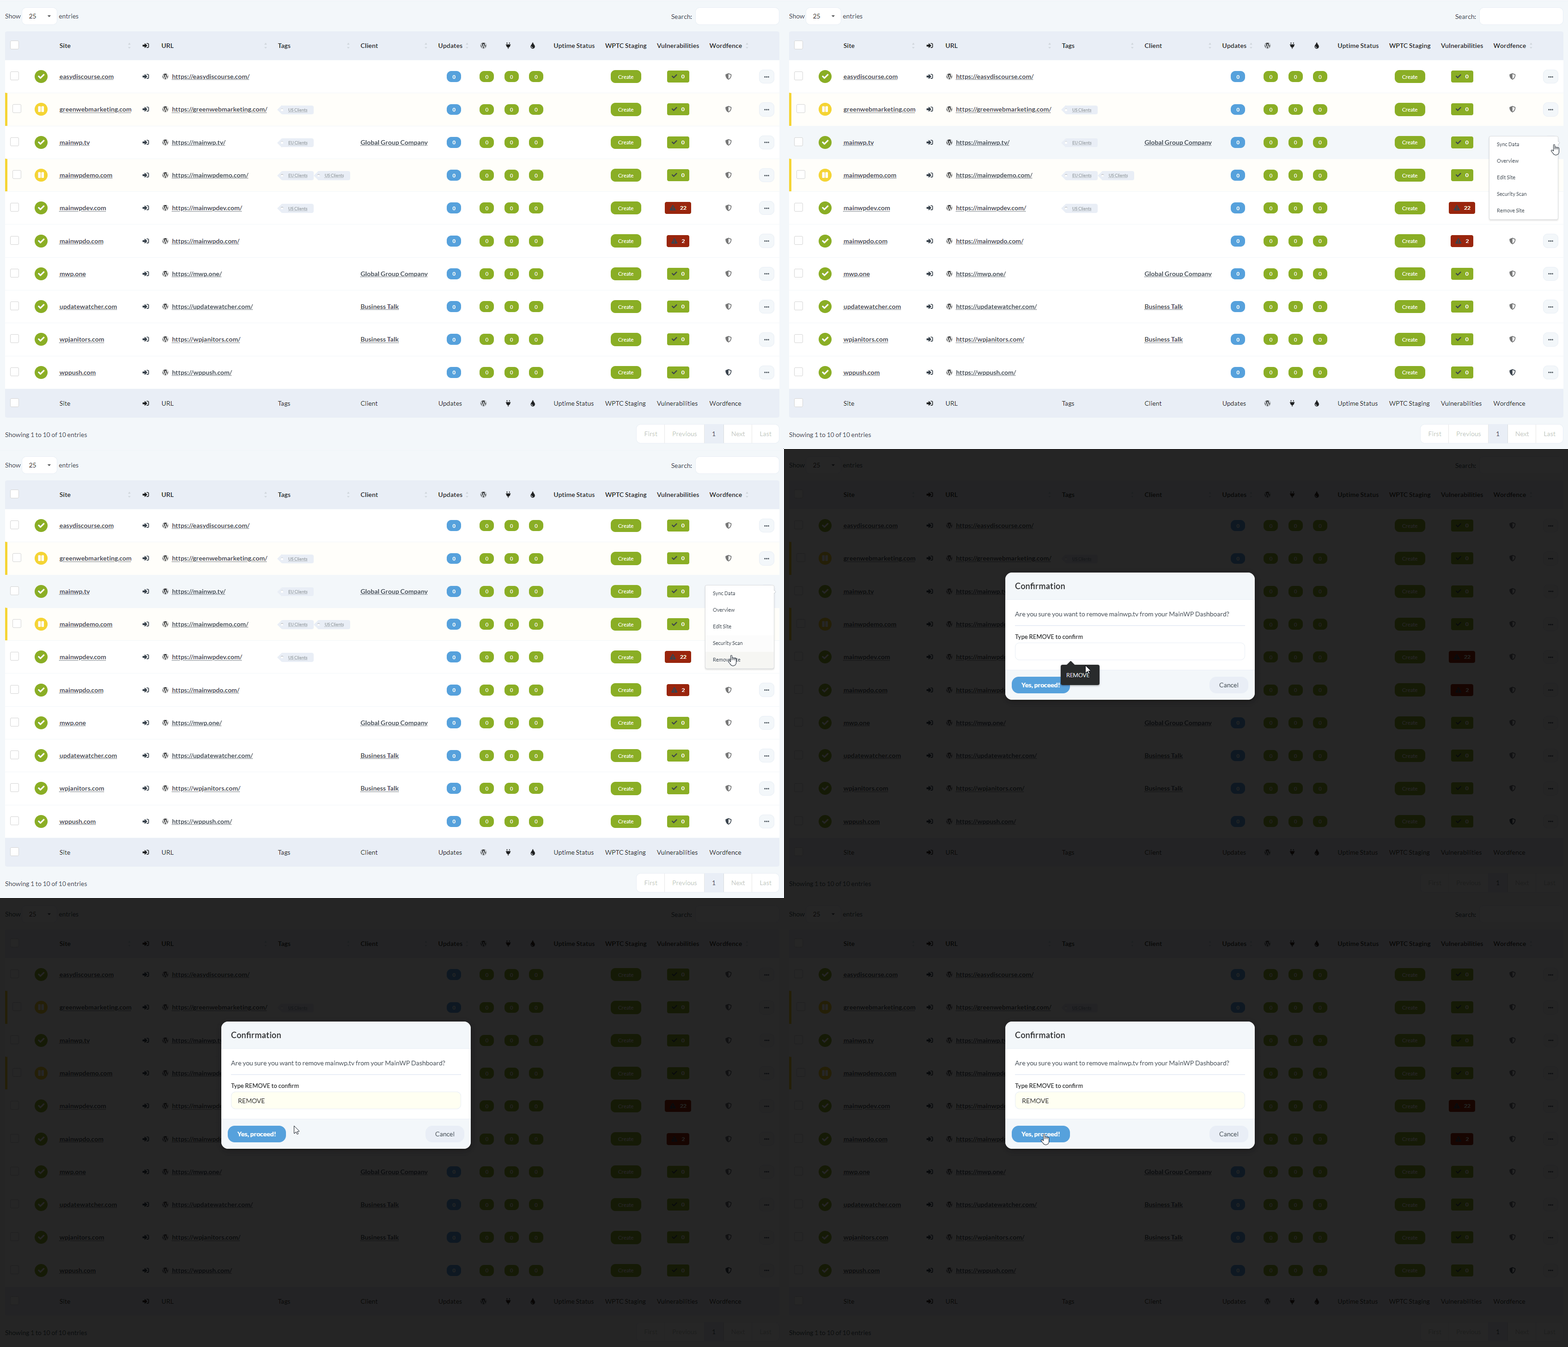
Delete Single Site
Navigate to Manage Sites
Remove site
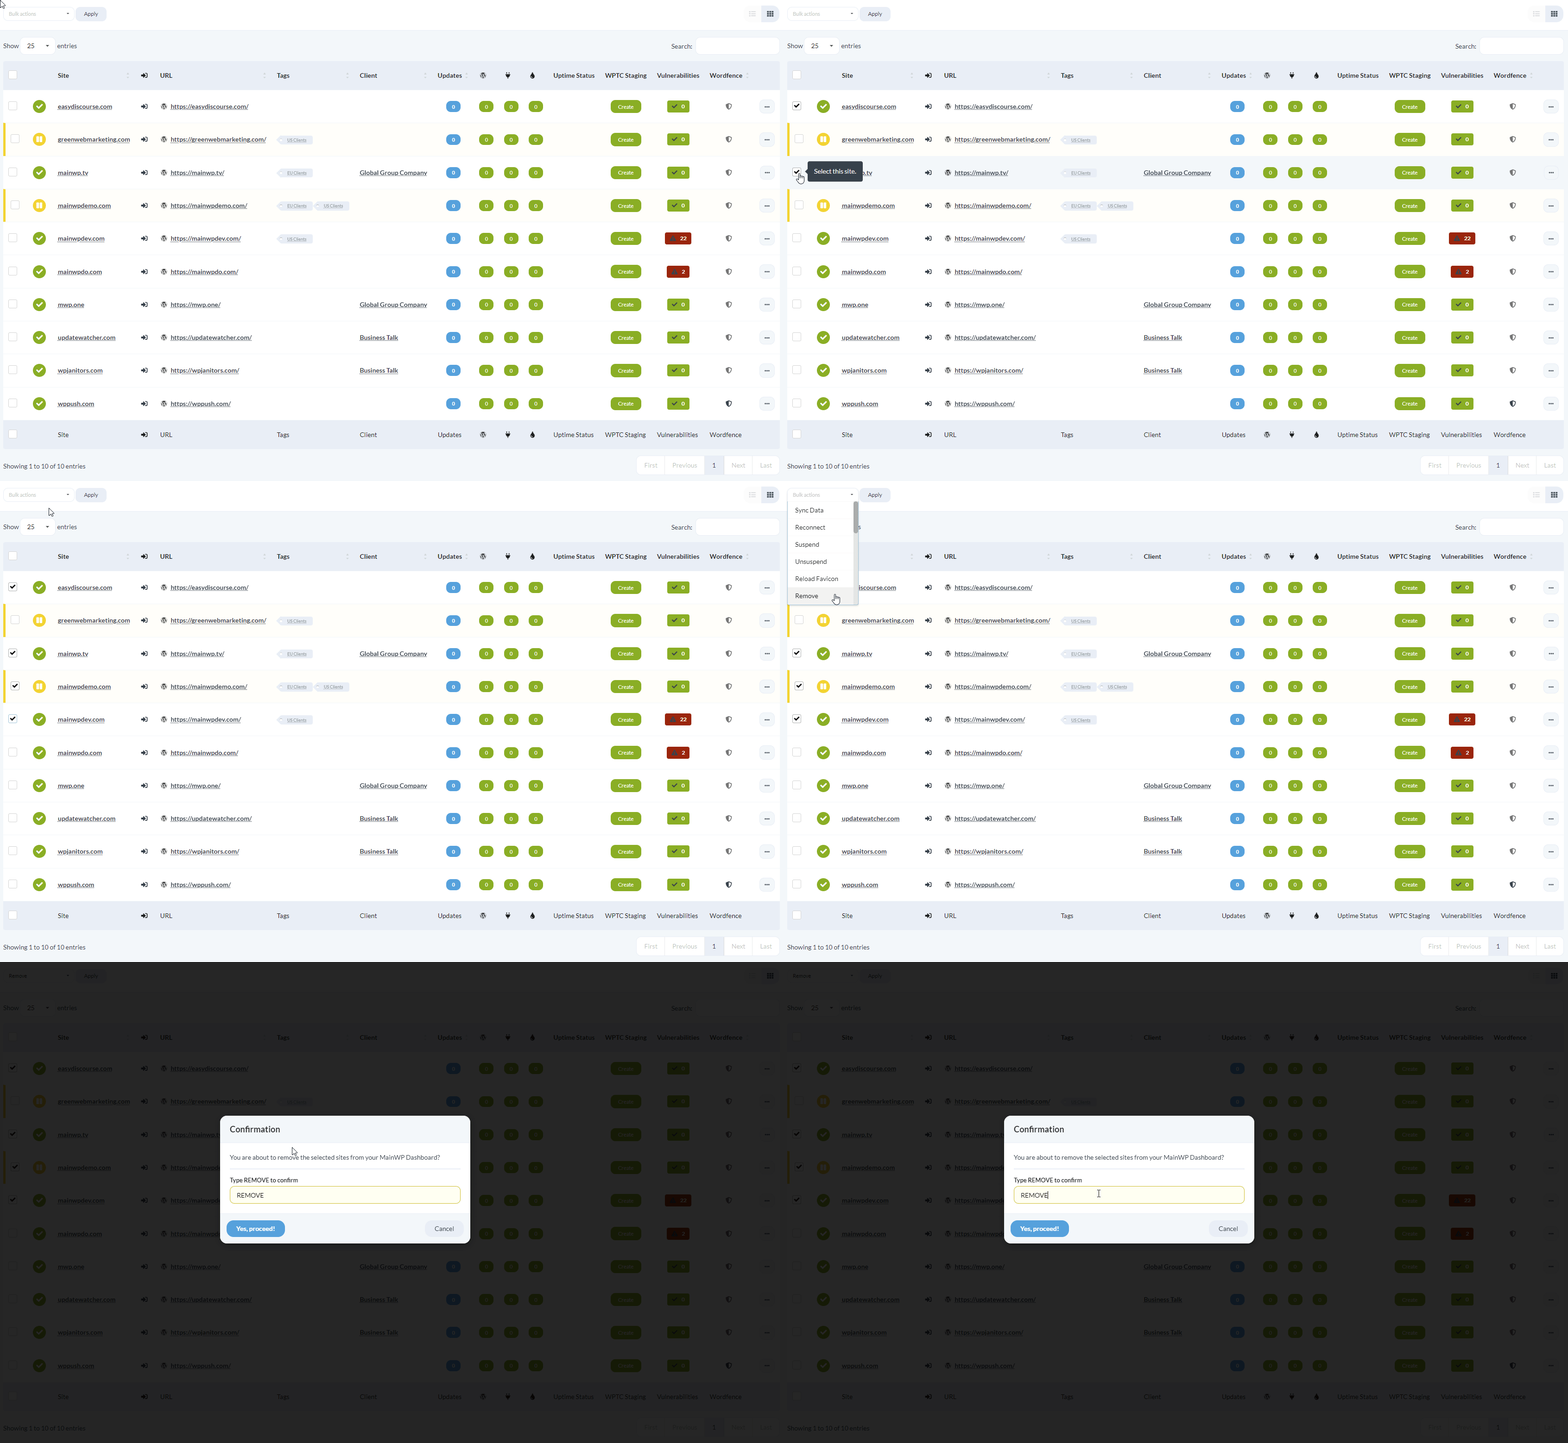
Delete Multiple Sites
Select sites
Remove sites
Manage Child Site Notes
Create a Note
Open notes
Add note
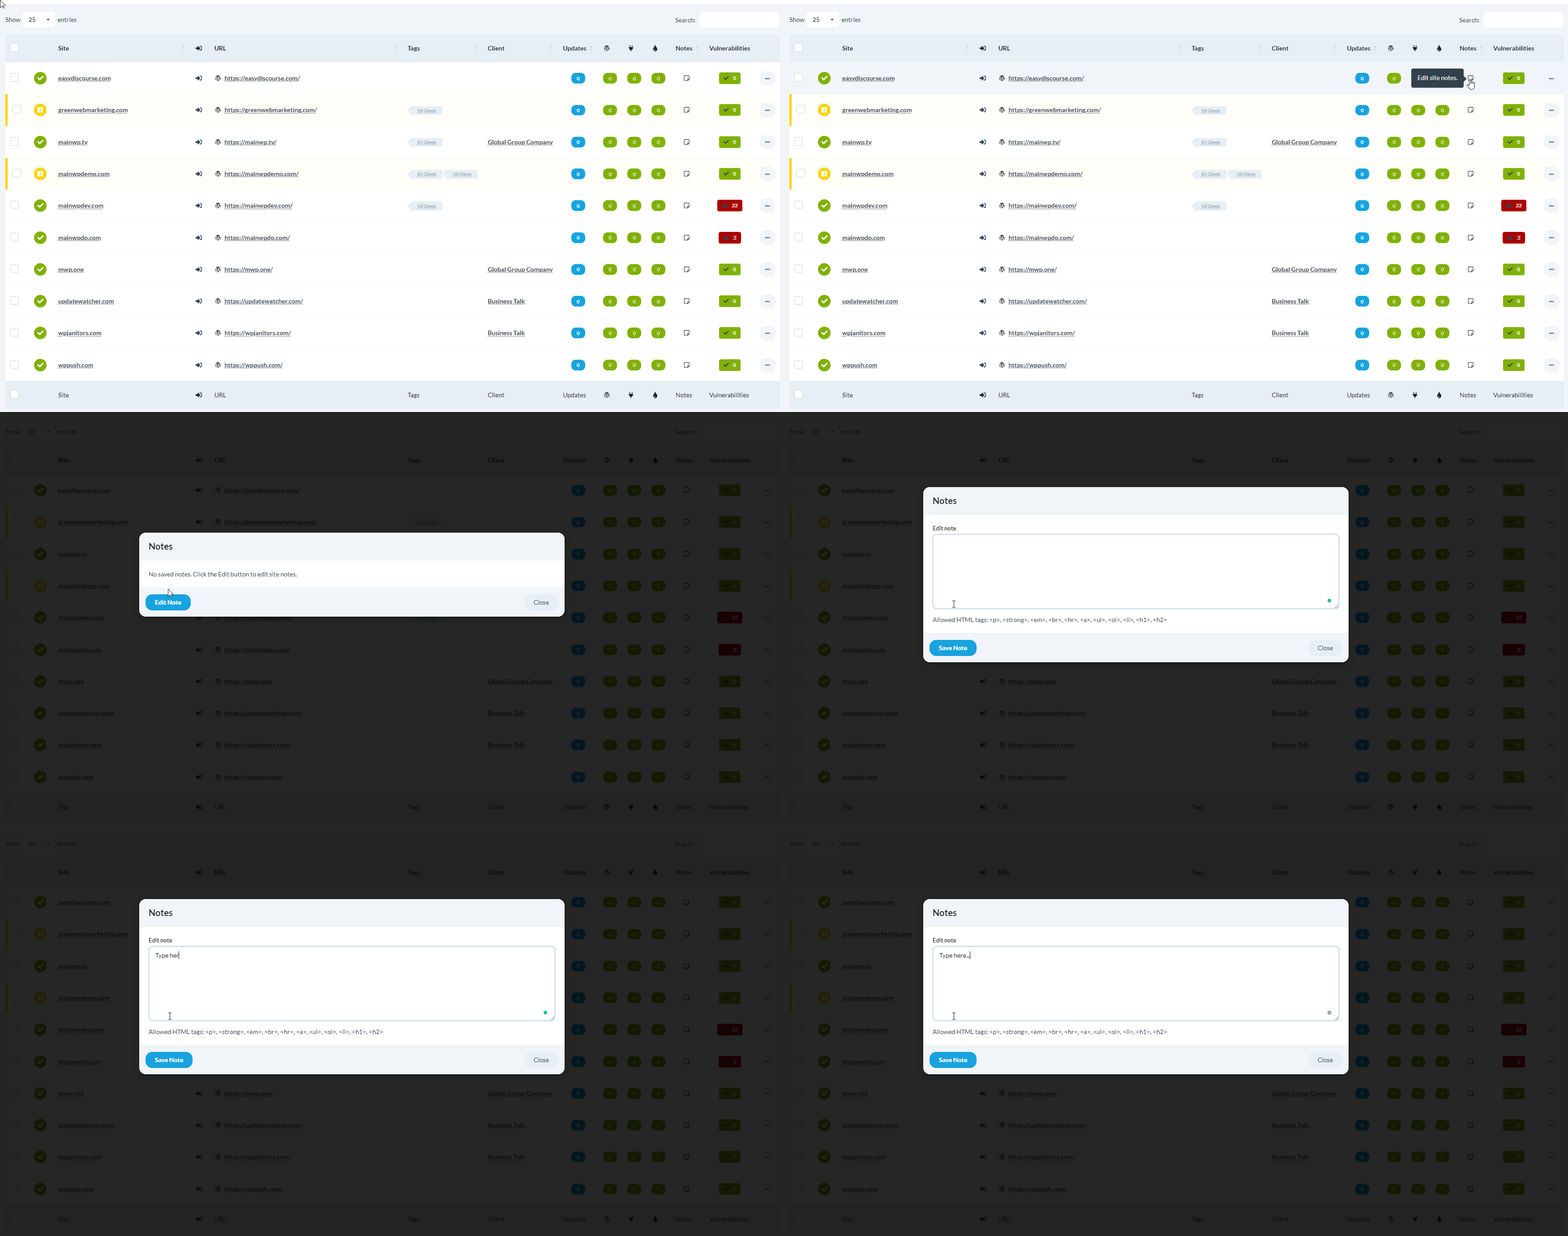
View Notes
View notes through the Notes column or the Notes widget on the Individual Child Site Dashboard.Manage Child Site Tags
Filter the Manage Sites Table
Use the filter row on Manage Sites to narrow results by tags, statuses, and clients.
Open filters
Set filter criteria
Apply or reset
Create a Tag
Open Tags page
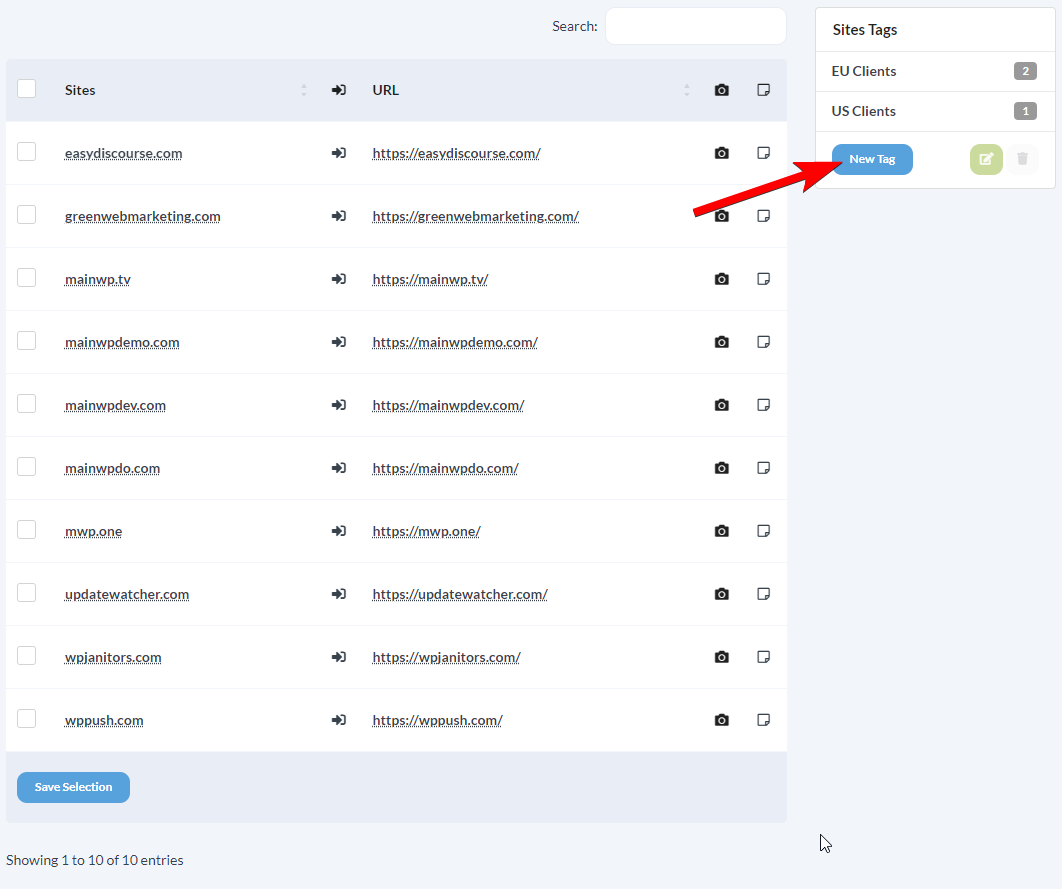
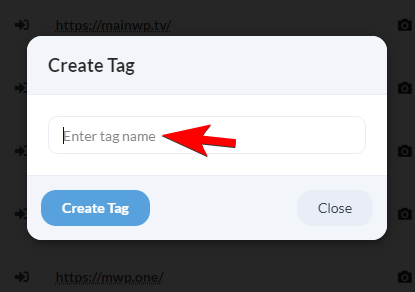
Name the tag
Assign sites
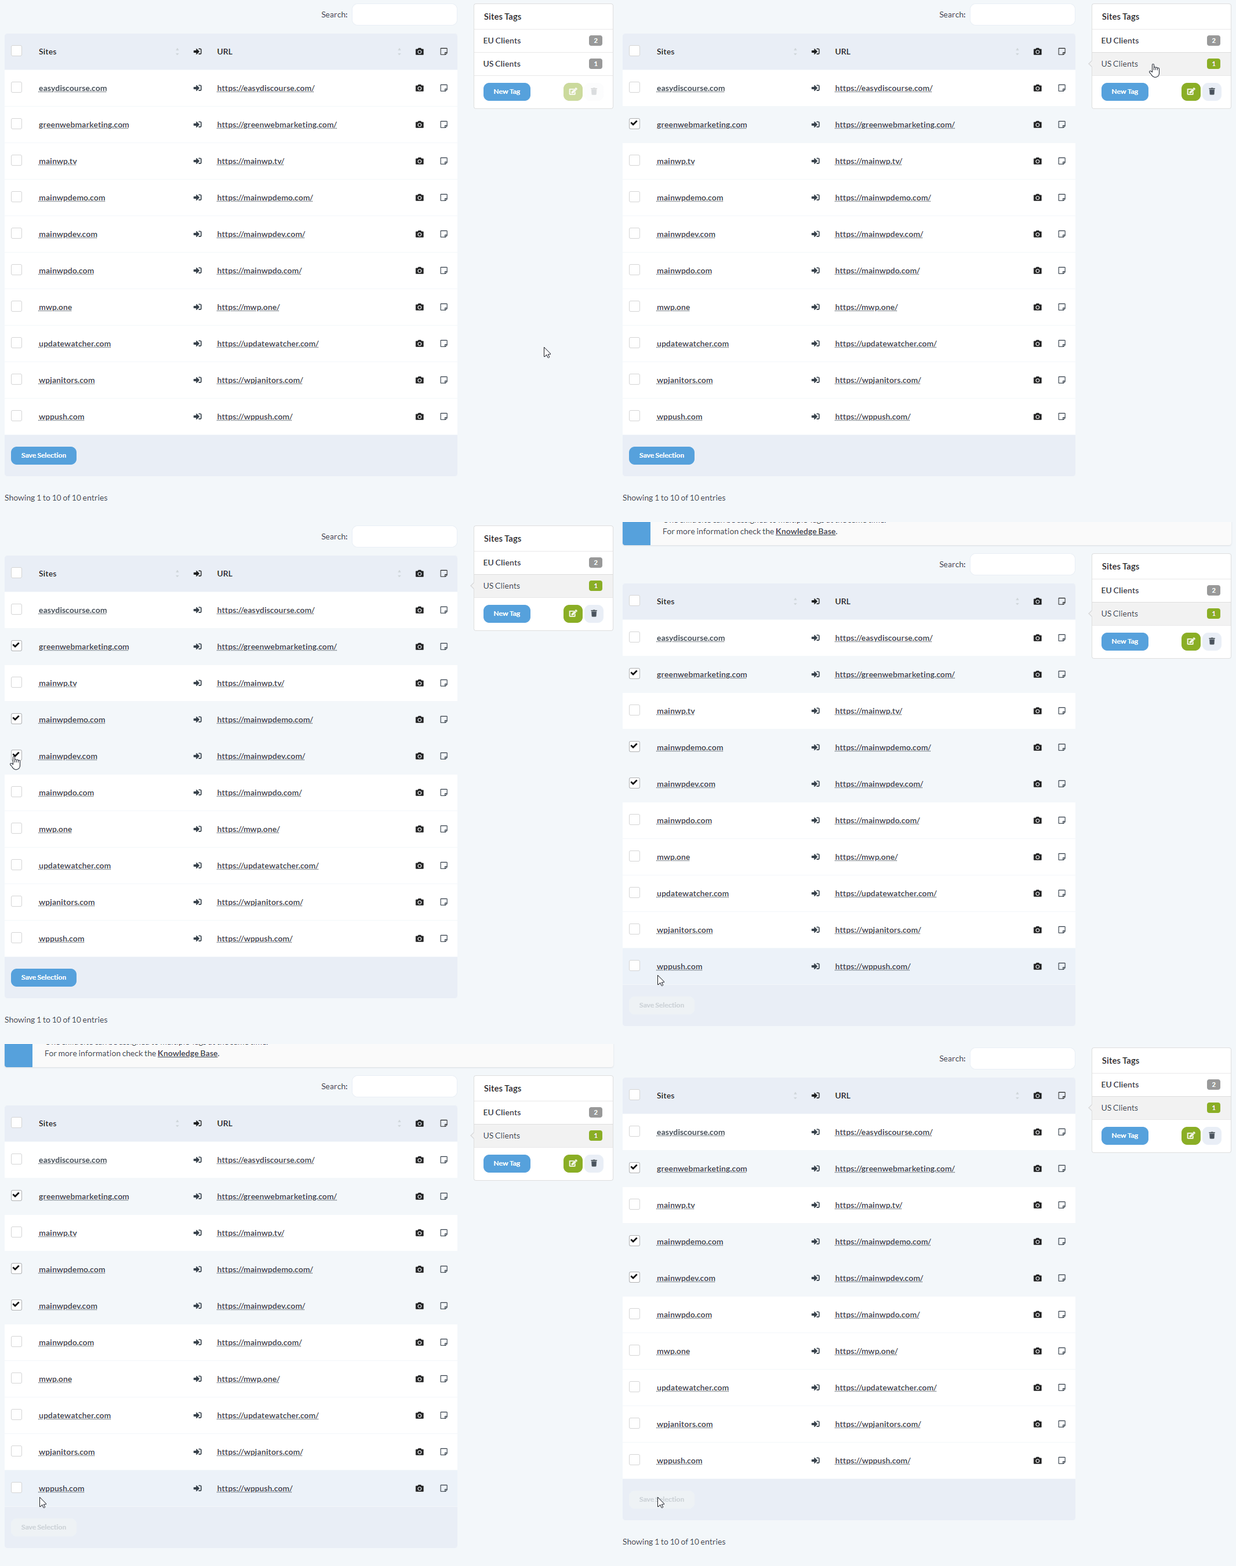
Edit a Tag
Go to MainWP > Sites > Tags > Manage Tags, click the tag name, add or remove sites, and click Save Selection.Delete a Tag
Go to MainWP > Sites > Tags > Manage Tags, select the tag, and click the Trash icon below the tag list.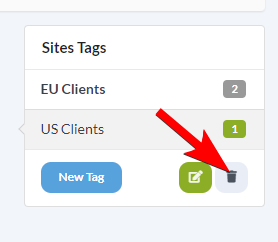
Site Health Monitoring
WordPress Site Health checks security and performance. MainWP monitors child site health status and alerts you when sites need attention.Common Problems and Fixes
Self-Check Checklist
After working through this guide, confirm:- Sites appear in the Manage Sites table with green status indicators
- Sync completes without errors
- You can access child site WP Admin via the Login icon
- Manage Sites filtering works for tags, statuses, and clients
- Multi-tag filtering works with both Match any (OR) and Match all (AND)
- Security scan runs and shows results
- Site Health monitoring is enabled if needed (Uptime Monitoring)
Related Resources
- MainWP User Interface: Tables - Learn common table controls used across MainWP pages
- MainWP Dashboard Settings - Configure global dashboard settings
- Uptime Monitoring - Configure Monitoring Settings (Uptime + Site Health)
- Potential Issues - Troubleshoot common connection problems
- Connection Security - Learn about MainWP’s security model