> ## Documentation Index
> Fetch the complete documentation index at: https://docs.mainwp.com/llms.txt
> Use this file to discover all available pages before exploring further.
# Getting started with MainWP
> Learn how to install and configure MainWP Dashboard and Child plugins to manage multiple WordPress sites.
[← Part 1: MainWP Introduction](/getting-started/mainwp-introduction)
[Part 3: MainWP User Interface →](/getting-started/mainwp-user-interface)
MainWP requires two components:
* **MainWP Dashboard** - Install on a dedicated WordPress site that controls all other sites
* **MainWP Child** - Install on each WordPress site you want to manage
Install MainWP Dashboard on a clean WordPress installation rather than an operating site. This eliminates plugin conflicts.
MainWP Dashboard has no site limit. Check the [System Requirements](/advanced/miscellaneous/mainwp-system-requirements) to verify your server can handle your planned number of child sites.
## Prerequisites
Before starting, confirm you have:
* A dedicated WordPress site for the MainWP Dashboard (not an existing production site)
* Administrator access to the Dashboard site
* Administrator access to each child site you want to manage
* MainWP Child plugin ready to install on child sites
## Install MainWP Dashboard
Go to **WP Admin > Plugins** on your WordPress site dedicated to hosting MainWP Dashboard.
Click **Add New**.
Enter "MainWP" in the search field and press Enter.
Find **MainWP Dashboard** in the results and click **Install Now**.
Click **Activate** once installation completes.
## Manual Installation
Download the [MainWP Dashboard](https://wordpress.org/plugins/mainwp) plugin.
If downloaded as a zip, extract the plugin folder.
Upload the plugin folder to `wp-content/plugins/` on your Dashboard site.
Go to **WP Admin > Plugins** and activate MainWP Dashboard.
## Quick Setup Wizard
The Quick Setup Wizard launches after a new MainWP Dashboard installation. It guides you through this sequence:
1. Welcome
2. Introduction
3. System Check
4. Add Site
5. Add Client
6. Monitoring
7. Setup Complete
You can skip from the Welcome step using **Skip the Setup Wizard**, and start it again later from **MainWP > Settings > Tools** using **Start Quick Setup Wizard**.
### Welcome
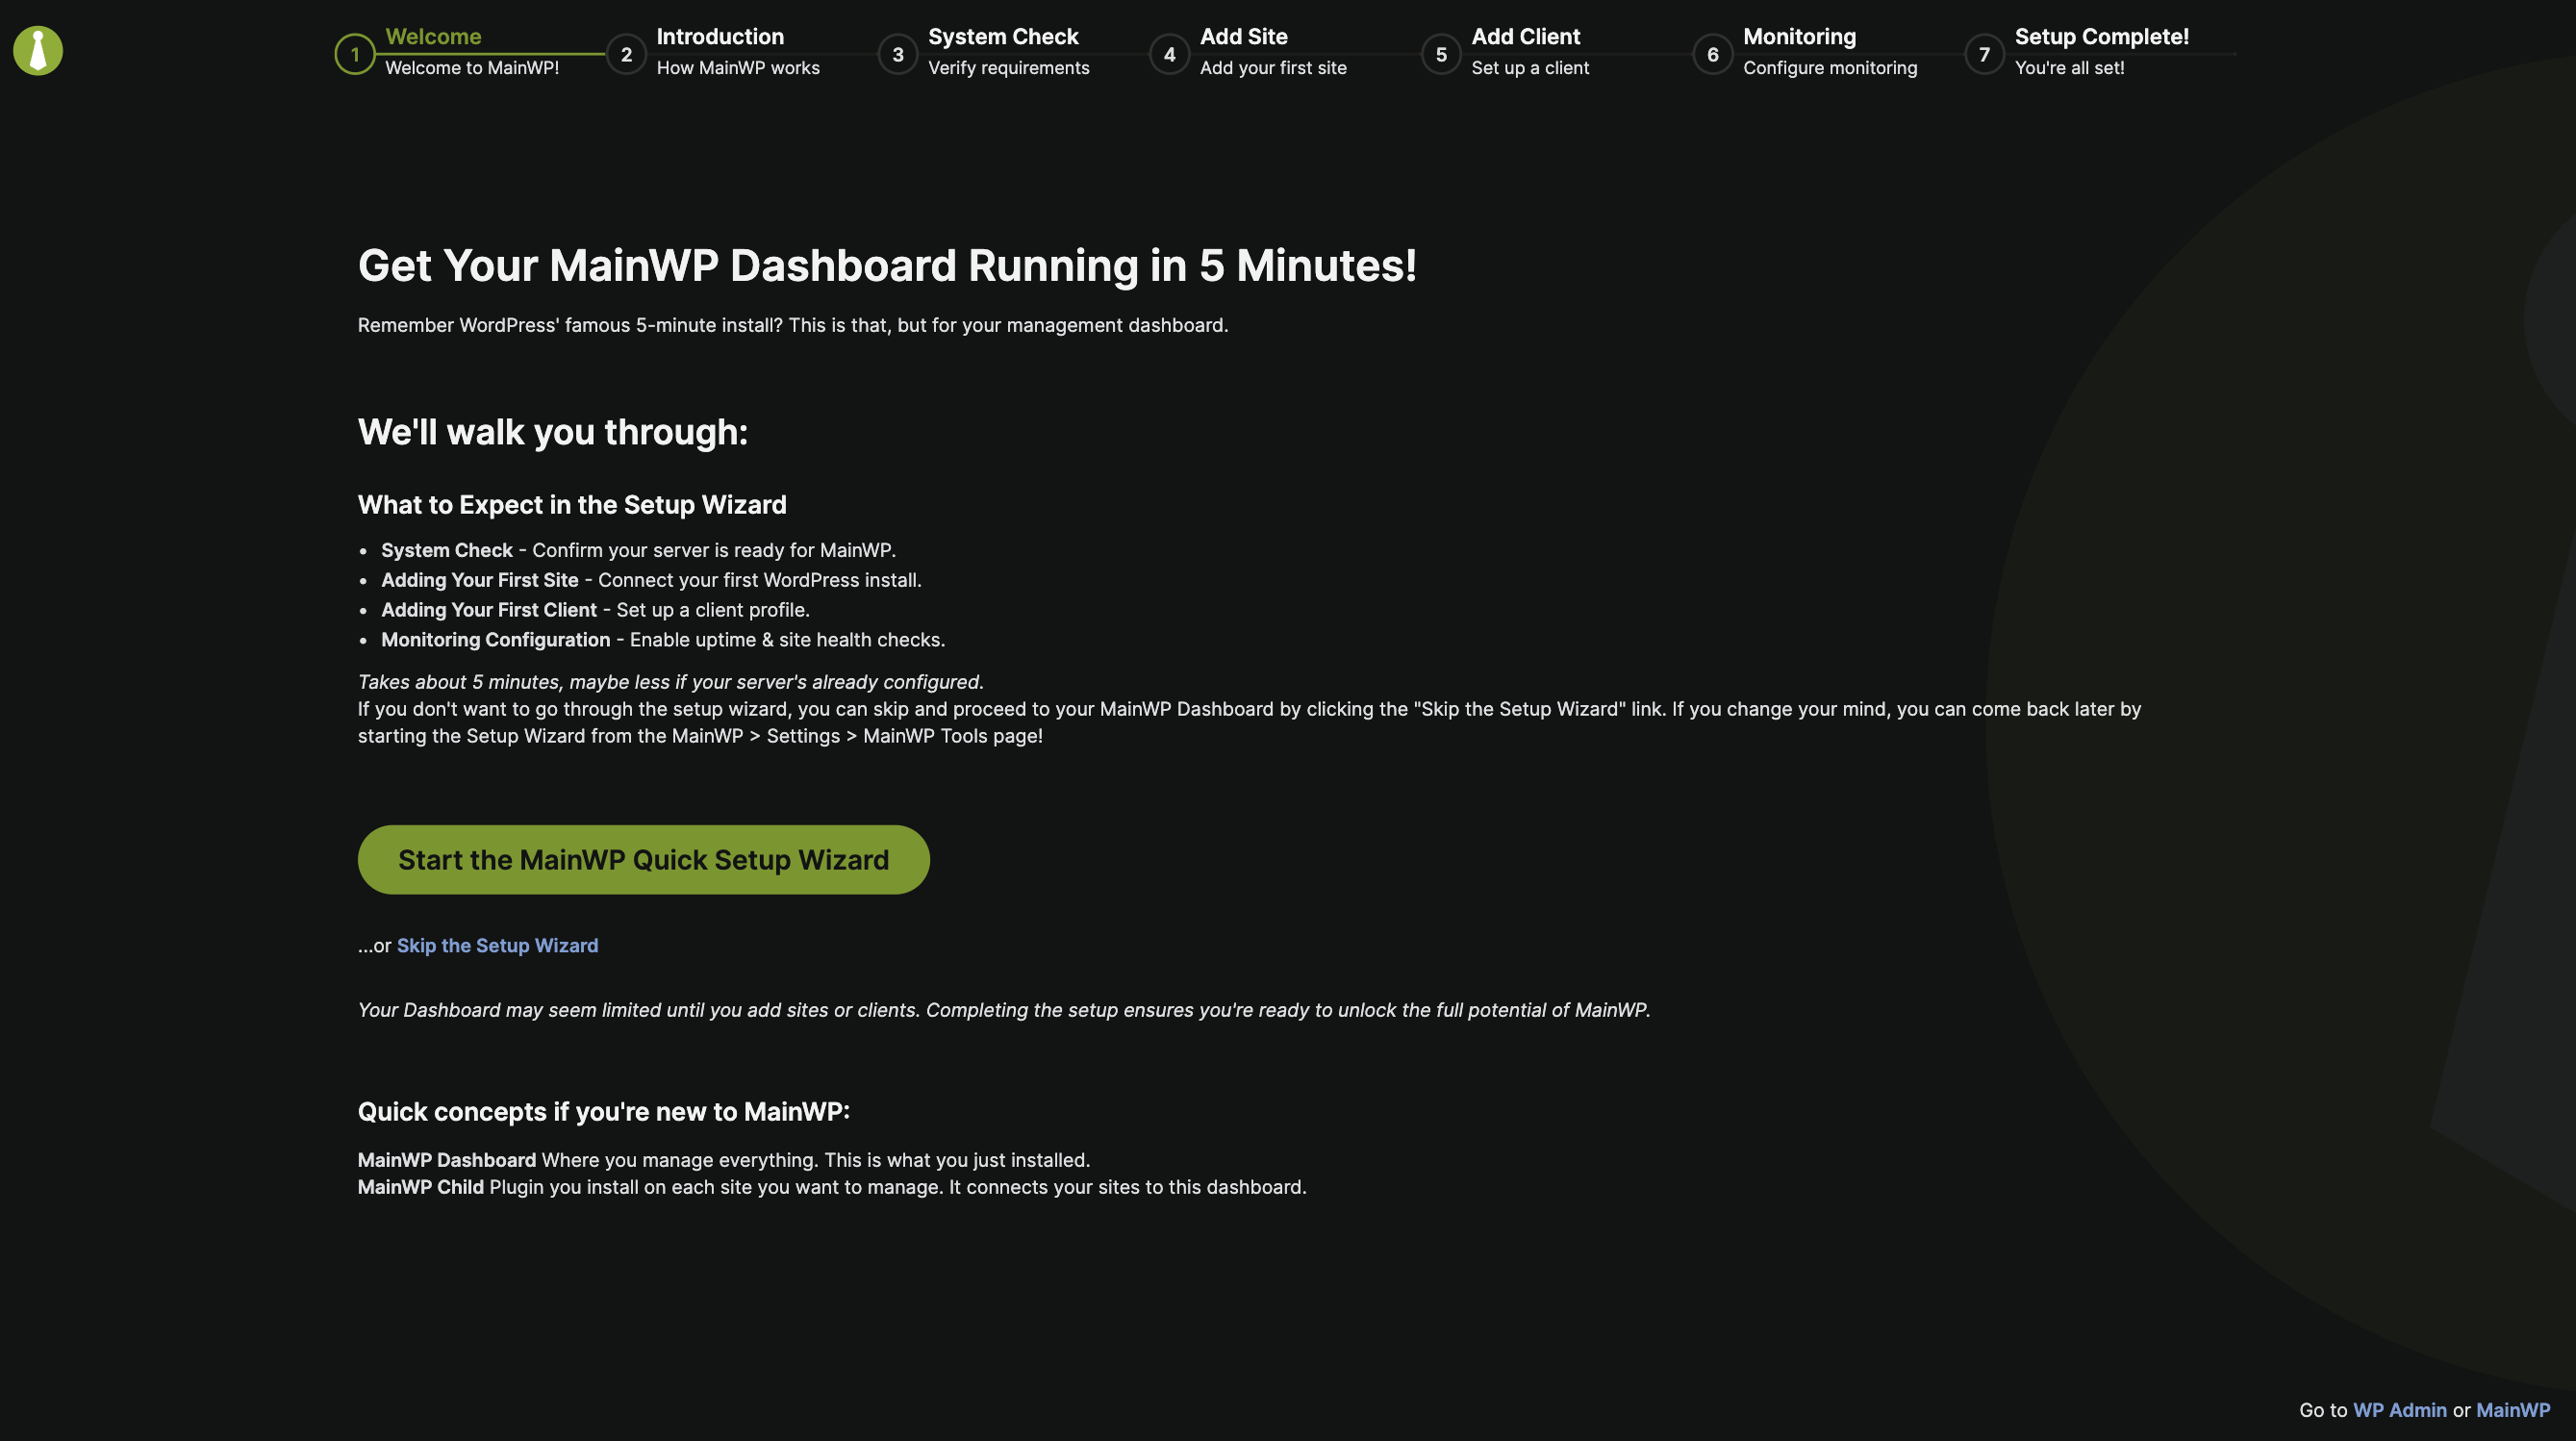
Start the wizard with **Start the MainWP Quick Setup Wizard** or skip to the Dashboard with **Skip the Setup Wizard**.
### Introduction
The Introduction step includes a **MainWP Guided Tours** option (enabled by default). Click **Let's Go!** to continue.
### System Check
MainWP verifies server requirements needed to connect Child sites. If any checks fail, [resolve the issues](/troubleshooting/resolve-system-requirement-issues) before continuing.
### Add Site
Choose whether to connect a single site or multiple sites.
1. Select **Single Site**
2. Enter the site URL and administrator username
3. Configure authentication:
* **Administrator password** - Default connection method. Enter the child site's administrator password when **Require Password Authentication** is enabled.
* **Unique Security ID** - Enter the Security ID when **Require Unique Security ID** is enabled.
4. Optionally set a Site Title
5. Enable **Confirm that the MainWP Child plugin is activated on the site(s) you wish to connect**
6. Click **Connect Site and Proceed**
MainWP Child requires at least one connection authentication method: **Require Password Authentication**, **Require Unique Security ID**, or both. You cannot disable both methods. Authentication options can be found in MainWP Child settings: `your-child-site.com/wp-admin/options-general.php?page=mainwp_child_tab`
1. Select **Multiple Sites**
2. Enter site information in the table, or upload a CSV file
3. Enable **Confirm that the MainWP Child plugin is activated on the site(s) you wish to connect**
4. Click **Connect Sites and Proceed**
For details, see:
* [Connect Multiple Sites](/sites/management/manage-child-sites#connect-multiple-sites)
* [Import Sites (CSV)](/sites/management/manage-child-sites#import-sites-csv-import)
### Add Client
Create client profiles to associate with your sites.
**Single client:** Enter Client Name (required), plus optional email, photo, and phone. Add additional contacts using **Additional Contact Information**.
**Multiple clients:** Switch to the Multiple Clients tab and enter Client Name and Email for each imported site. Sites with matching client name and email are merged into a single client profile.
### Monitoring
Configure:
* **Enable Uptime Monitoring** and the check interval
* **Enable Site Health monitoring** and the health threshold
For full configuration details, see:
* [Uptime Monitoring](/sites/management/uptime-monitoring)
* [MainWP Dashboard Settings](/sites/management/mainwp-dashboard-settings)
Click **Save and Finish!** to complete setup.
### Setup Complete
Your MainWP Dashboard is ready. Click **Go to Dashboard**.
* Restart the wizard anytime from **MainWP > Settings > Tools** using **Start Quick Setup Wizard**
* Use **Continue Without Adding Sites** or **Continue Without Creating Clients** to skip optional steps
* Use **Back to ...** buttons to adjust previous steps
## Install MainWP Child
Go to **WP Admin > Plugins** on the child site you want to add.
Click **Add New**.
Enter "MainWP" and press Enter.
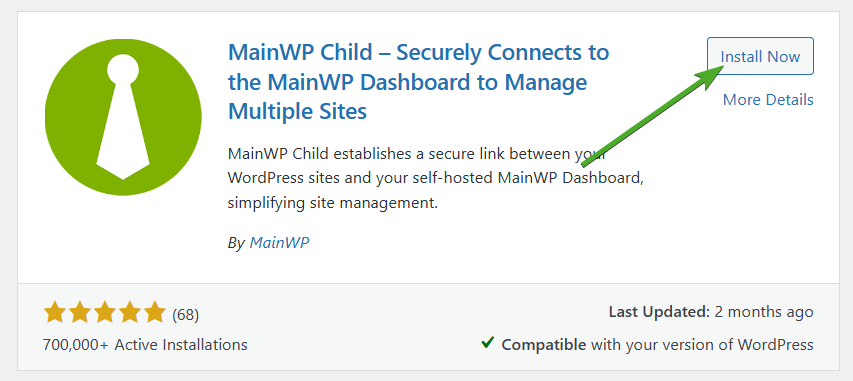
Find **MainWP Child** and click **Install Now**.
Click **Activate**.
### Manual Installation
Download the [MainWP Child](https://wordpress.org/plugins/mainwp-child/) plugin.
If downloaded as a zip, extract the plugin folder.
Upload to `wp-content/plugins/` on the child site.
Go to **WP Admin > Plugins** and activate MainWP Child.
After activation, open MainWP Child settings to confirm your connection authentication options.
## MainWP Child Plugin Settings
| Setting | Default | Description |
| ------------------------------- | -------- | ---------------------------------------------------------------------------------------------------------------------------- |
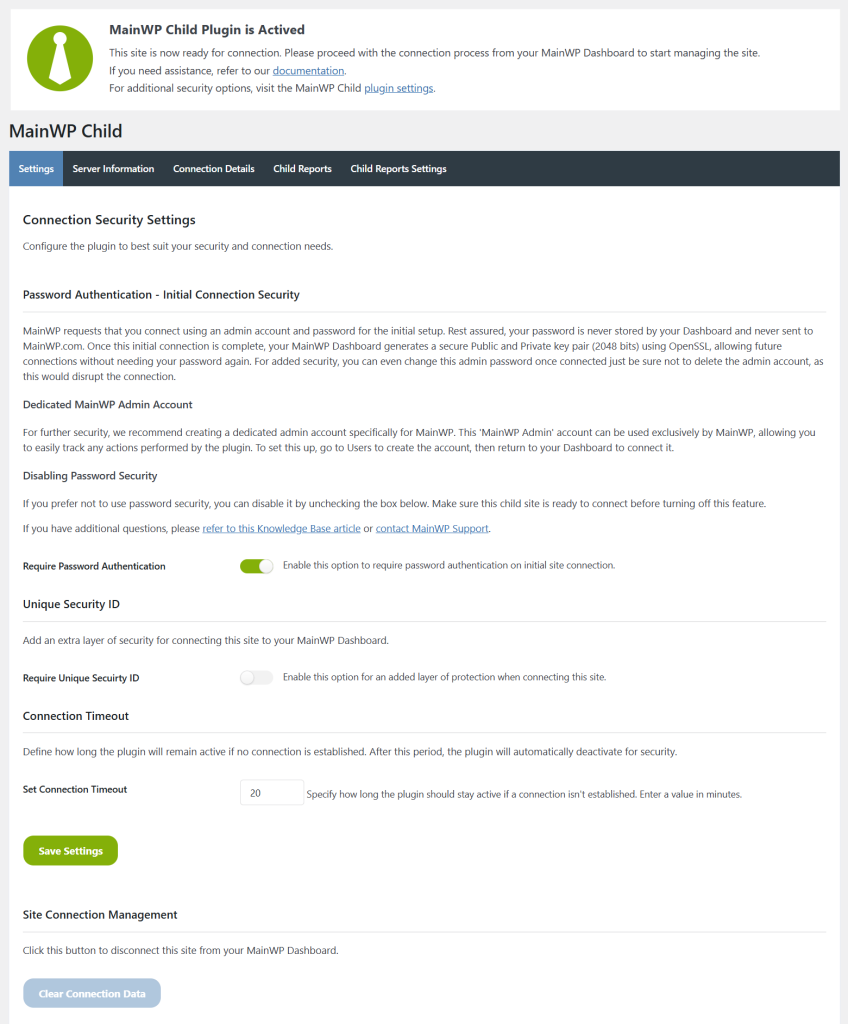
| Require Password Authentication | Enabled | Requires the administrator password when connecting from Dashboard. Can be disabled only when Unique Security ID is required |
| Unique Security ID | Disabled | Requires a matching Security ID when enabled. If Password Authentication is disabled, this must remain enabled |
| Connection Timeout | — | Minutes the plugin stays active waiting for connection |
MainWP Child requires at least one of **Require Password Authentication** or **Unique Security ID** to remain enabled.
For more details, see [Connection Security](/advanced/miscellaneous/mainwp-connection-security).
## Add a Site to Your Dashboard
After installing MainWP Child, add the site to your Dashboard.
Log into your Dashboard and go to **MainWP > Sites > Add New**.
Enter your child site URL.
Toggle **Confirm the MainWP Child plugin is active on this site** to reveal additional fields.
Enter the administrator username and provide the authentication method required by MainWP Child settings:
* **Administrator password** - Required when **Require Password Authentication** is enabled
* **Unique Security ID** - Required when **Require Unique Security ID** is enabled
If both methods are enabled on the child site, provide both values.
| Option | Description |
| ---------------------- | ------------------------------------------------------------------ |
| Site icon | Upload custom icon or select built-in icon (favicon used if empty) |
| Tags | Organize site with existing or new tags |
| Client | Associate site with a client |
| Verify SSL certificate | Disable for self-signed or outdated certificates |
| HTTP username/password | For sites using HTTP Basic Authentication |
Click **Add Site**.
### Add-ons Settings Synchronization
When supported [MainWP Add-ons](https://mainwp.com/mainwp-add-ons/) are installed, the Add New Site form can show synchronization options:
* Install a required third-party plugin on the child site
* Apply the add-on plugin settings (or global add-on options) during site connection
If you experience connection issues:
1. Use **Test Connection** to verify Dashboard can communicate with the site
2. Check [Potential Issues](/troubleshooting/potential-issues) for solutions
3. [Submit a support ticket](https://mainwp.com/mainwp-support/) if needed
## Test Connection
Test Connection verifies what your MainWP Dashboard can reach, which may differ from what your browser sees.
Go to **MainWP > Sites > Add New**.
Enter your child site URL.
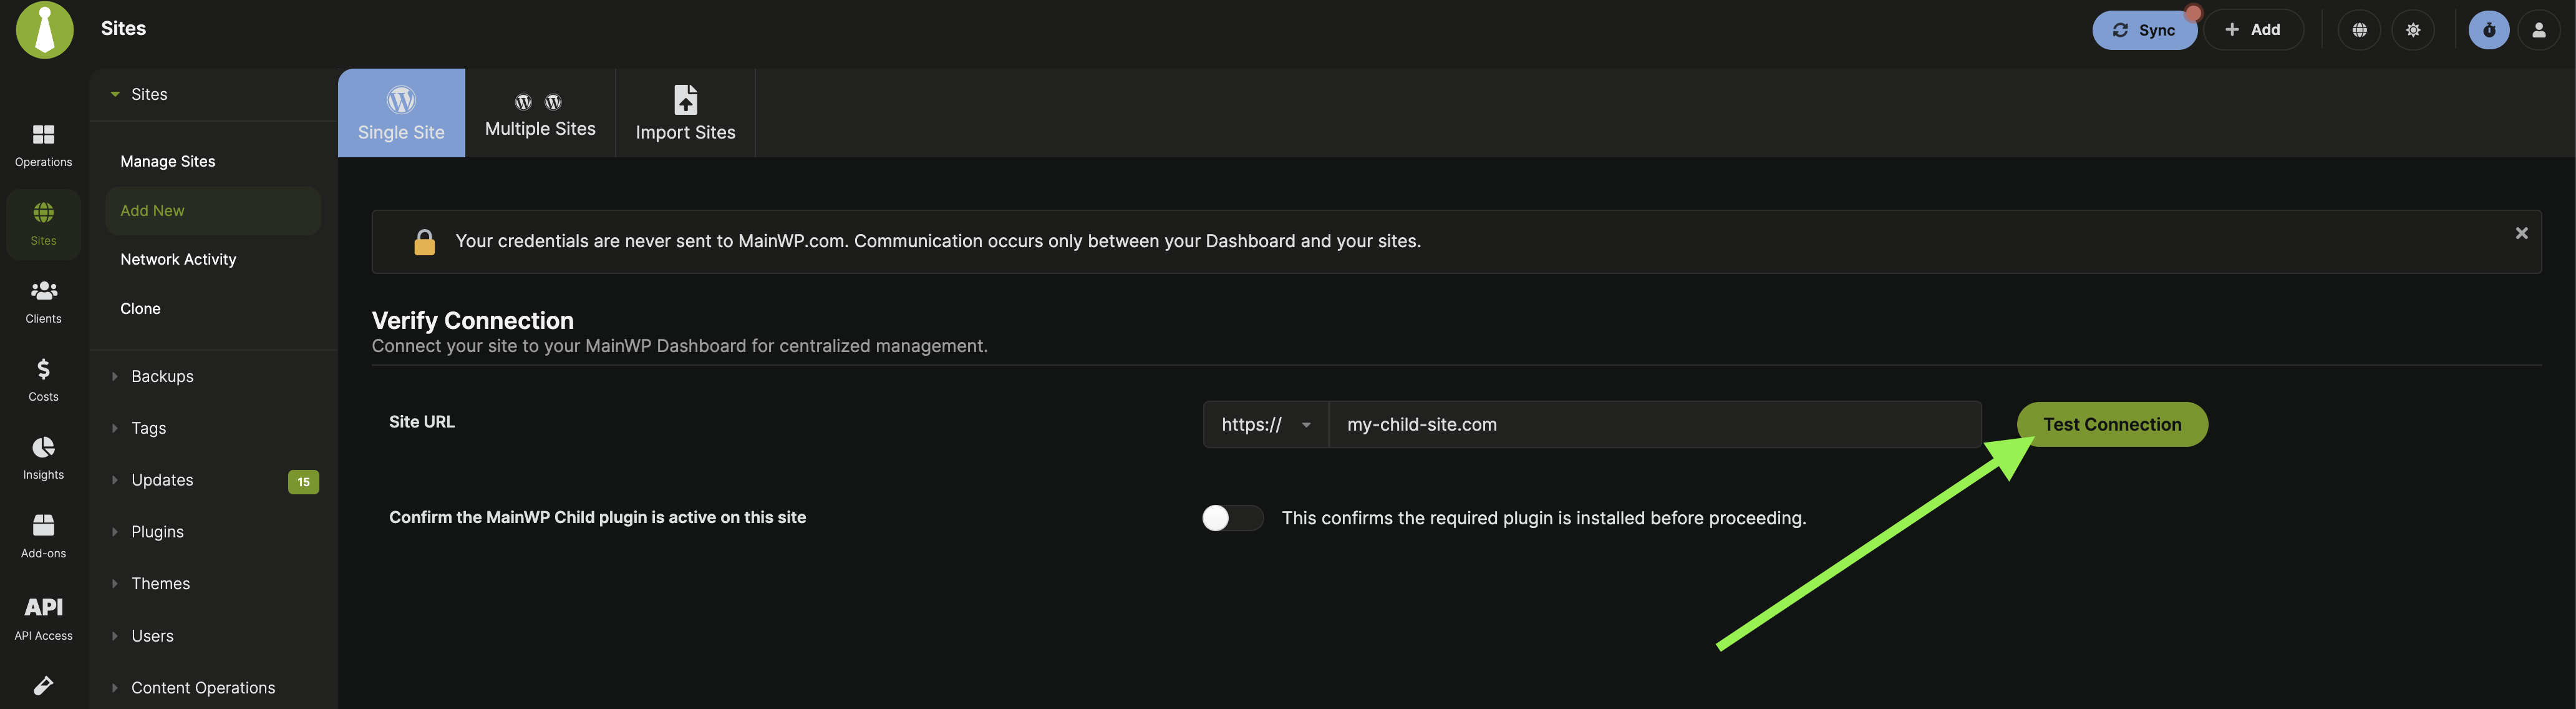
Click **Test Connection**.
A successful test shows a modal with:
```
Connection successful!
URL: yoururl.com (IP: xxx.xxx.xxx.xxx) - Received HTTP-code 200 (OK)
```
For other results, see the [full list of HTTP Status Codes](/troubleshooting/connection-test-results-status-codes).
## Completion Checklist
Verify your setup is complete:
* [ ] MainWP Dashboard installed and activated on dedicated site
* [ ] Quick Setup Wizard completed (or skipped intentionally)
* [ ] MainWP Child installed on at least one child site
* [ ] Child site connected successfully (shows in **MainWP > Sites > Manage Sites**)
* [ ] Test Connection returns HTTP 200 status
 Start the wizard with **Start the MainWP Quick Setup Wizard** or skip to the Dashboard with **Skip the Setup Wizard**.
### Introduction
The Introduction step includes a **MainWP Guided Tours** option (enabled by default). Click **Let's Go!** to continue.
### System Check
MainWP verifies server requirements needed to connect Child sites. If any checks fail, [resolve the issues](/troubleshooting/resolve-system-requirement-issues) before continuing.
### Add Site
Choose whether to connect a single site or multiple sites.
Start the wizard with **Start the MainWP Quick Setup Wizard** or skip to the Dashboard with **Skip the Setup Wizard**.
### Introduction
The Introduction step includes a **MainWP Guided Tours** option (enabled by default). Click **Let's Go!** to continue.
### System Check
MainWP verifies server requirements needed to connect Child sites. If any checks fail, [resolve the issues](/troubleshooting/resolve-system-requirement-issues) before continuing.
### Add Site
Choose whether to connect a single site or multiple sites.
 | Setting | Default | Description |
| ------------------------------- | -------- | ---------------------------------------------------------------------------------------------------------------------------- |
| Require Password Authentication | Enabled | Requires the administrator password when connecting from Dashboard. Can be disabled only when Unique Security ID is required |
| Unique Security ID | Disabled | Requires a matching Security ID when enabled. If Password Authentication is disabled, this must remain enabled |
| Connection Timeout | — | Minutes the plugin stays active waiting for connection |
MainWP Child requires at least one of **Require Password Authentication** or **Unique Security ID** to remain enabled.
For more details, see [Connection Security](/advanced/miscellaneous/mainwp-connection-security).
## Add a Site to Your Dashboard
After installing MainWP Child, add the site to your Dashboard.
| Setting | Default | Description |
| ------------------------------- | -------- | ---------------------------------------------------------------------------------------------------------------------------- |
| Require Password Authentication | Enabled | Requires the administrator password when connecting from Dashboard. Can be disabled only when Unique Security ID is required |
| Unique Security ID | Disabled | Requires a matching Security ID when enabled. If Password Authentication is disabled, this must remain enabled |
| Connection Timeout | — | Minutes the plugin stays active waiting for connection |
MainWP Child requires at least one of **Require Password Authentication** or **Unique Security ID** to remain enabled.
For more details, see [Connection Security](/advanced/miscellaneous/mainwp-connection-security).
## Add a Site to Your Dashboard
After installing MainWP Child, add the site to your Dashboard.
 A successful test shows a modal with:
```
Connection successful!
URL: yoururl.com (IP: xxx.xxx.xxx.xxx) - Received HTTP-code 200 (OK)
```
For other results, see the [full list of HTTP Status Codes](/troubleshooting/connection-test-results-status-codes).
## Completion Checklist
Verify your setup is complete:
* [ ] MainWP Dashboard installed and activated on dedicated site
* [ ] Quick Setup Wizard completed (or skipped intentionally)
* [ ] MainWP Child installed on at least one child site
* [ ] Child site connected successfully (shows in **MainWP > Sites > Manage Sites**)
* [ ] Test Connection returns HTTP 200 status
A successful test shows a modal with:
```
Connection successful!
URL: yoururl.com (IP: xxx.xxx.xxx.xxx) - Received HTTP-code 200 (OK)
```
For other results, see the [full list of HTTP Status Codes](/troubleshooting/connection-test-results-status-codes).
## Completion Checklist
Verify your setup is complete:
* [ ] MainWP Dashboard installed and activated on dedicated site
* [ ] Quick Setup Wizard completed (or skipped intentionally)
* [ ] MainWP Child installed on at least one child site
* [ ] Child site connected successfully (shows in **MainWP > Sites > Manage Sites**)
* [ ] Test Connection returns HTTP 200 status