> ## Documentation Index
> Fetch the complete documentation index at: https://docs.mainwp.com/llms.txt
> Use this file to discover all available pages before exploring further.

# URL Extractor

> URL Extractor allows you to extract URLs by custom tokens like (Title, Status, Author, Website URL and Website Name) from any post or page on your child sites and export them as CSV or TXT file. This is often helpful for both client reports and indexing software.

## What You'll Learn

* Extracting URLs using custom tokens
* Configuring output format and separators
* Saving and loading extraction templates
* Exporting results in CSV, TXT, or JSON format

***

<div id="addon-data" style={{display: 'none'}} data-title="URL Extractor" data-purchase-url="https://mainwp.com/extension/url-extractor/" data-pricing-tier="pro" data-bundle="MainWP Pro" data-addon-type="extension" data-version="5.0" data-developer="MainWP" data-changelog-url="https://mainwp.com/changelog/mainwp-url-extractor-extension/" data-owned-by="Jestart LLC" data-privacy-url="https://mainwp.com/mainwp-plugin-privacy-policy/" />

<Info>
  **Extension Add-on** - This add-on provides standalone functionality within MainWP Dashboard. No third-party plugins required.
</Info>

<iframe className="w-full aspect-video rounded-xl" src="https://www.youtube.com/embed/H1tL1VAOVlk" title="URL Extractor - Video Tutorial" frameBorder="0" allow="accelerometer; autoplay; clipboard-write; encrypted-media; gyroscope; picture-in-picture" allowFullScreen />

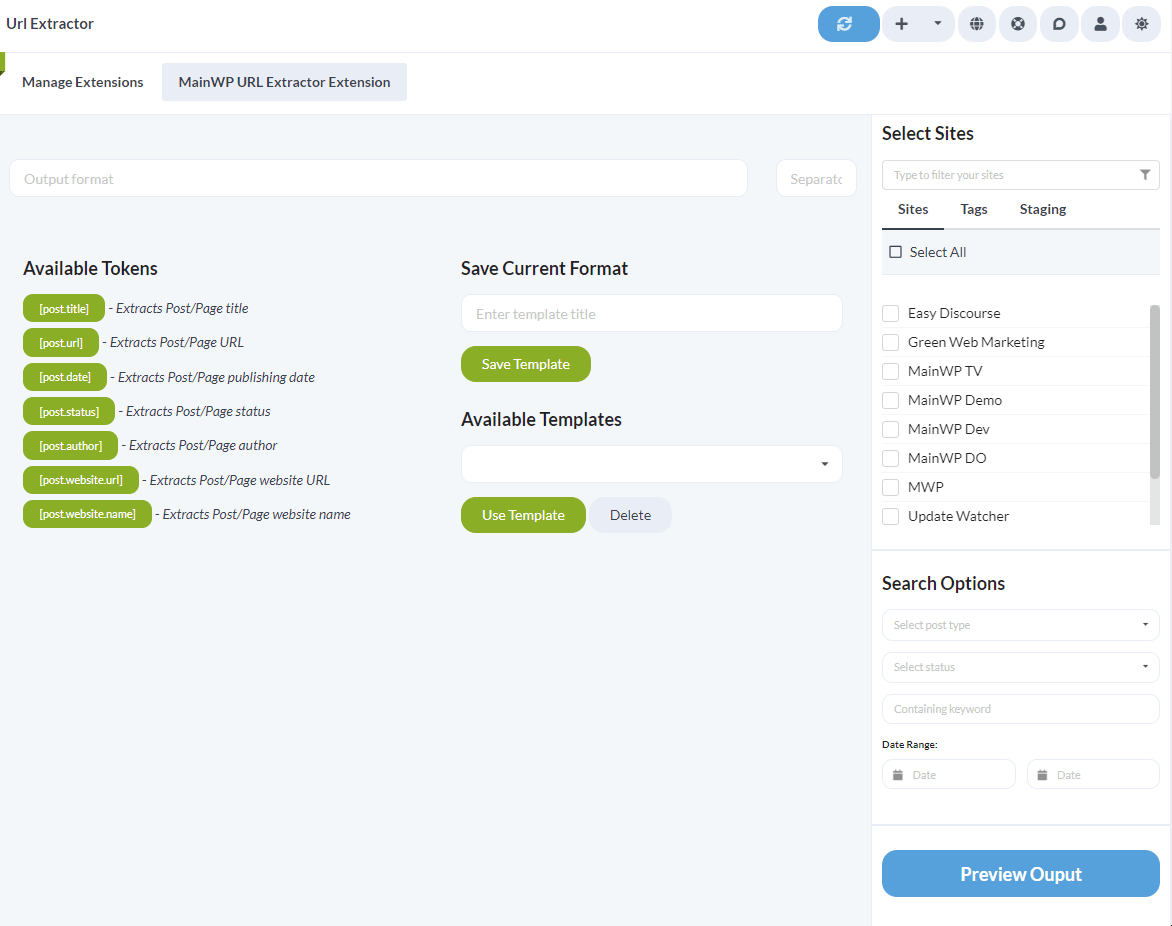
URL Extractor allows you to extract URLs using custom tokens (Title, Post URL, Date, Status, Author, Website URL, Website Name) of any post or page from your Child Sites and export them as CSV or TXT files. Provided search options will enable you to refine your search by:

* Type: Post or Page
* Status: Published, Pending, Private, Scheduled, Draft, Trash
* Arbitrary keywords
* Date Range
* Child Sites

You can easily customize your output. Combining the provided tokens and custom characters, create any output structure you need. This is often helpful for both client reports and indexing software.

## How to use URL Extractor

<img src="https://mintcdn.com/mainwp/RPovfYRqnTPYvuIf/images/add-ons/url-extractor-tokens-page.png?fit=max&auto=format&n=RPovfYRqnTPYvuIf&q=85&s=171f31becc55148aafb21a09dc29a21b" alt="URL Extractor page with output format tokens and sidebar options" width="1172" height="926" data-path="images/add-ons/url-extractor-tokens-page.png" />

<Steps>
  <Step title="Navigate to MainWP Dashboard > Add-ons > URL Extractor page" />

  <Step title="Configure the output format using Available Tokens">
    In the **Output format** field, either type in the Available Tokens or click on the green bubbles of respective tokens to insert them automatically **NOTE:** You can also combine plain text with the token names. For example: `This is the Post URL [post.url], and this is the Post Title [post.title]`
  </Step>

  <Step title="Enter a separator in the Separator field">
    Type in the desired text in the Separator field **NOTE:** This text will be used to separate individual entries in the output. By leaving the field empty, the individual entries will be placed in a new line.
  </Step>

  <Step title="In the Sidebar">
    In the Sidebar

    1. Select the desired Sites, either individually or by Tags
    2. Select the post type, either Post or Page, or both
    3. Select one or multiple statuses from the list: Published, Pending, Private, Scheduled, Draft, Trash
    4. Optionally filter the results by a Keyword
    5. Select the desired Date Range
  </Step>

  <Step title="Click the Preview Output button" />

  <Step title="Review the Output in the popup modal and Export it as .txt, .csv, .json file" />
</Steps>

## URL Extractor Templates

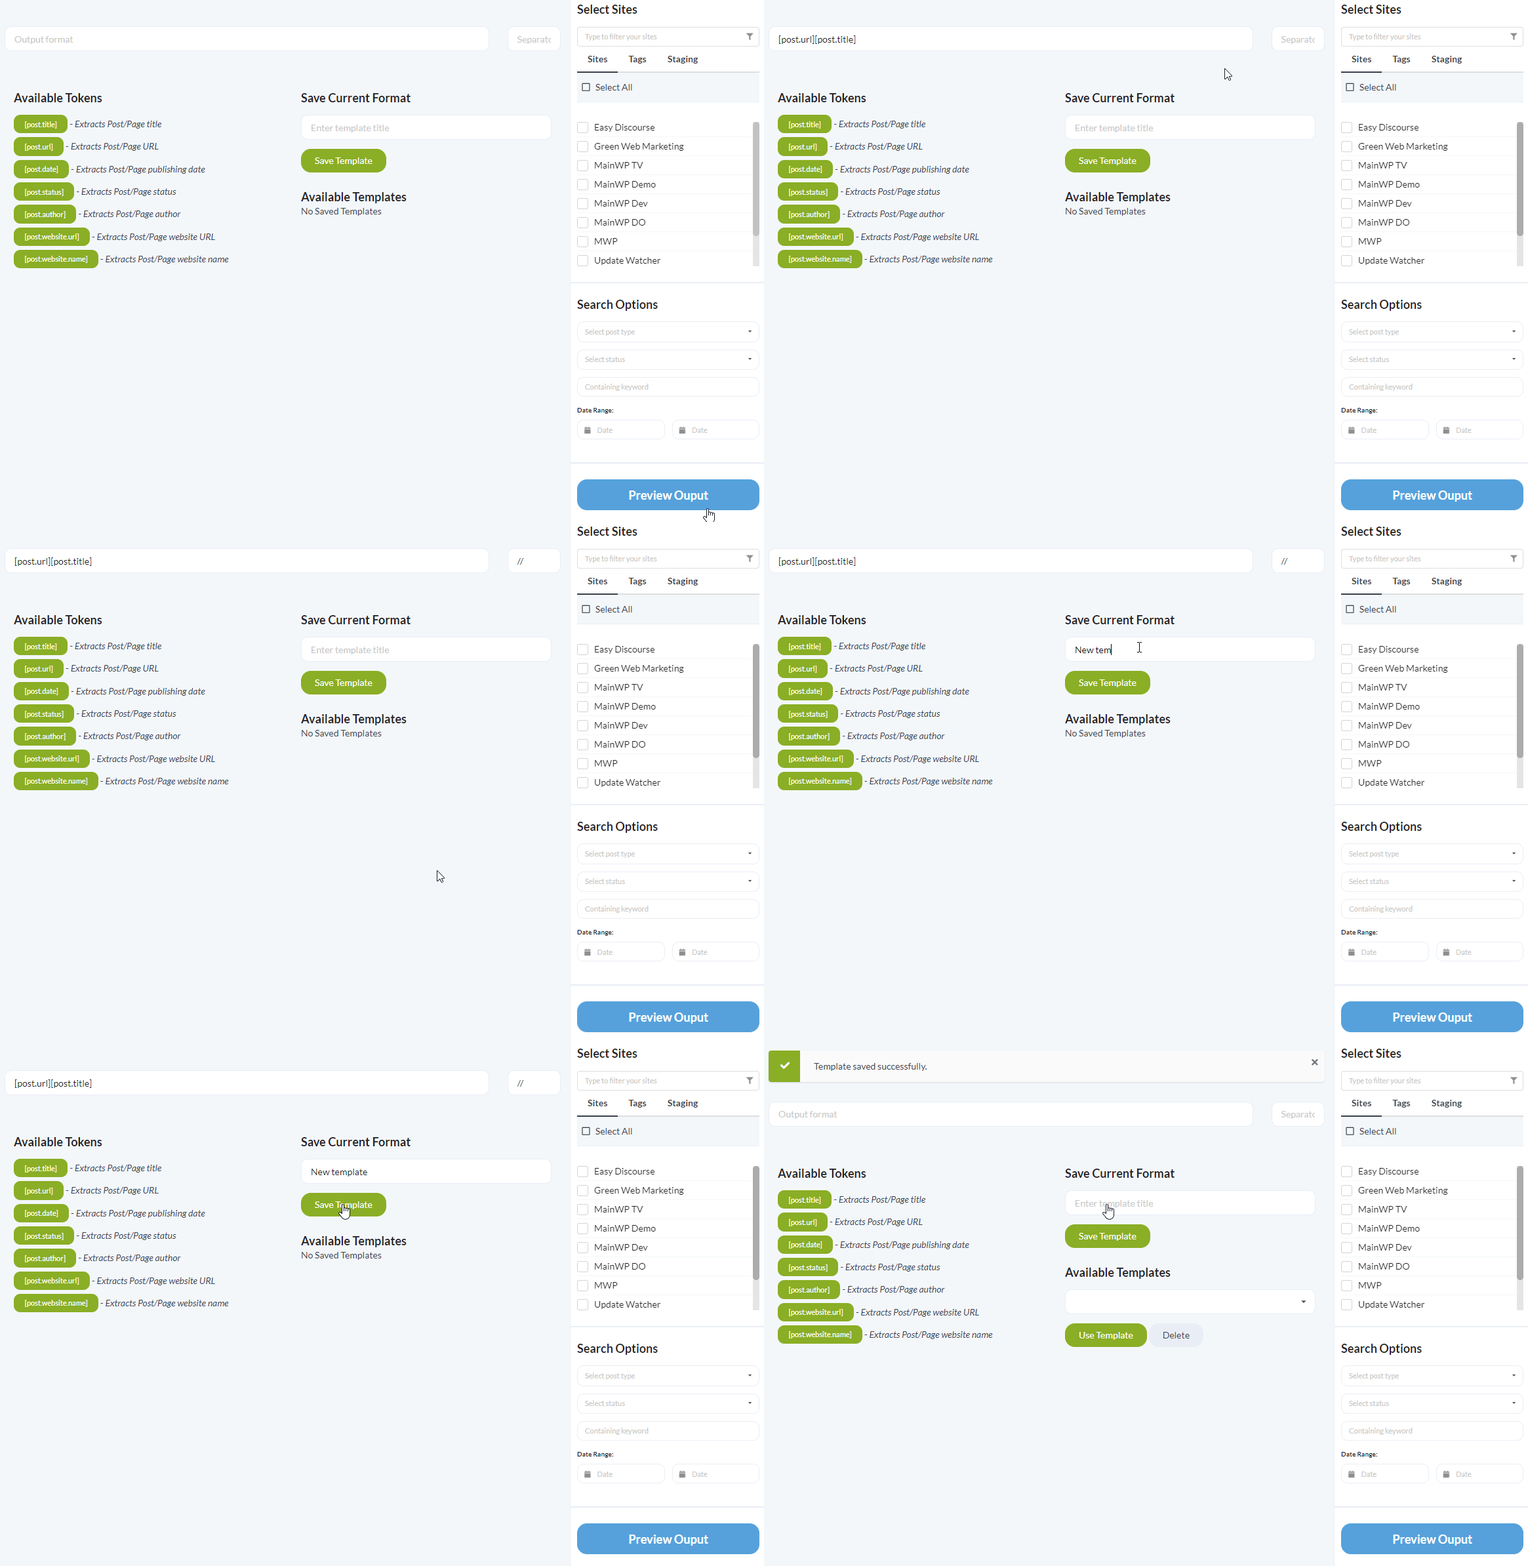
The values in the Output format and Separator fields can be saved as templates for speed and convenience.

### Saving a template

<img src="https://mintcdn.com/mainwp/RPovfYRqnTPYvuIf/images/add-ons/url-extractor-preview.gif?s=753136b06c6225ad8768deab3f0535b2" alt="Animation showing how to save a URL Extractor template" width="1165" height="796" data-path="images/add-ons/url-extractor-preview.gif" />

<Steps>
  <Step title="Navigate to MainWP Dashboard > Add-ons > URL Extractor page" />

  <Step title="Enter the desired text in the Output format and Separator fields" />

  <Step title="Enter the template name" />

  <Step title="Click the Save Template button" />
</Steps>

### Loading a template

<img src="https://mintcdn.com/mainwp/2rlXQ4CNzTqDCqtT/images/add-ons/40134b0f3f65.gif?s=60480396ebc1403e5007d16d17441a9c" alt="Animation showing how to load a saved template" width="1166" height="812" data-path="images/add-ons/40134b0f3f65.gif" />

<Steps>
  <Step title="Navigate to MainWP Dashboard > Add-ons > URL Extractor page" />

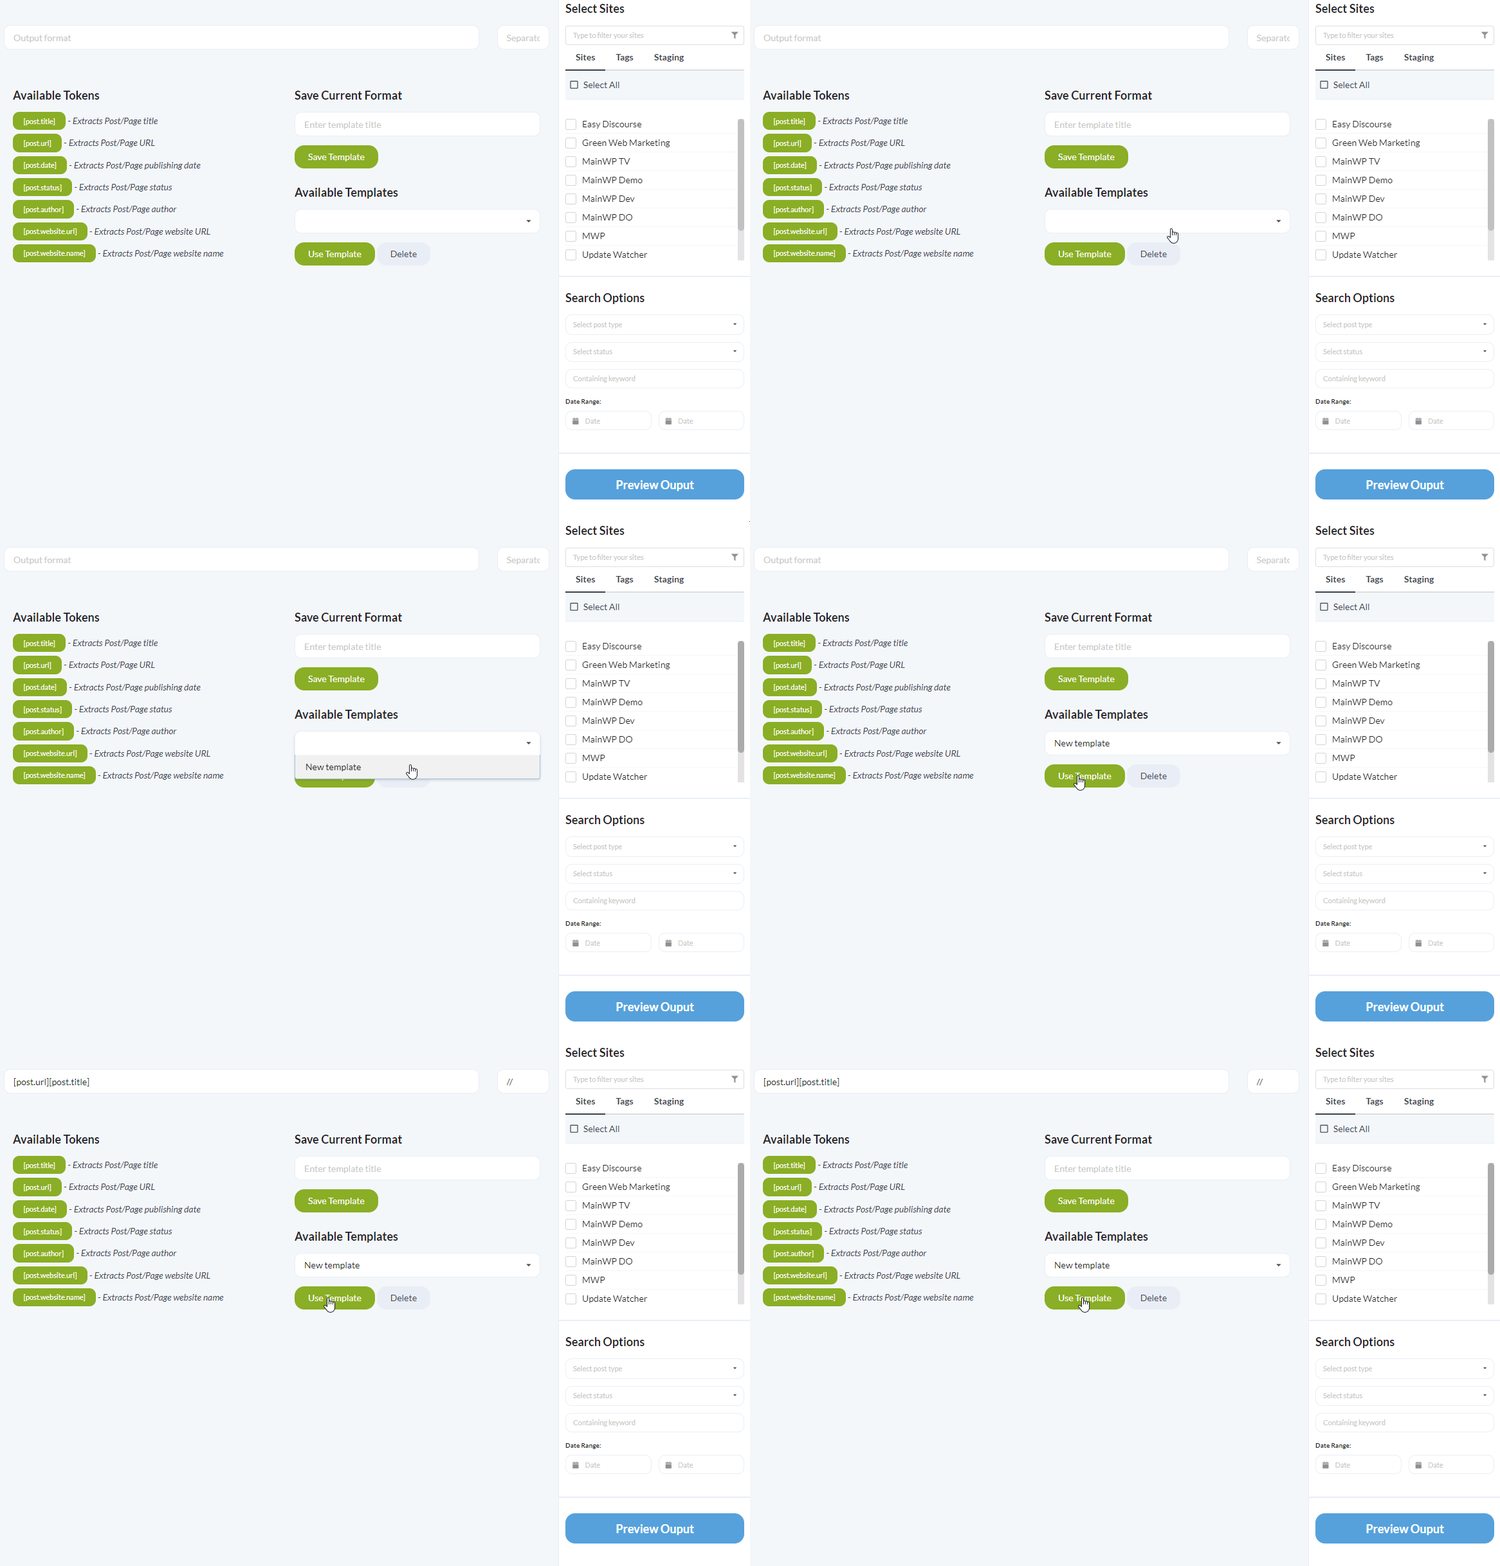
  <Step title="Select the desired template from the Available Templates dropdown" />

  <Step title="Click the Use Template button" />
</Steps>

### Deleting a template

<Steps>
  <Step title="Navigate to MainWP Dashboard > Add-ons > URL Extractor page" />

  <Step title="Select the desired template from the Available Templates dropdown" />

  <Step title="Click the Delete button" />
</Steps>

## Increase the maximum number of Posts returned from a Child site

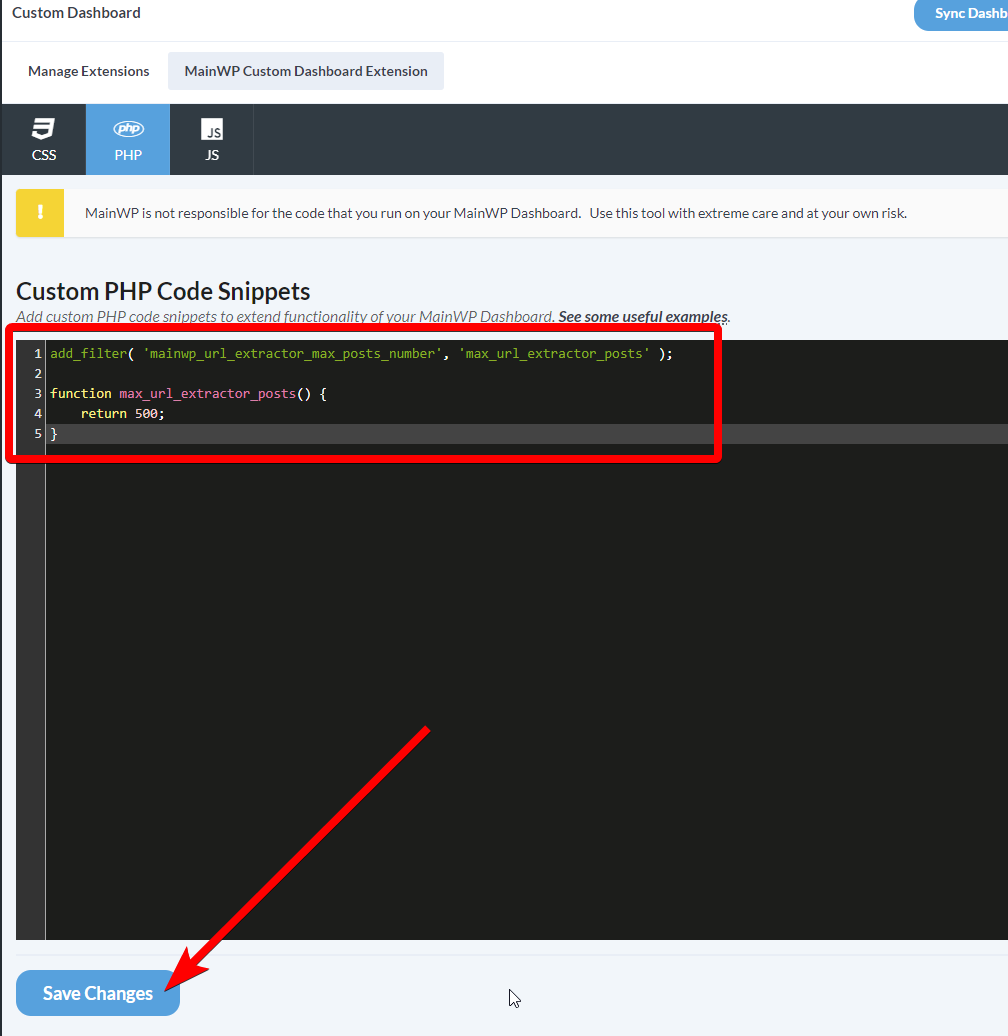
URL Extractor extensions returns a maximum of 50 posts from a single child site. This number can be customized with a filter. As an example, this code snippet will increase the maximum number of posts to 500.

```php theme={null}
add_filter( 'mainwp_url_extractor_max_posts_number', 'max_url_extractor_posts' );

function max_url_extractor_posts() {
	return 500;
}

```

The easiest way to insert this code snippet to the MainWP Dashboard site is by using our [Custom Dashboard](https://mainwp.com/extension/mainwp-custom-dashboard-extension/) extension.

<Steps>
  <Step title="Install the Custom Dashboard extension" />

  <Step title="Add the code snippet to the PHP tab in the Custom Dashboard extension">
    Add the code snippet to the PHP tab in the Custom Dashboard extension <img src="https://mintcdn.com/mainwp/fYo8wl5GET5OrNvZ/images/add-ons/7d9bde1c6d30.png?fit=max&auto=format&n=fYo8wl5GET5OrNvZ&q=85&s=326a6f1cb1c930b1e604f25c8e9d958d" alt="Custom Dashboard PHP tab with code snippet for max posts" width="1008" height="1036" data-path="images/add-ons/7d9bde1c6d30.png" />
  </Step>

  <Step title="Adjust the number of returned posts as desired" />

  <Step title="Click the Save Changes button" />
</Steps>

***

## Related Resources

* [Posts/Pages Add-ons](/add-ons/posts-pages) - Browse all content tools
* [Post Plus Extension](/add-ons/posts-pages/post-plus-extension) - Advanced post creation
* [Manage Posts](/sites/content/manage-posts) - Post management guide