> ## Documentation Index
> Fetch the complete documentation index at: https://docs.mainwp.com/llms.txt
> Use this file to discover all available pages before exploring further.
# Advanced Uptime Monitor
> This Advanced Uptime Monitor for WordPress is a free MainWP extension that extends your ability to monitor the uptime of all your connected Child Sites at once on one screen.
## What You'll Learn
* Creating and managing uptime monitors
* Connecting supported monitoring services
* Understanding monitor fields and actions
* Creating monitors for connected child sites
***
**Integration Add-on** - This add-on connects MainWP Dashboard to supported uptime monitoring services. No third-party WordPress plugin is required.
The MainWP Advanced Uptime Monitor extension allows you to monitor your websites' uptime by integrating with uptime monitoring services through their APIs. This extension enables you to create, edit, display, start, pause, or delete your monitors directly from the MainWP Dashboard.
The extension currently supports these uptime monitoring services:
* Uptime Robot
* Better Uptime
* NodePing
* Site24x7
The extension itself does not check for uptime, nor does it notify in case of some event. Both of these actions are performed by third-party uptime monitoring services.
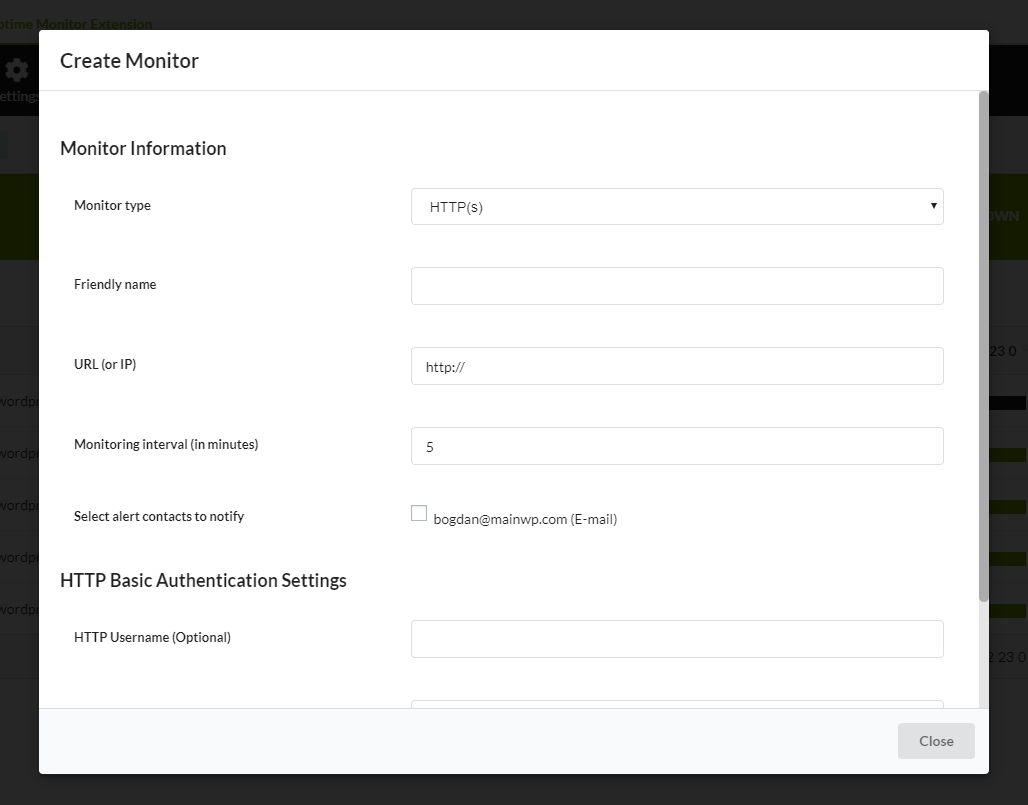
## Create New Monitor
1. Select **Monitor types**
2. Set **Friendly name**
3. Add the **URL (or IP)** address of your website
4. Set **Monitoring interval (in minutes)**
5. Select **alert contacts to notify**
### Monitor Types
* **http(s):** Perfect for website monitoring. The service regularly sends requests (which are the same as if a visitor is browsing your website) to the URL and decides if it is up or down depending on the HTTP statuses returned from the website (200-success, 404-not found, etc.)
* **ping:** Good for monitoring a server. Ping (ICMP) requests are sent, and up/down status is decided according to whether responses are received. Ping is not a good fit for monitoring websites as a website (its IP) can respond to ping requests while it is down (which means that the site is down but the server hosting the site is up)
* **keyword:** Checks if a keyword exists or does not exist on a web page
* **port:** Good for monitoring services like SMTP, DNS, POP as all these services run from a specific port, and Uptime Robot decides their statuses based on whether they respond to the requests
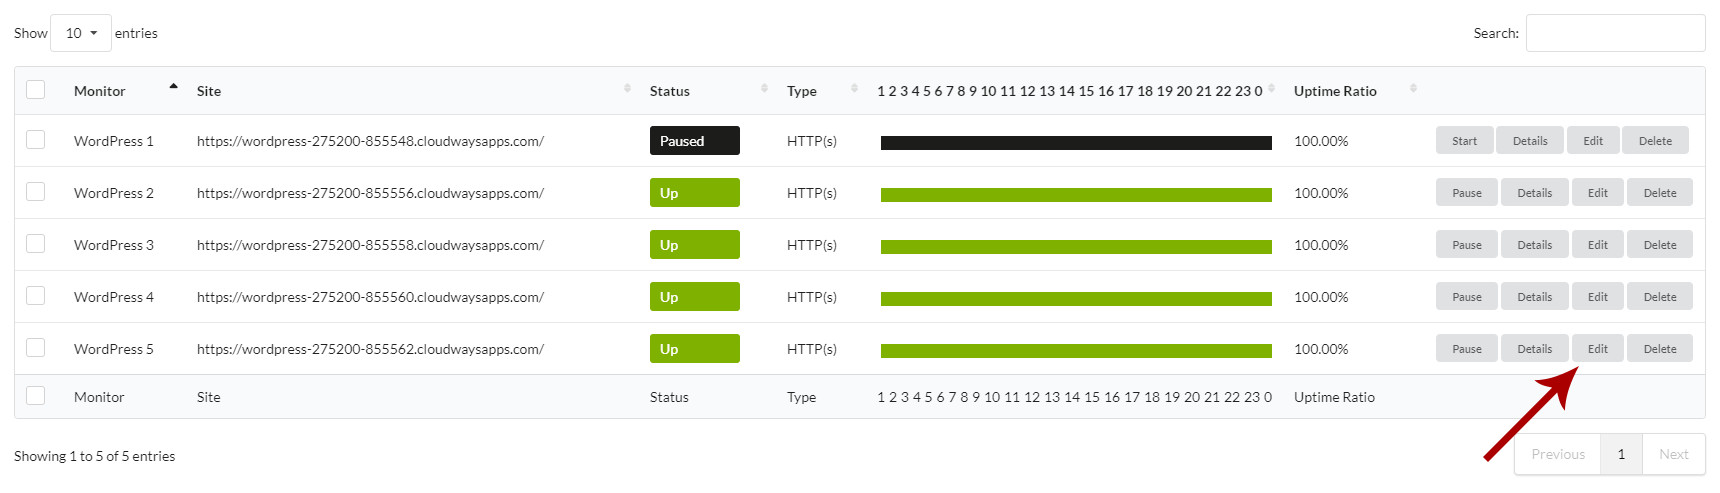
## Edit Monitor
Once the popup screen opens:
1. Edit monitor data
2. Click the **Save Monitor** button
## Start-Pause Monitor
## Monitor Statistics
## Delete Monitor
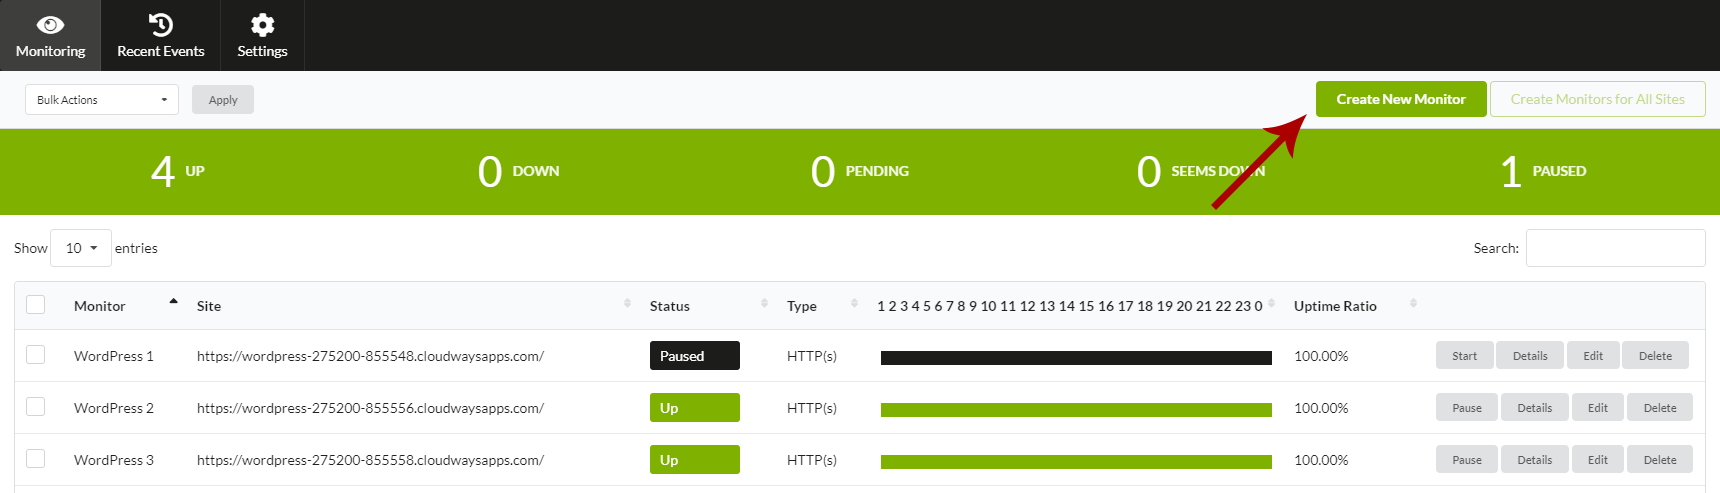
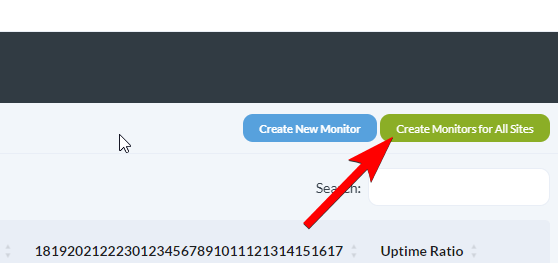
## Create Monitors for All Child Sites
To automatically create monitors for all child sites that don't have corresponding monitors:
## Connect Your Uptime Robot Account
To get your Uptime Robot API Key to use the [MainWP Advanced Uptime Monitor](https://mainwp.com/extension/advanced-uptime-monitor/) extension, visit the [Uptime Robot Webpage.](http://uptimerobot.com/)
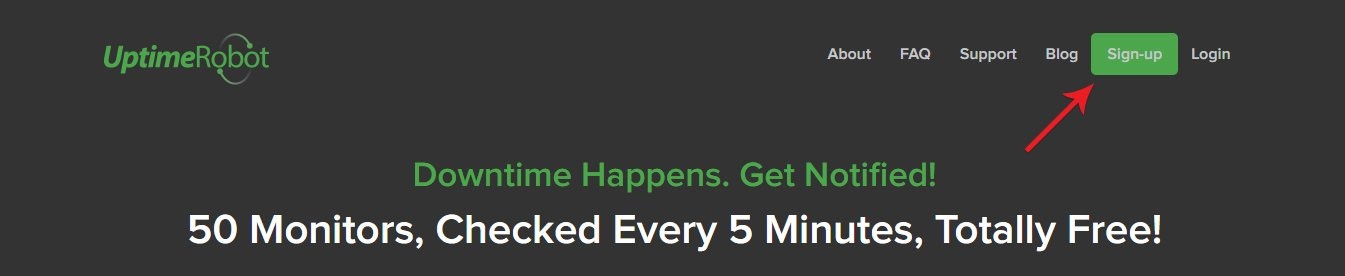
Click the **Sign-Up** button *(If you already have an account, proceed to step 4)*
Fill up the registration form and check your email to activate your account. Follow the link in the email. You will get the confirmation note.
After confirmation, you are successfully registered. Next, you need to log in and generate an API Key.
When you type in your email address and password and click the **Login** button, you will be prompted to the **Account Dashboard** page
Proceed to the **My Settings** page
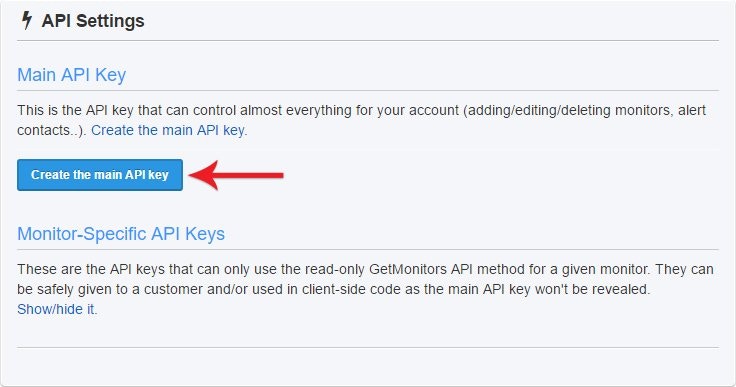
Scroll down to the API Information area and click the **Create the main API key** link
Then it will show you the **Create the main API key** button, click that button
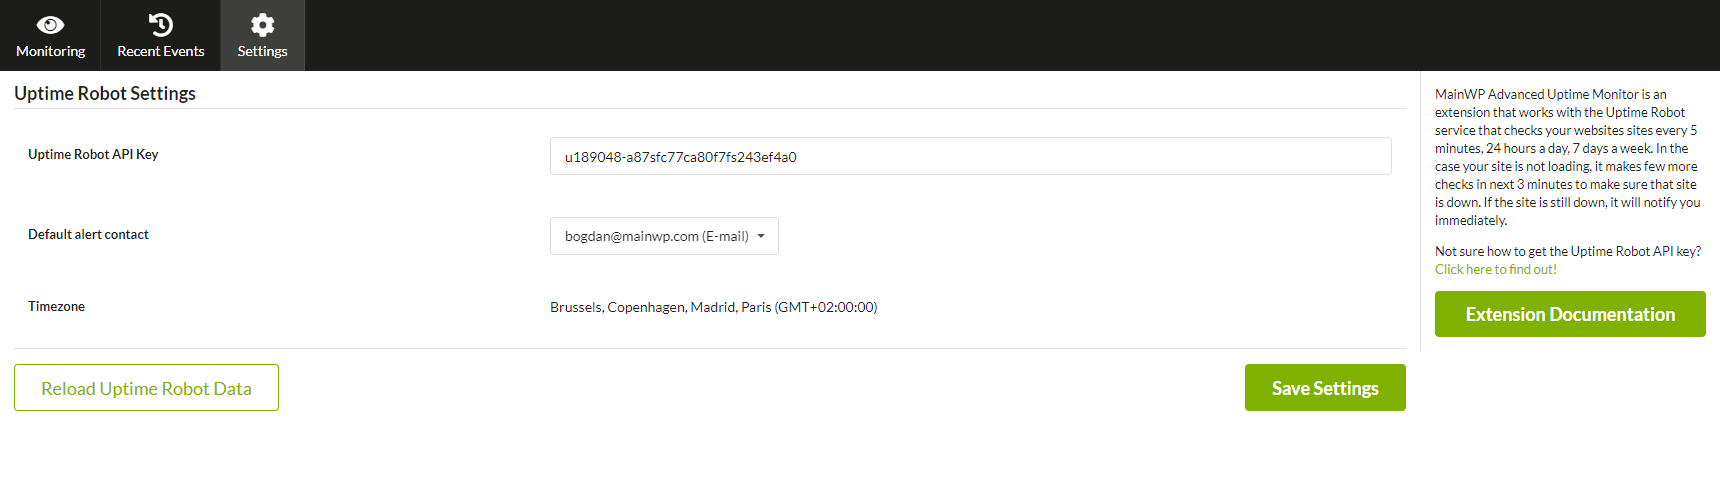
Before being able to create, display, or manage Uptime Robot monitors, you need to add your [Uptime Robot API key](/add-ons/monitoring/advanced-uptime-monitor-extension#connect-your-uptime-robot-account) to your Advanced Uptime Monitor extension.
1. Select **Uptime Robot** as the monitoring service
2. Enter your **Uptime Robot API Key** in the provided field
3. Select a **Default alert contact** after contacts are available
4. Click the **Save Settings** button
After you connect your account, you can set the default alert contact.
## Connect Other Monitoring Services
The Settings tab also supports:
* **Site24x7** - Select the data center, enter the Client ID and Client Secret, then complete the Administrator, Reports, and Operations authorization steps.
* **NodePing** - Enter the NodePing API Token.
* **Better Uptime** - Enter the Better Uptime API Key.
### API limitations of the free Uptime Robot plan
Uptime Robot has recently reduced the limit to only **10 requests per minute**. Requests include creating new monitors through the MainWP extension and fetching information about existing monitors. Reaching the limit is fairly easy for a large number of sites.
This limit is most often hit when creating monitors for all sites by clicking the **"Create Monitors for All Sites"** button in the UI. You will likely be able to create 2 or 3 monitors **per attempt** and receive an error (red exclamation mark) for other sites because the API limit will be reached.
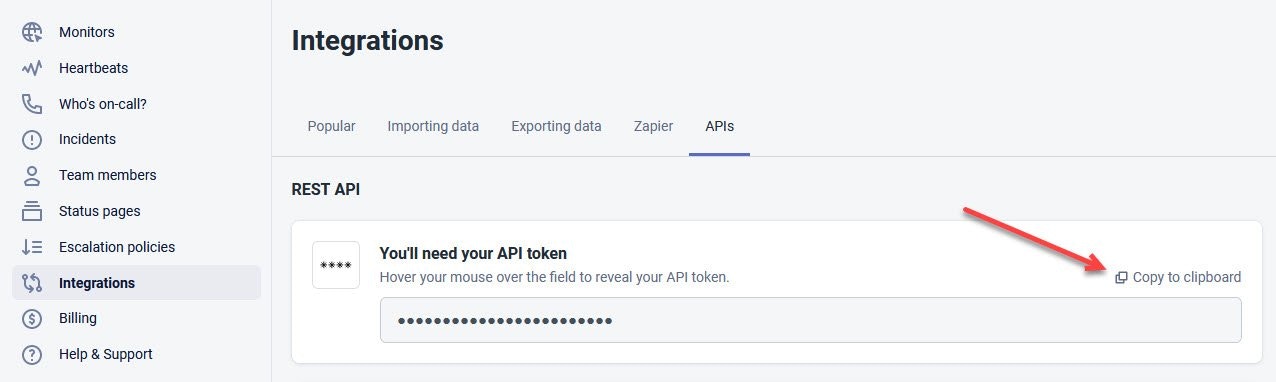
## How to get a Better Uptime API token
To get the Better Uptime API token:
**Important Notes:**
* MainWP Advanced Uptime Monitor Extension does not support Monitor Specific API Keys.
* If you cannot create your first monitor from the MainWP Advanced Uptime Monitor Extension, try creating the first monitor directly in the Uptime Robot dashboard, then create subsequent monitors from your Extension.
* If you cannot connect your account, try re-creating your Uptime Robot API key and try again.
* If data is not loading properly from your Uptime Robot account, try resaving the Uptime Robot settings in the Advanced Uptime Monitor Extension.
## Team Control Permissions
If you use the [Team Control](/add-ons/agency/team-control-extension) extension, the Advanced Uptime Monitor respects each role's **Allowed Child Sites** configuration. Users signed in with a restricted role only see monitors that belong to the child sites they are permitted to access; monitors for sites outside their scope are hidden from the Monitors tab and from related views.
Notes on how this works:
* Each monitor is automatically associated with the matching child site based on its URL. Monitors created before this association existed are migrated automatically the first time they are viewed or updated.
* Monitors that cannot be matched to a child site (for example, IP-based or standalone endpoints) remain visible to all users so that they are not accidentally hidden.
* Scheduled uptime checks, WP-CLI commands, and the MainWP REST API are unaffected and continue to process every monitor regardless of the current user's role.
No additional configuration is required. Assign **Allowed Child Sites** to each role in Team Control as described in the [Define Role Permissions](/add-ons/agency/team-control-extension#define-role-permissions) section, and the uptime monitor list will honor those permissions automatically.
***
## Related Resources
* [Monitoring Add-ons](/add-ons/monitoring) - Browse all monitoring tools
* [Domain Monitor](/add-ons/monitoring/mainwp-domain-monitor-extension) - Track domain expiration
* [SSL Monitor](/add-ons/monitoring/mainwp-ssl-monitor-extension) - Monitor SSL certificates
* [Team Control](/add-ons/agency/team-control-extension) - Manage role-based access to monitors
 1. Select **Monitor types**
2. Set **Friendly name**
3. Add the **URL (or IP)** address of your website
4. Set **Monitoring interval (in minutes)**
5. Select **alert contacts to notify**
1. Select **Monitor types**
2. Set **Friendly name**
3. Add the **URL (or IP)** address of your website
4. Set **Monitoring interval (in minutes)**
5. Select **alert contacts to notify**
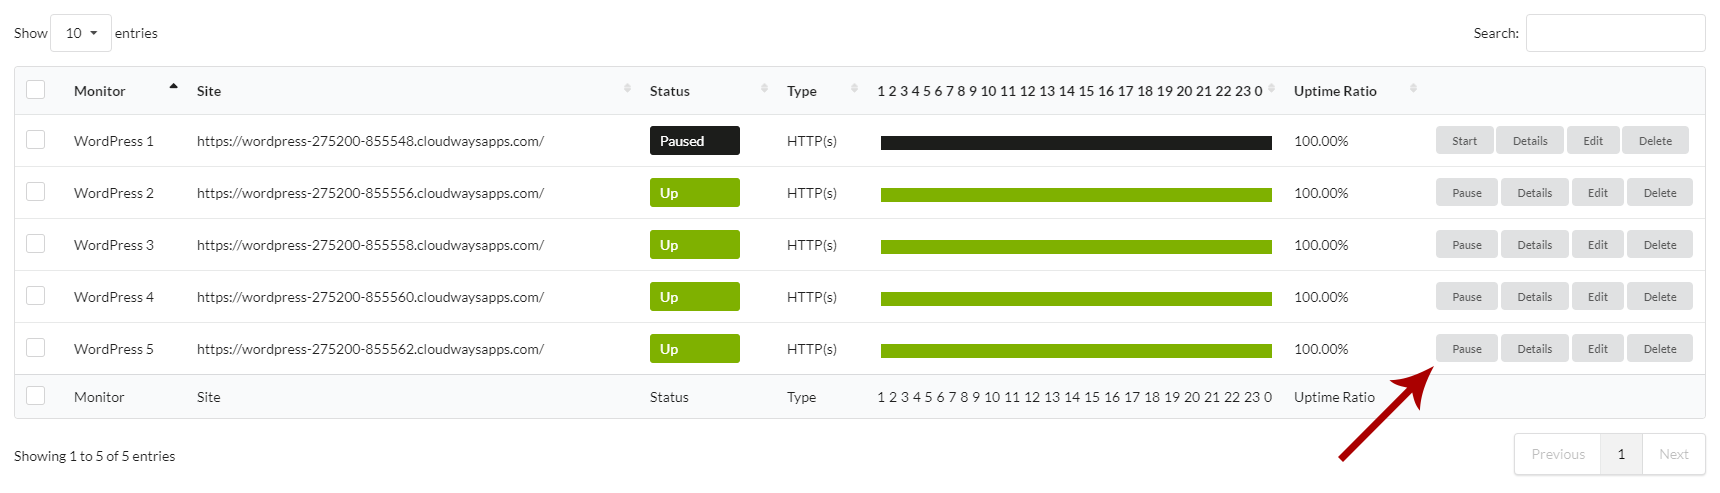 ## Monitor Statistics
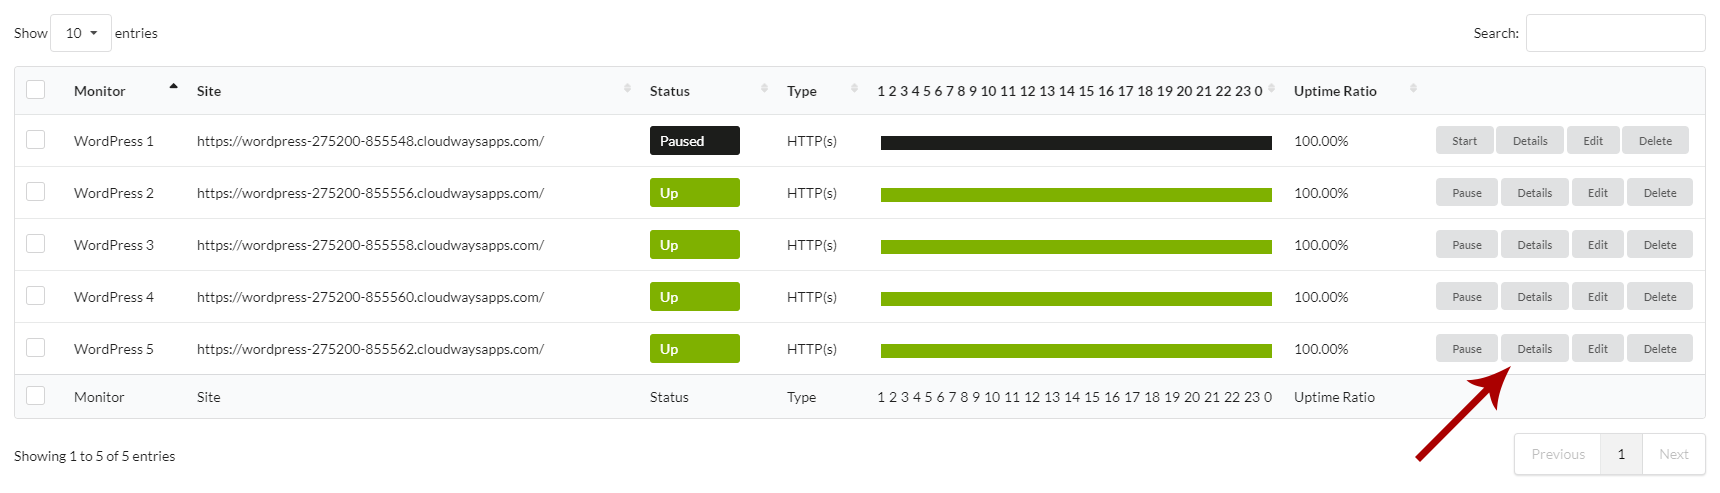 ## Delete Monitor
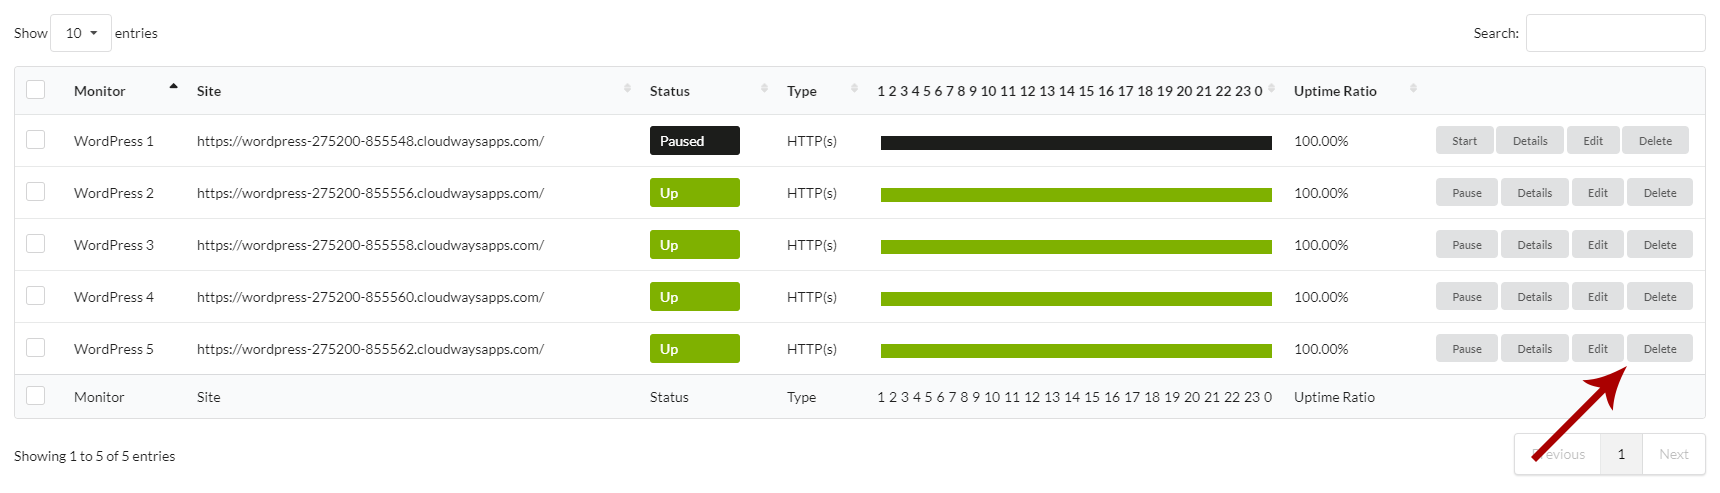 ## Create Monitors for All Child Sites
To automatically create monitors for all child sites that don't have corresponding monitors:
## Create Monitors for All Child Sites
To automatically create monitors for all child sites that don't have corresponding monitors:

 1. Select **Uptime Robot** as the monitoring service
2. Enter your **Uptime Robot API Key** in the provided field
3. Select a **Default alert contact** after contacts are available
4. Click the **Save Settings** button
1. Select **Uptime Robot** as the monitoring service
2. Enter your **Uptime Robot API Key** in the provided field
3. Select a **Default alert contact** after contacts are available
4. Click the **Save Settings** button
 ## How to get a Better Uptime API token
To get the Better Uptime API token:
## How to get a Better Uptime API token
To get the Better Uptime API token: