> ## Documentation Index
> Fetch the complete documentation index at: https://docs.mainwp.com/llms.txt
> Use this file to discover all available pages before exploring further.
# Solid Backups
> Control Solid Backups (formerly BackupBuddy) plugin settings, create backups, and set backup schedules for all Child Sites directly from your MainWP Dashboard. Requires an active Solid Backups subscription from StellarWP.
## What You'll Learn
* Installing the extension and BackupBuddy plugin
* Managing backup settings globally and per-site
* Creating backups and backup schedules
* Managing remote storage destinations
* Downloading and restoring backup files
***
**Integration Add-on** - This add-on extends MainWP to work with Solid Backups (formerly BackupBuddy). Requires Solid Backups to be installed on your child sites.
With the MainWP Solid Backups Extension (formerly Buddy Extension), you can control the [Solid Backups plugin](https://solidwp.com/solid-backups/) (formerly BackupBuddy) on all your child sites directly from your MainWP Dashboard.
This extension was previously known as "MainWP Buddy Extension" when it integrated with BackupBuddy. After iThemes was acquired by StellarWP, BackupBuddy was rebranded to Solid Backups. The functionality remains the same.
This includes giving you the ability to create your child site backups and even set Backup schedules directly from your MainWP Dashboard. **Important Notes:** The MainWP Buddy Extension requires an active BackupBuddy subscription which can be purchased from StellarWP MainWP Buddy Extension does not support the auto restore feature for the BackupBuddy backups. Backups created by the BackupBuddy plugin can be restored only manually. If you need to restore your site from a BackupBuddy backup, please check the Solid Backups documentation. Backups created by the BackupBuddy plugin are not suitable for the MainWP Cloning and MainWP Auto Restore feature. MainWP Buddy Extension requires the BackupBuddy plugin installed and activated on your child sites.
## Install and Set the MainWP Buddy Extension
Installation of the MainWP Buddy Extension requires two important steps:
* Installing the Extension itself on your MainWP Dashboard site
* Installing the BackupBuddy plugin on Child Sites
### Installing the Extension
The MainWP Buddy Extension needs to be installed only on your MainWP Dashboard site. You can [install it as any other MainWP Extension.](/dashboard/overview/manage-extensions#install-extensions)
### Installing the Plugin
For the proper use of the MainWP Buddy Extension, you need to install the BackupBuddy Plugin on your child sites.
### Install from MainWP Dashboard
[Select your child](/getting-started/mainwp-user-interface) sites
In the **Installation Options** box, make sure that the **Activate after installation option** is selected
For additional help with installing WordPress plugins from the MainWP Dashboard, please review this [help document](/sites/plugins/managing-plugins-with-mainwp).
### Install directly on the Child Site
For additional help with installing WordPress plugins, please review this [help document.](https://wordpress.org/documentation/article/manage-plugins/) After installing the BackupBuddy plugin, it is required to Synchronize your sites, so your MainWP Dashboard becomes aware that the plugin has been installed and activated.
## BackupBuddy Dashboard
From the **MainWP > Add-ons > MainWP Buddy > Overview page**\*\*,\*\* you can monitor all of your child sites where you have the BackupBuddy plugin installed. In the sites list, you will be notified if the plugin has an update available or if the plugin is deactivated.
* In case the plugin is not activated, the **Activate** action will appear in the corresponding site row
* In case there is a new version of the plugin, the **Update** action will appear in the corresponding site row
### Available Actions
From the **MainWP > Add-ons > BackupBuddy > Overview page**\*\*,\*\* you can **hide/unhide** the BackupBuddy plugin on your child sites, and quickly **access** the plugin settings on a child site or the WP Admin section. Actions are provided in the actions menu. If you know that you have the plugin installed on a child site, but the child site doesn't appear in the list, try to re-sync your sites.
## Manage BackupBuddy Settings
The MainWP Buddy Extension allows you to manage BackupBuddy plugin settings. It provides you the ability to manage the following settings:
* General
* ImportBuddy
* Email Notifications
* Local Archive Storage Limits
* Database Defaults
* File and Directory Defaults
* Advanced & Troubleshooting
* Basic Operation
* Logging
* Technical & Server Compatibility
* Database
* Zip
* Housekeeping Tools
* Licensing
### Update BackupBuddy Settings on All Your Sites
### Update BackupBuddy Settings on a Single Site
Set the **Overwrite General Settings** option to **YES** and click the **Save Changes** button
## Manage BackupBuddy Backups
The MainWP Buddy Extension allows you to manage the BackupBuddy plugin backups directly from your MainWP Dashboard. It will allow you to:
* Backup Schedules
* Create Backups
* Manage Backup Files
### Remote Storage
The extension allows you to manage Remote Storage options, including:
* BackupBuddy Stash
* BackupBuddy Deployment
* Amazon S3
* Dropbox
* Email
* FTP
* Google Drive
* Local Directory
* Rackspace
* sFTP
**Note**: Due to security reasons imposed by the providers of remote storage options, some of them may need to be authenticated on the child site itself. After that initial authentication, the rest of the setup can be performed via the MainWP Dashboard.
## Backup Your Child Sites With BackupBuddy
### Backup Multiple Child Sites with BackupBuddy
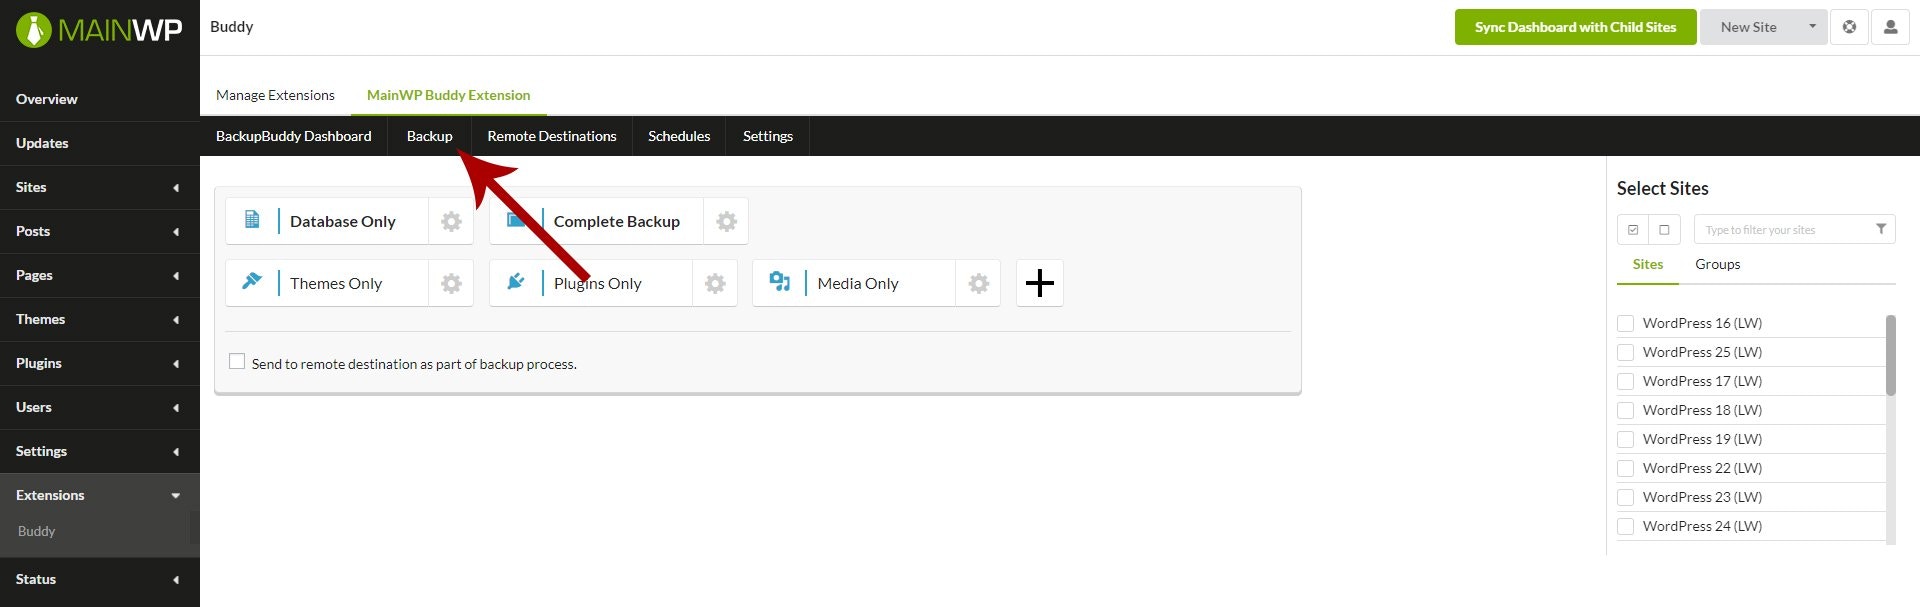 [Select the Child Sites](/getting-started/mainwp-user-interface) that you want to backup
Choose a backup type (or any custom-made backup profile) and click the appropriate button
### Backup a Single Site with BackupBuddy
Set the **Overwrite General Settings** option to **YES** and click the **Save Changes** button
Choose if you want a **Database** or a **Complete Backup** (or any custom-made backup profile) and click the appropriate button
## Create Backup Schedule
### Create a Backup Schedule on Multiple Sites
[Select the Child Sites](/getting-started/mainwp-user-interface) that you want to backup
Choose a backup type (or any custom-made backup profile) and click the appropriate button
### Backup a Single Site with BackupBuddy
Set the **Overwrite General Settings** option to **YES** and click the **Save Changes** button
Choose if you want a **Database** or a **Complete Backup** (or any custom-made backup profile) and click the appropriate button
## Create Backup Schedule
### Create a Backup Schedule on Multiple Sites
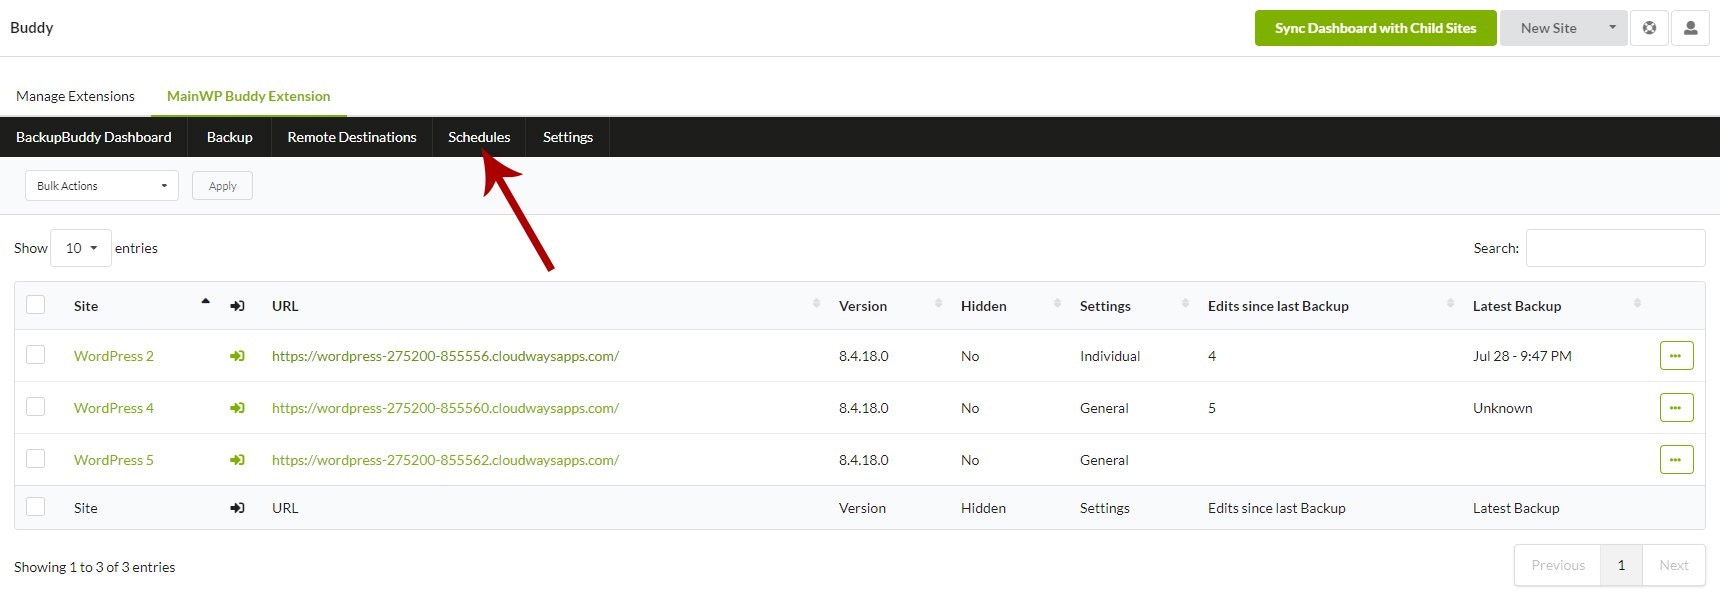 Locate the **Add New Schedule** section
1. Add a **Schedule name** *(for your use only)*
2. Select **a Backup profile** *(database, complete backup, or any custom-made profile)*
3. Select **Backup interval** *(time period between backups)*
4. Set the **Date and Time** of the next (first) run
5. Optionally, set a Remote destination **Note**: Due to security reasons imposed by the providers of remote storage options, some of them may need to be authenticated or configured initially on the child site itself.
6. Select if you want to delete a local backup after successful upload to a remote destination
7. Enable the Schedule
[Select the Child Sites](/getting-started/mainwp-user-interface) that you want to backup
### Create a Backup Schedule on a single Site
Set the **Overwrite General Settings** option to **YES** and click the **Save Changes** button
Locate the **Add New Schedule** options box
1. Add a **Schedule name** *(for your use only)*
2. Select **a Backup profile** *(database, complete backup, or any custom-made profile)*
3. Select **Backup interval** *(time period between backups)*
4. Set the **Date and Time** of the next (first) run
5. Optionally, set a Remote destination **Note**: Due to security reasons imposed by the providers of remote storage options, some of them may need to be authenticated or configured initially on the child site itself.
6. Select if you want to delete a local backup after successful upload to a remote destination
7. Enable the Schedule
8. Click the **Add New Schedule** button
**Note**: Due to security reasons imposed by the providers of remote storage options, some of them may need to be authenticated on the child site itself. After that initial authentication, the rest of the setup can be performed via the MainWP Dashboard.
## Edit BackupBuddy Schedules
When editing a schedule created for a Single Site, Site selection is not available, since it's an individual site schedule. When editing a global schedule, you can Update sites selection. This means the following:
* If you unselect a child site, the schedule will be deleted from it
* If you select a new site, the schedule will be added to the site
## Run BackupBuddy Schedules
## Manage BackupBuddy Backup Files
MainWP Buddy extension allows you to manage your backup files directly from your MainWP Dashboard. It gives you the ability to:
* Download your backup files
* Send Backup files to remote locations
* Browse & Restore files
### Download Backup Files
Locate the **Add New Schedule** section
1. Add a **Schedule name** *(for your use only)*
2. Select **a Backup profile** *(database, complete backup, or any custom-made profile)*
3. Select **Backup interval** *(time period between backups)*
4. Set the **Date and Time** of the next (first) run
5. Optionally, set a Remote destination **Note**: Due to security reasons imposed by the providers of remote storage options, some of them may need to be authenticated or configured initially on the child site itself.
6. Select if you want to delete a local backup after successful upload to a remote destination
7. Enable the Schedule
[Select the Child Sites](/getting-started/mainwp-user-interface) that you want to backup
### Create a Backup Schedule on a single Site
Set the **Overwrite General Settings** option to **YES** and click the **Save Changes** button
Locate the **Add New Schedule** options box
1. Add a **Schedule name** *(for your use only)*
2. Select **a Backup profile** *(database, complete backup, or any custom-made profile)*
3. Select **Backup interval** *(time period between backups)*
4. Set the **Date and Time** of the next (first) run
5. Optionally, set a Remote destination **Note**: Due to security reasons imposed by the providers of remote storage options, some of them may need to be authenticated or configured initially on the child site itself.
6. Select if you want to delete a local backup after successful upload to a remote destination
7. Enable the Schedule
8. Click the **Add New Schedule** button
**Note**: Due to security reasons imposed by the providers of remote storage options, some of them may need to be authenticated on the child site itself. After that initial authentication, the rest of the setup can be performed via the MainWP Dashboard.
## Edit BackupBuddy Schedules
When editing a schedule created for a Single Site, Site selection is not available, since it's an individual site schedule. When editing a global schedule, you can Update sites selection. This means the following:
* If you unselect a child site, the schedule will be deleted from it
* If you select a new site, the schedule will be added to the site
## Run BackupBuddy Schedules
## Manage BackupBuddy Backup Files
MainWP Buddy extension allows you to manage your backup files directly from your MainWP Dashboard. It gives you the ability to:
* Download your backup files
* Send Backup files to remote locations
* Browse & Restore files
### Download Backup Files
 ### Send files
Remote locations options will appear, set the wanted location and upload will start
### Browse & Restore Files
***
## Related Resources
* [Backup Add-ons](/add-ons/backups) - Browse all backup integrations
* [Manage Backups](/sites/backups/manage-backups) - Understanding backup management in MainWP
* [Managing Plugins with MainWP](/sites/plugins/managing-plugins-with-mainwp) - Installing plugins on child sites
### Send files
Remote locations options will appear, set the wanted location and upload will start
### Browse & Restore Files
***
## Related Resources
* [Backup Add-ons](/add-ons/backups) - Browse all backup integrations
* [Manage Backups](/sites/backups/manage-backups) - Understanding backup management in MainWP
* [Managing Plugins with MainWP](/sites/plugins/managing-plugins-with-mainwp) - Installing plugins on child sites