> ## Documentation Index
> Fetch the complete documentation index at: https://docs.mainwp.com/llms.txt
> Use this file to discover all available pages before exploring further.
# How to use a different logo for the Pro Reports email only
> If you wish to use a different logo in the email body compared to the logo in the attached PDF file, you can create a custom email template to achieve that. This guide shows you how to customize the email-specific logo.
## What You'll Learn
* Creating custom email templates for Pro Reports
* Replacing dynamic logo code with a static URL
* Uploading templates to the correct directory
* Selecting custom email templates in reports
***
**Extension Add-on** - This add-on provides standalone functionality within MainWP Dashboard. No third-party plugins required.
If you wish to use a different logo in the email body compared to the logo in the attached PDF file, you can create a custom email template to achieve that. We will use one of the built-in templates as a starting point for the new custom email report.
Locate one of the default email templates in the `/mainwp-pro-reports-extension/templates/emails/` path. **NOTE:** You can download the MainWP Pro Reports Extension from your MainWP Account, or you can navigate to this path using FTP client.
Copy the PHP file of one of the templates (in this example we will be using `pro-report-email-modern.php`) and rename it to a new desired filename
Open the new PHP file in your favorite code editor
1. Locate these three lines  2. And replace them with just one line with a hardcoded URL from your MainWP Dashboard that contains the desired logo
  Once you are finished with the customization and the template is ready, upload the PHP file the `/wp-content/uploads/mainwp/report-email-templates/` directory on your Dashboard site
Once uploaded, the template will be available in the **Email template** dropdown
Once you are finished with the customization and the template is ready, upload the PHP file the `/wp-content/uploads/mainwp/report-email-templates/` directory on your Dashboard site
Once uploaded, the template will be available in the **Email template** dropdown 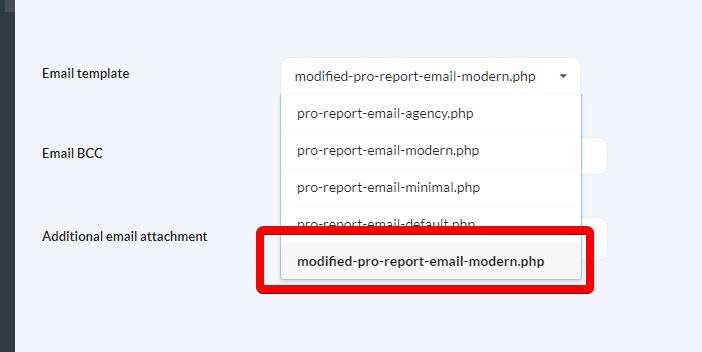 ***
## Related Resources
* [Create Custom Report Templates](/add-ons/agency/create-custom-report-templates) - Build custom PHP templates
* [Pro Reports Extension](/add-ons/agency/pro-reports-extension-overview) - Main Pro Reports documentation
* [Available Pro Reports Tokens](/add-ons/agency/available-pro-reports-tokens) - Complete token reference
***
## Related Resources
* [Create Custom Report Templates](/add-ons/agency/create-custom-report-templates) - Build custom PHP templates
* [Pro Reports Extension](/add-ons/agency/pro-reports-extension-overview) - Main Pro Reports documentation
* [Available Pro Reports Tokens](/add-ons/agency/available-pro-reports-tokens) - Complete token reference