> ## Documentation Index
> Fetch the complete documentation index at: https://docs.mainwp.com/llms.txt
> Use this file to discover all available pages before exploring further.
# Bulk Settings Manager
> The Bulk Settings Manager Extension unlocks the world of WordPress directly from your MainWP Dashboard. With Bulk Settings Manager you can adjust your Child site settings for the WordPress Core and almost any WordPress Plugin or Theme.
## What You'll Learn
* Creating keys with the MainWP Key Maker plugin
* Importing and managing keys in Bulk Settings Manager
* Applying settings to multiple child sites
* Using Key Rings to group related keys
* Troubleshooting common issues like nonce errors
***
**Extension Add-on** - This add-on provides standalone functionality within MainWP Dashboard. No third-party plugins required.
With the [MainWP Bulk Settings Manager](https://mainwp.com/add-on/bulk-settings-manager/) Extension, you can adjust your Child site settings for the WordPress Core and almost any WordPress Plugin or Theme.
## How it Works
MainWP Bulk Settings Manager Extension works together with the [MainWP Key Maker plugin](https://wordpress.org/plugins/mainwp-key-maker/). The Key Maker plugin grabs necessary data from your WordPress site (where you have set your preferences); next, the Extension converts the data to a key that you can submit to the rest of your child sites and apply your preferences. Quick and easy, with just a few clicks, you can update settings on all your child sites!
## Does Bulk Settings Manager work with the XYZ plugin or theme?
While we have not tested every plugin or theme, Bulk Settings Manager should technically work with any plugin or theme that uses standard forms. If you want to check if the information you want to work with will be recorded:
Once you have submitted the form, press the MainWP Key Maker button in your WP Admin Top Menu.
You will now see at least 2 "Keys" that will pop up for you: "Post-submission Request" and "Pre-submission Request". You almost always want to use Post-submission since that is the information gathered after you submitted the form.
Now click on “Verify Form Fields and Values” this will show you in a human-readable way what information was gathered.
If everything looks right and all your information was gathered correctly, you can be 99% sure that it will work with Bulk Settings Manager to change all your Child sites.
An example of where Bulk Settings Manager **would not work** is during the initial setup of JetPack, where you are required to leave your Child site to verify log-in credentials.
However, you would be able to set up keys for JetPack after the verify credential step.
Pre-submission requests often don't have all fields and values detected.
Using the Pre-submission requests may lead to incomplete Keys.
We strongly recommend using Post-submission requests!
To see the Post-submission request, you need to submit the form that you are trying to grab and make the Key.
Once you get to the page where the form is located, make sure that the wanted values are correctly set, submit the form, and after that, you will see the Post-submission request.
Some forms are divided into multiple mini-forms.
MainWP Key Maker plugin detects all mini-forms and displays Post-submission requests for all of them.
If you get multiple Post-Submission requests, be sure to use the Verify Form Fields and Values button and find the "biggest" one.
The request that is showing all form fields will probably be the one.
## Bulk Settings Manager Workflow
Install the Key Maker plugin on a site that has a Theme or Plugin with settings that you want to share across your Child Sites
Go to a settings page of plugin or theme that you want to copy to all your Child sites and Submit that page, so the form is passed
Press the **MainWP Key Maker** button listed at the top of your screen
Select the **post-submission Request** field and copy the generated code by clicking the **Copy to Clipboard** button
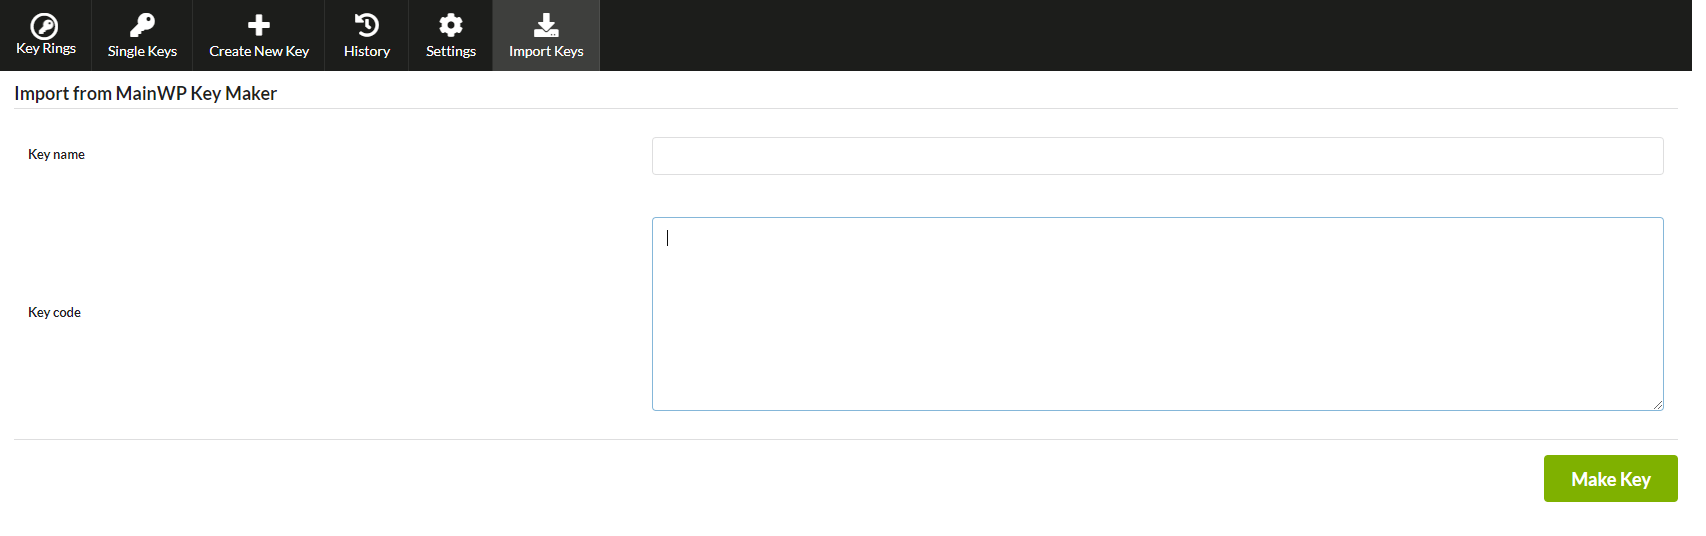
1. In the **Import from MainWP Key Maker** section, give your key a name
2. Paste the copied code in the **Key code** field
3. Click the **Import Key** button
After the Key has been created, you will be redirected to the **Key Edit** screen.
Verify the form fields look correct for you and, if needed, update field values
Go to the **Single Keys** tab
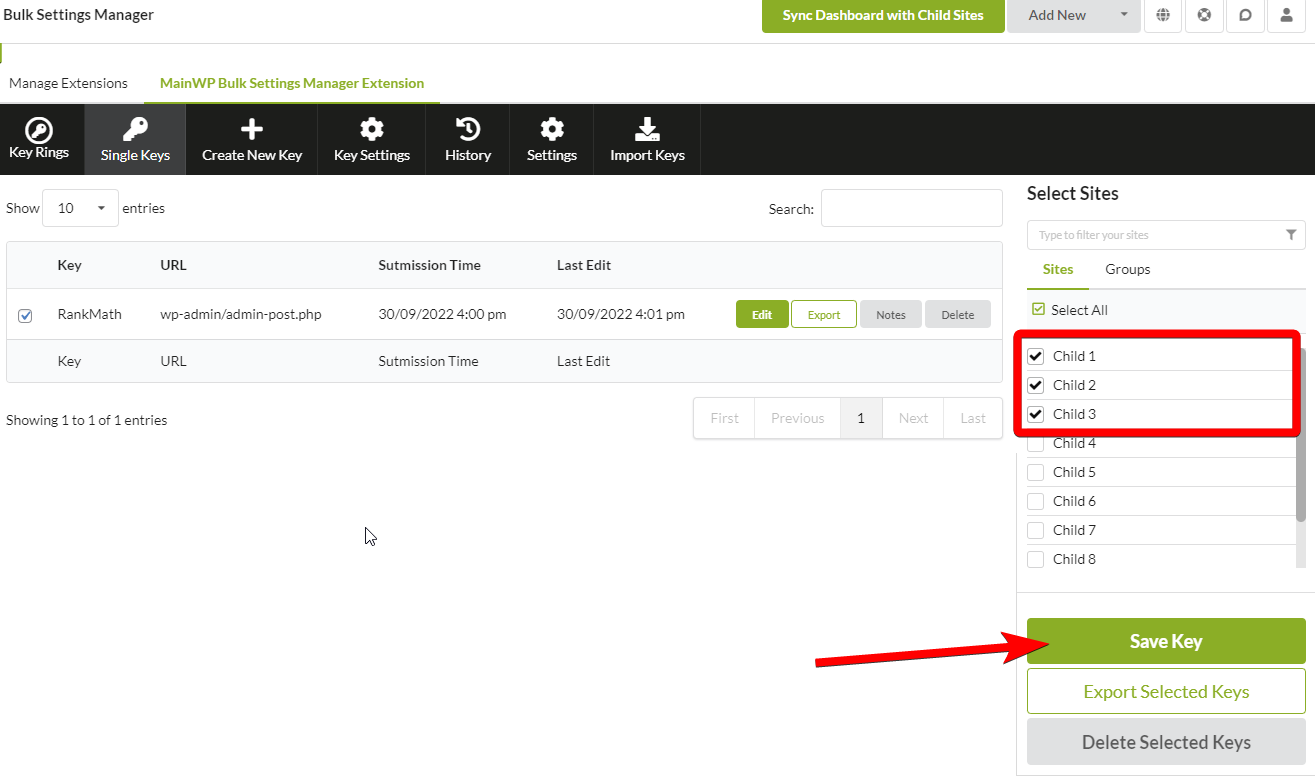
1. Select the Key
2. Select your Child Sites
3. Click the **Save Key** button
## Add a Key to a Key Ring
Key Ring feature allows you to group your Keys and submit them all at once. It comes pretty handy in case one Plugin or Theme has multiple settings forms. After you create all Keys for a plugin or theme, you can group them in a single Key Rings that allow you to manage them more efficiently.
## Save Keys to Child Sites
### Submit a Single Key
### Submit a Key Ring
## Create a Single Key
MainWP Bulk Settings Manager extension allows you to create Keys manually or import them from the MainWP Key Maker plugin or a file. Please note that we highly recommend making your keys by importing them from the Key Maker plugin. This method is much easier, quicker, and minimizes potential issues. However, if you decide to make keys manually, note that it is a harder process and recommended only to advanced users.
### Make a Single Key with the Key Maker plugin.
The Bulk Settings Manager Extension works with the MainWP Key Maker plugin to record your form settings and make a “key.” Once you have the “key,” you save it into your Bulk Settings Manager Extension. From this point, you can submit your settings to child sites, or if needed, you can update your settings and submit them to child sites after that.
Go to a settings page of a plugin, theme, or one of the WordPress settings pages that you want to copy to all your Child sites
Go to the **Import Keys** tab and use the **Import from MainWP Key Maker** section
1. Paste the copied code in the **Key code** field
2. Give your key a name
3. Click the **Import Key** button
After the Key has been created, you will be redirected to the **Key Edit** screen.
Verify the form fields look correct for you and, if needed, update field values
## Bulk Settings Manager Settings
* **Delay** – allows you to set a time delay between two submissions. For example, if you set a delay to 5 seconds and submit a key to 3 child sites after the Key has been submitted to the first site, the extension will wait for 5 seconds before it proceeds to the next child site. **This option helps you to reduce server load.**
* **Clear History** – by clicking the button, you will delete all historical data from the Bulk Settings Manager extension.
* **Use Boilerplate** – if enabled, you will be able to use Boilerplate tokens as key field values. **Note that this option works only if the [MainWP Boilerplate Extension](https://mainwp.com/add-on/boilerplate/) has been installed and activated on your MainWP Dashboard.**
## Import a Bulk Settings Manager Key
There are two ways to import Bulk Settings Manager Extension keys: by pasting a key code or by importing a key file.
### Paste Key Code
Locate the **Import from MainWP Key Maker** section
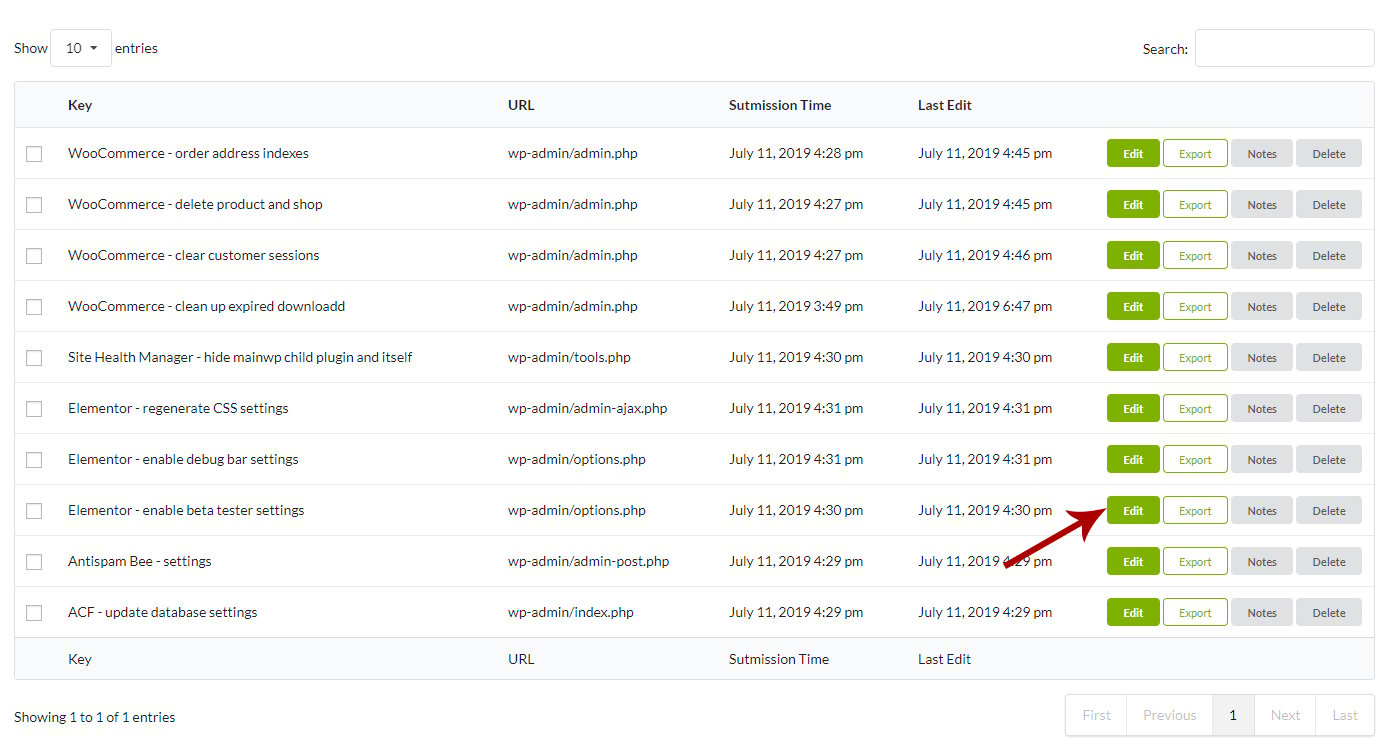
1. Enter the key name in the **Key name** field
2. Paste the previously copied code in the **Key code** field
3. Click the **Import Key** button
After pasting the key, you will be prompted to the Edit Key screen, where you can verify the key fields. Once all set, save the key, and you are ready to go.
### Import Key File
Locate the **Upload Key File** section
1. Click the **Choose File** button
2. Browse and select the previously downloaded key file
3. Click the **Upload Key** button
After importing the key, you will be prompted to the Edit Key screen, where you can verify the key fields. Once all set, save the key, and you are ready to go.
## Edit Key Values
To edit Key values,
Once prompted to the **Key Edit** page, locate the fields that you need to update
1. Click the Field title to expand it
2. Update the Value
3. Update these two steps for all fields that you want to edit
## How to Use Boilerplate Tokens in Keys
MainWP Bulk Settings Manager Extension supports Boilerplate tokens. By using tokens, it is possible to set per-site unique values in forms. Changing the WordPress **Settings > General** form is a common example. In that form, the `siteurl` and `home` fields must remain unique for each child site. To handle that kind of form correctly:
Make sure that the **Use Boilerplate** option is enabled
Replace the relevant field values with the Boilerplate tokens you want to use.
Bulk Settings Manager replaces Boilerplate tokens only when the MainWP Boilerplate Extension is installed, activated, and the **Use Boilerplate** option is enabled. Confirm that the token names and per-site values in your Boilerplate setup are correct before you save the key.
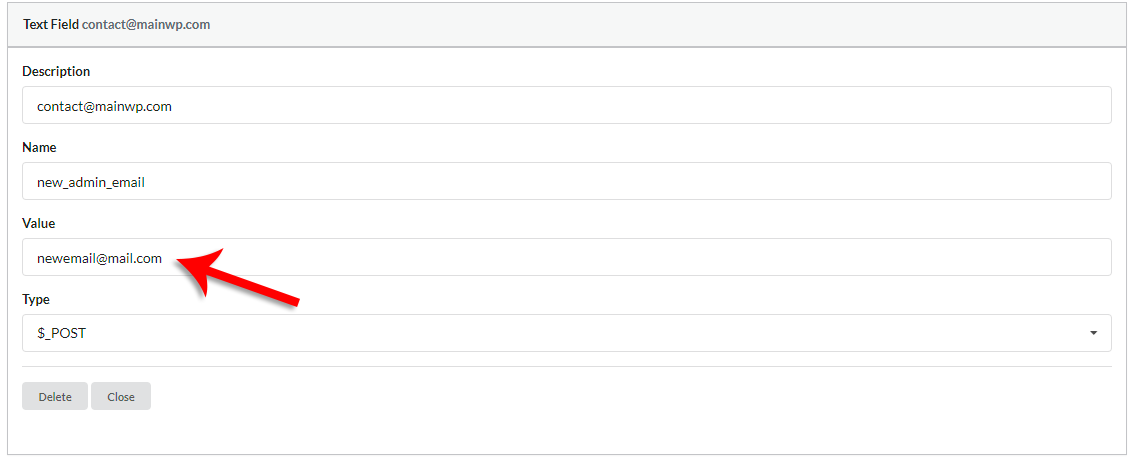
## Change WordPress Administration Email Address on Multiple Child Sites at Once
The WordPress admin email address of all/selected Child sites can be changed using the Bulk Settings Manager extension. Considering that the Bulk Settings Manager will overwrite all WordPress General Settings and that the **WordPress Address (URL)** and **Site Address (URL)** must be unique for each Child site, we will use the Boilerplate extension to define tokens for those two fields. Both extensions are included in our [Pro plan](https://mainwp.com/signup/). Please note that the tutorial is written with the assumption that the Administration Email Address is the only field that needs to be changed and that all other options on the WordPress General Settings page should be the same on all Child sites. Follow the following steps, and visit linked articles for detailed instructions for individual steps.
Install Bulk Settings Manager and Boilerplate extension on your MainWP Dashboard
Install MainWP Key Maker on any of the Child Sites to create a template to replicate on other Child sites
On **MainWP Dashboard > Add-ons > Administrative > Bulk Settings Manager > Settings** enable **Use Boilerplate**.
Navigate to **WordPress Dashboard > Settings > General Settings** on a Child Site with the Key Maker plugin installed in step 2, and create a Key
Go to **MainWP Dashboard > Add-ons > Administrative > Bulk Settings Manager > Import Keys** and import the key you just created
Replace those values with the Boilerplate tokens you want to apply. If one token cannot cover every field you need, create the additional token in [MainWP Boilerplate](/add-ons/posts-pages/boilerplate-extension#create-custom-tokens).
Replace the **Value** of the field with the new address you want to apply to Child sites
Before you apply the key, confirm that the Boilerplate tokens you used have the correct per-site values for every selected child site.
## How to fix Invalid nonce error in Bulk Settings Manager
When saving a key to child sites, Bulk Settings Manager can, under some circumstances, report an "Invalid nonce" error message. The current interface includes a built-in **Skip Invalid nonce** option in the **Save Key Options** panel. To use it:
Enable **Skip Invalid nonce** in **Save Key Options**
If a child site error still tells you to "Try to use:" a specific nonce action, you can edit the key and add a **Text Field** where the **Name** matches that action and the **Value** is `mainwp-bsm-unverify-nonce`.
## How to change Rank Math settings on your child sites using Bulk Settings Manager
In this help document, we will cover how to change the settings of the Rank Math plugin on your Child Sites using Bulk Settings Manager. Even though most settings pages can be changed, a notable exception is toggling Modules On/Off on the **Rank Math > Dashboard** page because that page doesn't use submission requests to save changes. **Note:** Considering that the Bulk Settings Manager will overwrite all options on a given settings page, please ensure that it is acceptable that all Child sites have the same options on that page. This help document will cover how to change the options on the **Rank Math > General Settings** page. However, the same logic applies to other settings pages. To change Rank Math settings, please follow the following steps, and visit linked articles for detailed instructions for individual steps.
Install MainWP Key Maker on any of the Child Sites to create a template to replicate on other Child sites
Navigate to **WordPress Dashboard > Rank Math > General Settings** on a Child Site with the Key Maker plugin installed, and create a Key
Go to **MainWP Dashboard > Add-ons > Administrative > Bulk Settings Manager > Import Keys** and import the key you just created
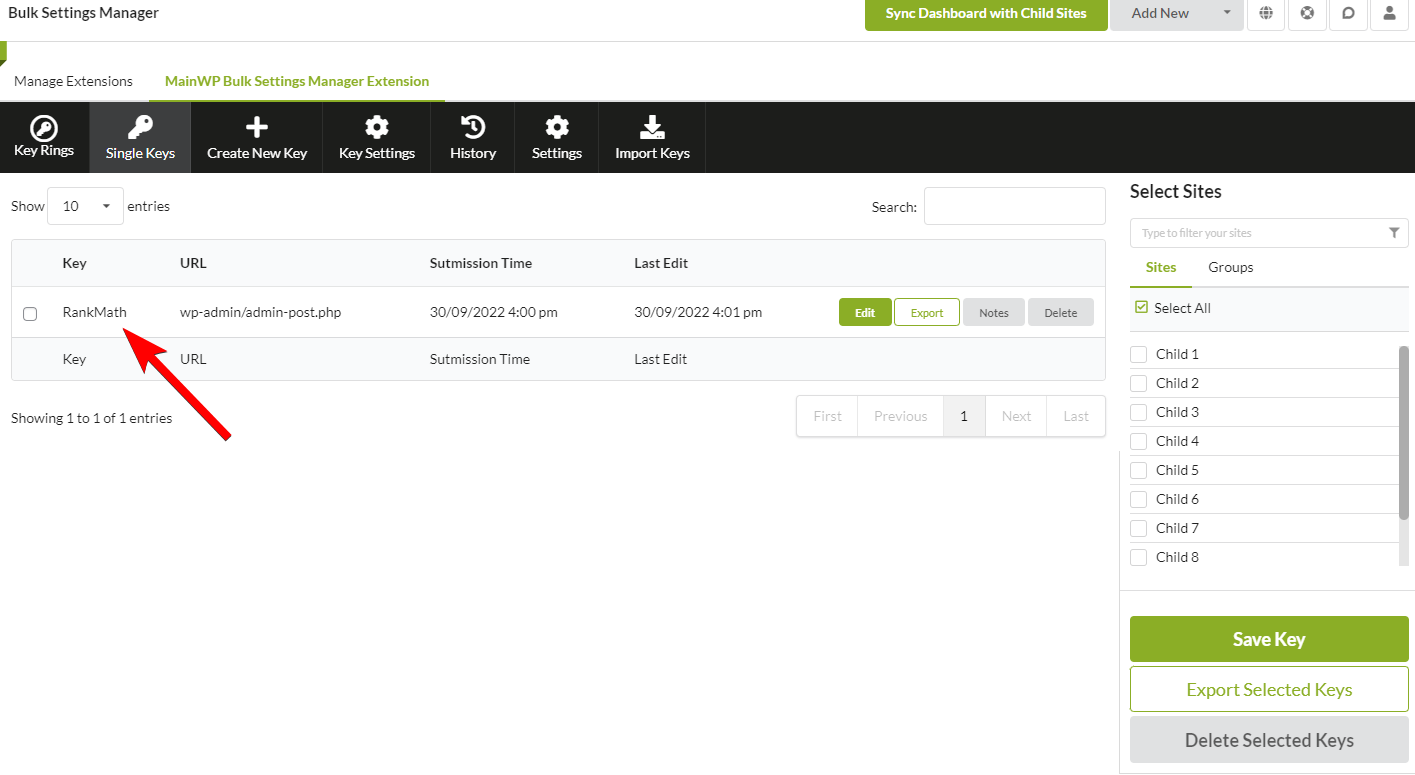
Next, after creating the Key, please find it in the list on the **Single Keys** tab
Select Sites from the right and click **Save Key**
All options from **Rank Math > General Settings** page are now applied to all selected Child Sites
In case you would get a nonce-related error when Saving the Key in **Step 6**, please follow the instructions in this help document to resolve the issue.
***
## Related Resources
* [Administrative Add-ons](/add-ons/administrative) - Browse all administrative tools
* [Code Snippets Extension](/add-ons/development/code-snippets-extension) - Deploy code snippets to child sites
* [White Label Extension](/add-ons/agency/white-label-extension) - Customize child site branding

 1. In the **Import from MainWP Key Maker** section, give your key a name
2. Paste the copied code in the **Key code** field
3. Click the **Import Key** button
1. In the **Import from MainWP Key Maker** section, give your key a name
2. Paste the copied code in the **Key code** field
3. Click the **Import Key** button
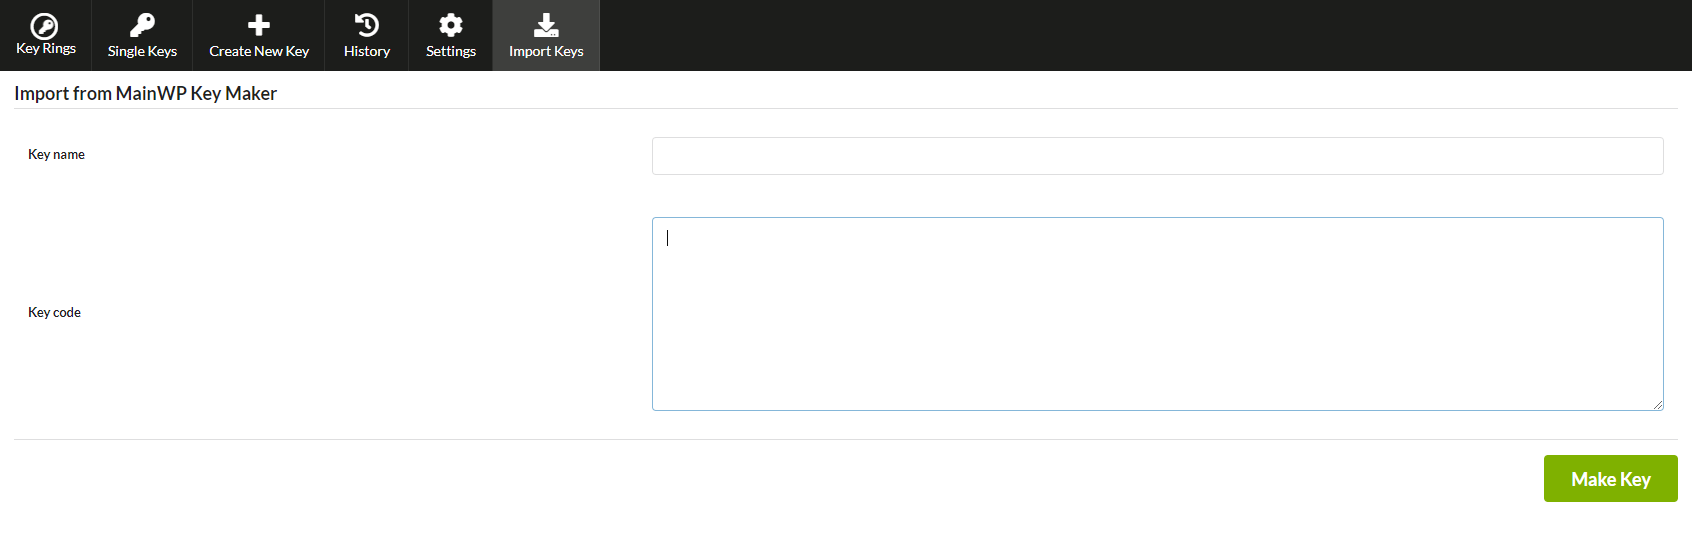 1. Enter the key name in the **Key name** field
2. Paste the previously copied code in the **Key code** field
3. Click the **Import Key** button
1. Enter the key name in the **Key name** field
2. Paste the previously copied code in the **Key code** field
3. Click the **Import Key** button
 1. Click the **Choose File** button
2. Browse and select the previously downloaded key file
3. Click the **Upload Key** button
1. Click the **Choose File** button
2. Browse and select the previously downloaded key file
3. Click the **Upload Key** button
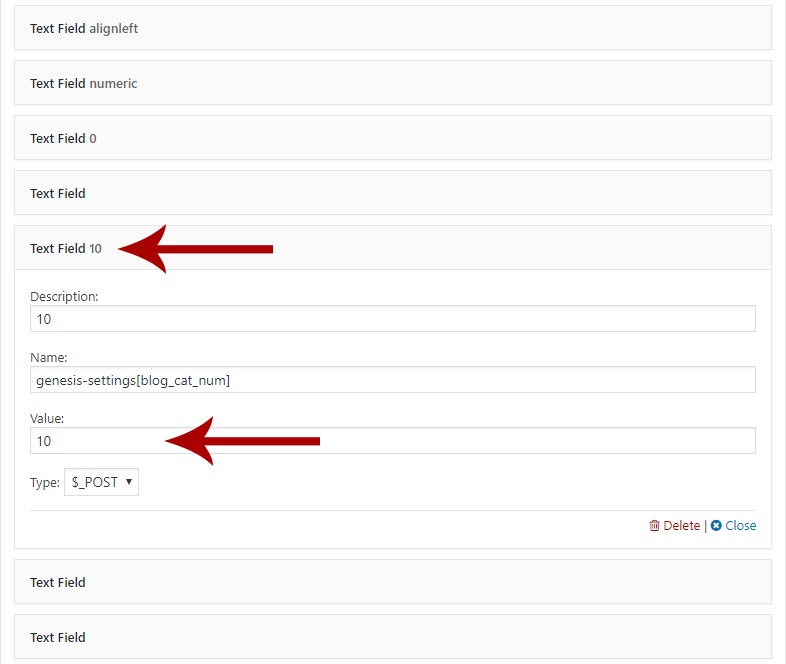 1. Click the Field title to expand it
2. Update the Value
3. Update these two steps for all fields that you want to edit
1. Click the Field title to expand it
2. Update the Value
3. Update these two steps for all fields that you want to edit
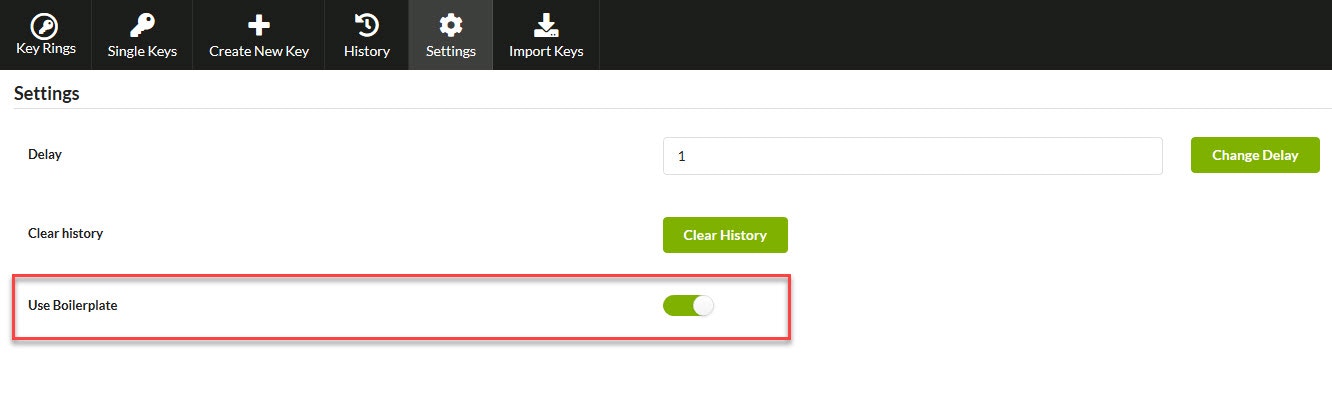
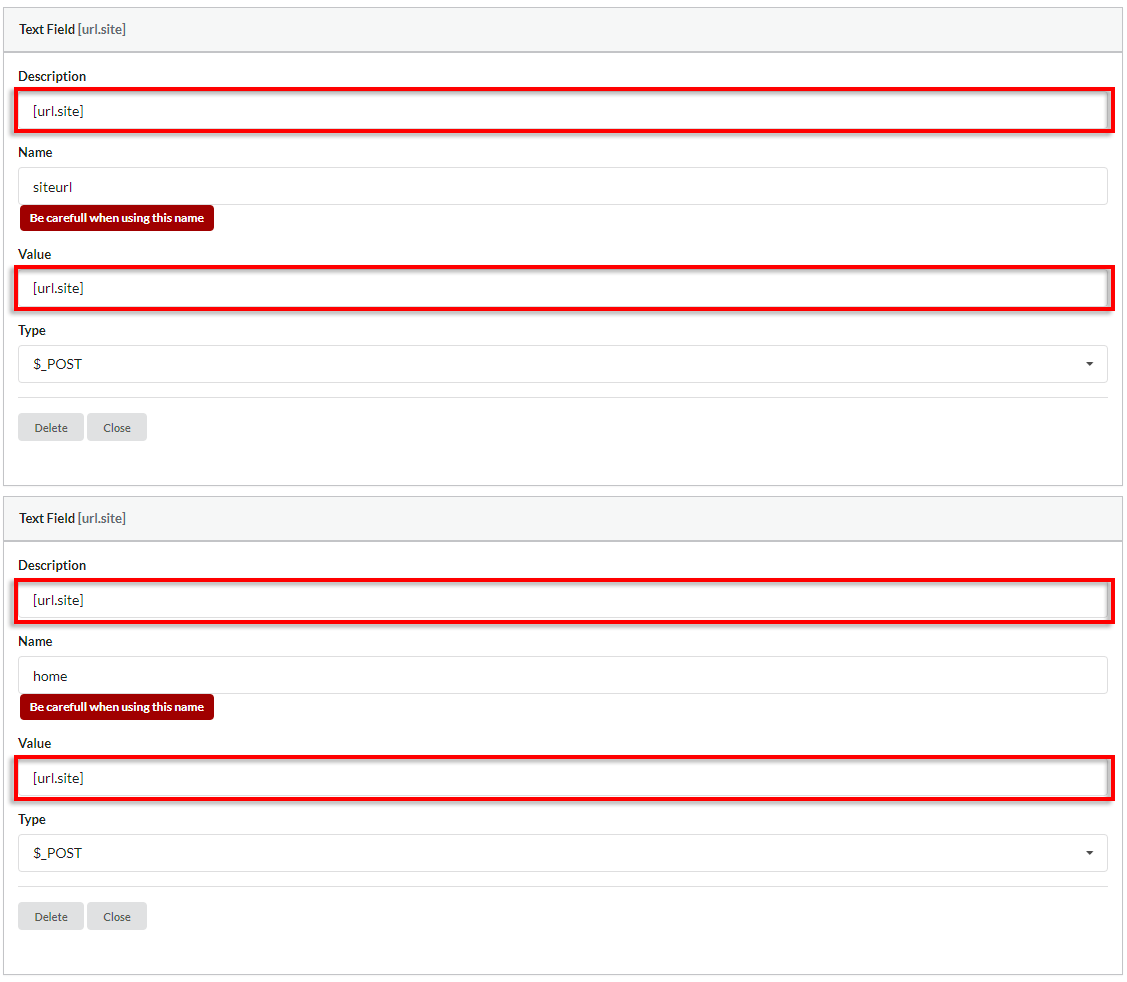
 The current interface includes a built-in **Skip Invalid nonce** option in the **Save Key Options** panel. To use it:
 **Note:** Considering that the Bulk Settings Manager will overwrite all options on a given settings page, please ensure that it is acceptable that all Child sites have the same options on that page. This help document will cover how to change the options on the **Rank Math > General Settings** page. However, the same logic applies to other settings pages. To change Rank Math settings, please follow the following steps, and visit linked articles for detailed instructions for individual steps.